
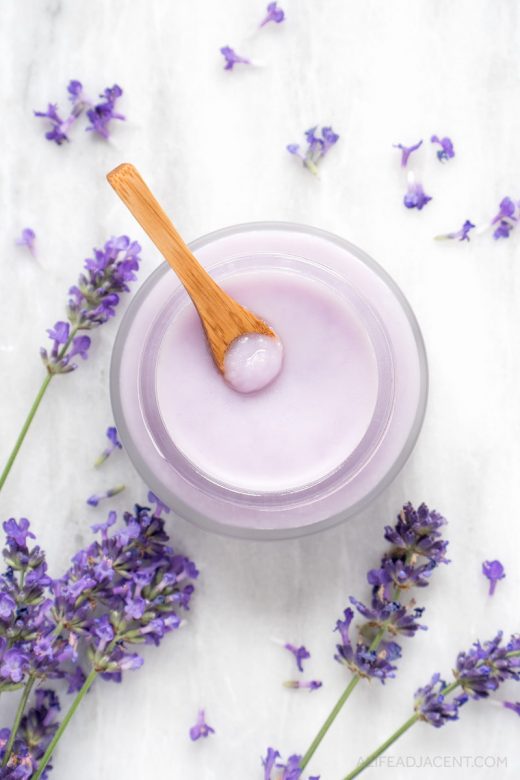
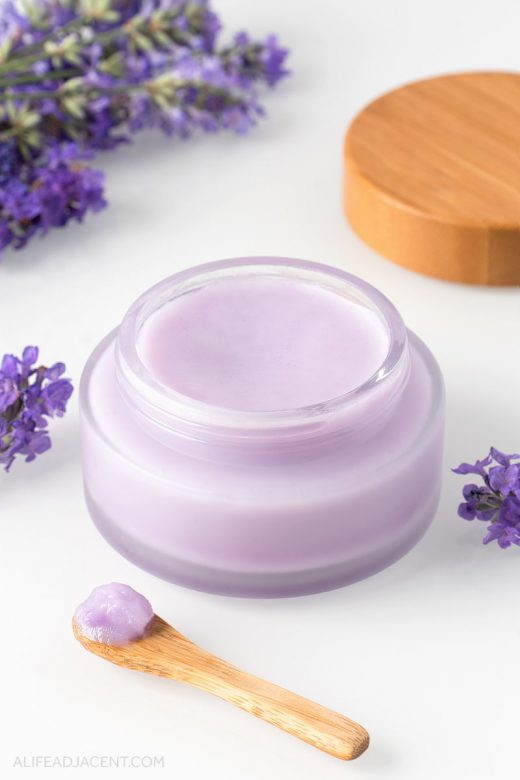
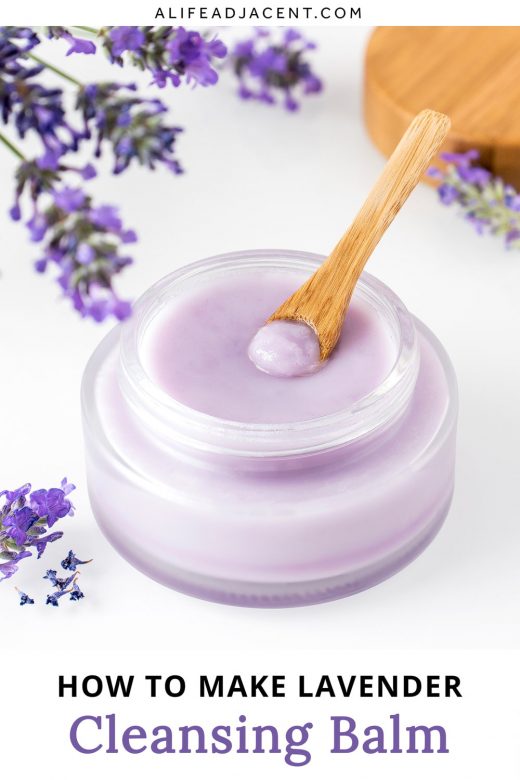
Learn how to make a lavender-infused DIY oil cleansing balm! This nourishing face cleanser turns from balm to oil in seconds, quickly melting away makeup, sunscreen, and sebum. It’s infused with dried lavender for a soothing natural fragrance without essential oils. Plus, this makeup remover balm is self-emulsifying, so it washes off easily.
One of the easiest ways to fit in a little bit of relaxation and self-care is during your nightly skincare routine.
And what better way to promote relaxation than with the soothing scent of lavender?
This DIY lavender cleansing balm is the perfect way to add a hint of aromatherapy to your oil cleansing routine. It releases a calming lavender fragrance as it cleanses, helping to soothe the senses as it melts away makeup.
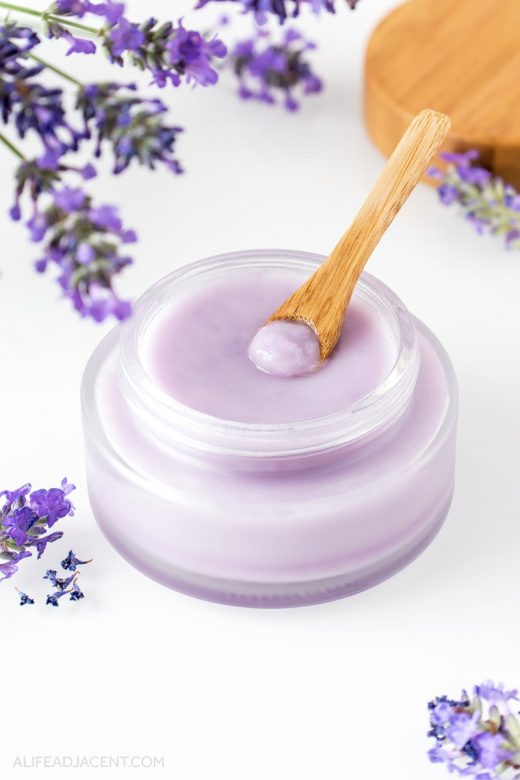
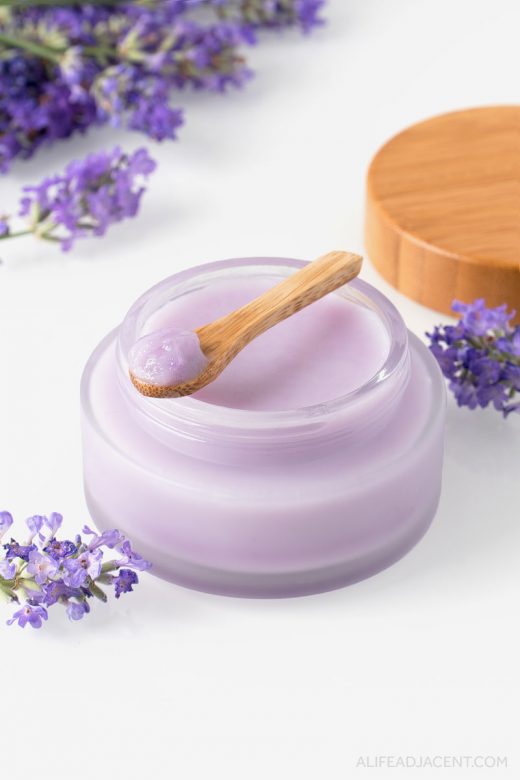
Natural ingredients like lavender infused oil, white beeswax and a plant-based emulsifier create a velvety balm-to-oil consistency that melts on contact with skin, quickly dissolving makeup and impurities.
Plus, this balm is self-emulsifying. So after you’ve finished cleansing, it’s easy to remove. The emulsifier creates a milky lather that rinses off with just water, leaving skin feeling clean, soft, and moisturized.
Whether you’re new to homemade skincare or already experienced, this oil cleansing balm is easy to make and very enjoyable to use.
Before we get into the recipe, I’d like to touch on why oil-based cleansers like this one are so good for your skin.
As well, if you’d like to make your own balm cleanser but don’t love the scent of lavender, I also have recipes for blue tansy and vanilla makeup melting balms, as well as an exfoliating papaya enzyme cleansing balm.
But if you’d prefer a different kind of makeup remover, you might also be interested in my simple cleansing oil, micellar water, or my homemade makeup remover wipes.
Why you should use an oil cleansing balm
Oil cleansing has been around long enough that you’ve likely heard about its purported benefits. But I always like to give a bit of a refresher for those who might not be familiar.
The idea of cleansing with oil may cause some concern, especially for the acne-prone. After all, excess oil is typically synonymous with breakouts and skin issues.
And while it’s true that excess oil left on the skin can cause breakouts, an oil-based cleanser can actually help prevent them in the first place.
This all comes down to the “like dissolves like” rule in chemistry. Oil dissolves other oily substances, including our skin’s sebum.
Therefore, an oil-based cleanser (such as an oil cleansing balm) can help dissolve and dislodge excess sebum from inside the pores. As a result, this breakout-causing oil can easily be washed away.
It may seem counterintuitive, but it works, at least for me. In fact, my nose tends to break out when I don’t use an oil-based cleanser. And when I run out of homemade cleansers, this Boscia cleansing oil is a lifesaver.
How oil cleansing can go wrong
Oil cleansing is good for your skin, but this isn’t to say that you can rub any oil on your face and call it a day.
When done improperly, the oil cleansing method can lead to major skin issues, including cystic acne.
One key point is that the oil must be properly washed away, which is what many homemade oil cleansing recipes get wrong.
That’s why my oil cleansing balm recipe includes a liquid emulsifier. This allows the balm to truly wash off instead of sitting in the pores.
Without an emulsifier, an oil cleanser cannot truly “cleanse,” and should be followed up with another facial cleanser to ensure thorough removal.
However, this is merely scratching the surface of oil cleansing. If you’re interested in learning more about the topic, I go into more detail about the oil cleansing method in this post.
What skin types should use this oil cleansing balm?
The information I’ve presented mostly applies to oily skin. But oil cleansing benefits a wide variety of skin types, making this lavender cleansing balm useful for just about anyone.
Oily skin
Oil cleansing works well for oily skin, as oil can penetrate into the skin’s pores. This helps dislodge excess sebum before it turns into a full-fledged clog or breakout.
Just make sure to fully wash away the oil to avoid exacerbating acne. And if you have fungal acne or another yeast issue, make sure to stick to oils that don’t feed Malassezia yeast, such as MCT oil.
Dry skin
Cleansing balms are wonderful for dry skin. The oil acts as a buffer that helps protect the skin’s delicate acid mantle.
Oil cleansing also helps preserve the skin’s existing moisture. So if your skin has ever felt tight or dry after washing your face, you might find an oil cleansing balm to be beneficial.
Mature skin
As our skin matures, it needs a little extra help retaining moisture. Mature skin loses water at a higher rate due to reduced skin barrier function. This leads to an increase in transepidermal water loss (TEWL).
A gentle cleanser like an oil cleansing balm can help moisturize the skin and prevent further water loss.
Ingredients for lavender cleansing balm
Lavender infused oil
Of course, this lavender cleansing balm recipe wouldn’t be complete without lavender!
I chose to incorporate lavender into the balm by using lavender infused oil as the base. This gives it a subtle floral fragrance without essential oils.
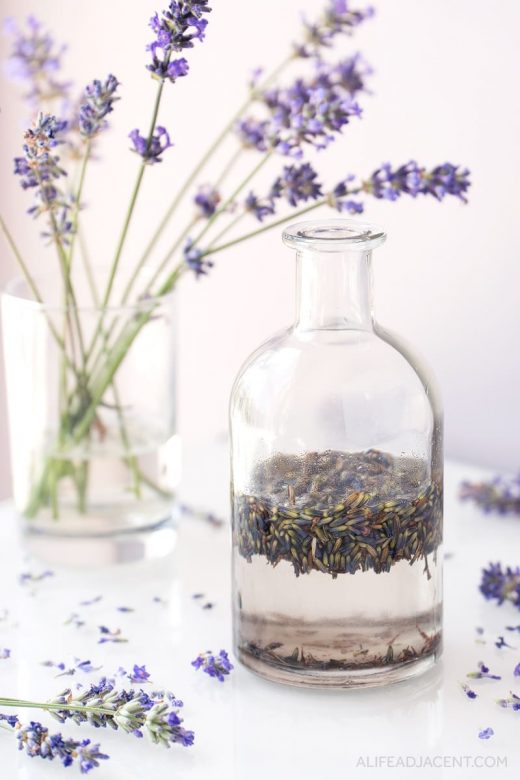
Making your own lavender infused oil is incredibly easy. All you need is dried lavender flowers (preferably organic) and a heat stable carrier oil. More on which carrier oils are heat stable later.
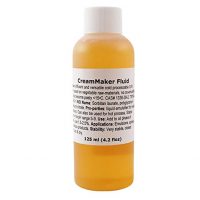
CreamMaker FLUID
While lavender might be the focus of this oil cleansing balm recipe, it’s not technically the most important ingredient.
The real star ingredient is CreamMaker FLUID, a plant-based liquid emulsifier blend that allows this balm to truly cleanse the skin.
If you’ve ever made a cleansing balm without an emulsifier, you know what happens when you try to rinse it off. Chances are it won’t budge, as oil and water simply don’t mix.
But that’s where CreamMaker FLUID comes in. A small amount of this unique ingredient acts as a mediator between oil and water, making this recipe self-emulsifying.
When mixed with water, CreamMaker FLUID creates a milky lather that cleanses gently yet thoroughly. And once you’ve finished cleansing, it allows the balm to rinse clean with minimal residue.
It’s likely obvious by now how much I love this ingredient. I’ve already used it in two cleanser recipes: my 2-ingredient cleansing oil and my green tea oil cleanser.
I’ve been busy formulating a collection of recipes with it, so it was only a matter of time before I incorporated it into an oil cleansing balm as well.
I sought out CreamMaker FLUID over popular emulsifier choices such as emulsifying wax, Polysorbates and Cromollient SCE as it’s non-ethoxylated and naturally derived, both characteristics which are important to me when selecting DIY skincare ingredients.
When available, CreamMaker FLUID can usually be purchased Amazon.ca. In the USA and other places, it can usually be found on Etsy.
Substitutions for CreamMaker FLUID
Unfortunately there is no easy substitute for this unique emulsifier. It’s the only one of its kind that I’ve found.
If you can’t find it, another emulsifier that I’ve used and enjoyed is Olivem 1000, also sometimes called olive wax. However, this is a very different product with a distinctive texture.
Whereas CreamMaker FLUID has a thin and washable consistency, Olivem 1000 is very viscous and needs to be removed using a washcloth and another cleanser.
If you’re interested in making a balm cleanser using Olivem 1000, check out my emulsifying cleansing balm recipe with blue tansy oil.
This isn’t to say there’s anything wrong with using an oil cleansing balm without an emulsifier. It all depends on your personal preference.
My simple cleansing balm does not contain an emulsifier, and is meant to be followed with a second facial cleanser to remove residue.
But if you’re looking for a balm that rinses off with water, you’ll need to use an emulsifier like CreamMaker FLUID.
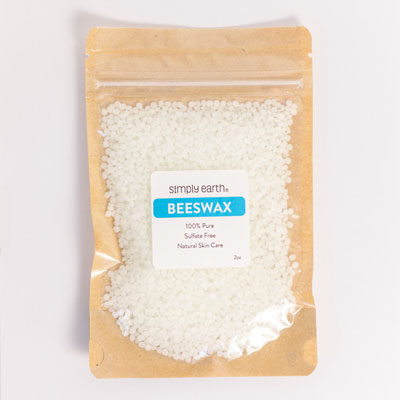
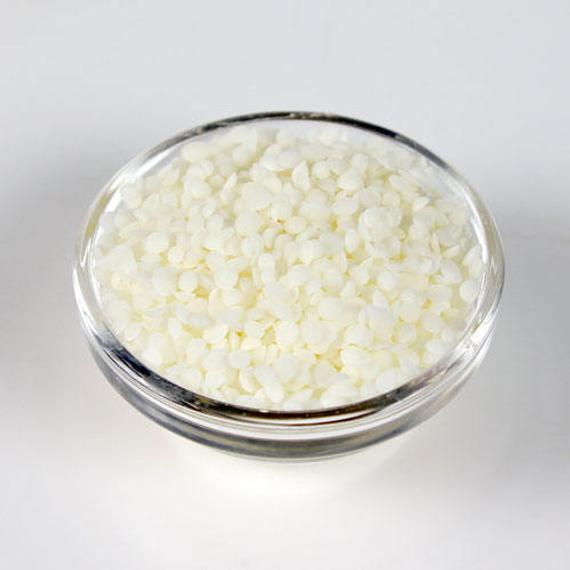
White beeswax
White beeswax is by far my favourite cosmetic wax. Unlike regular yellow beeswax, white beeswax has been refined and filtered to remove impurities, leaving behind a colourless, odourless product.
The benefit of white beeswax is that it imparts a creamier, lighter texture than unfiltered beeswax. This makes for a velvety skin feel with a uniform consistency.
Unfortunately, regular beeswax is not a substitute for filtered beeswax, as it creates a harder product with less glide.
You can still use regular beeswax, but just know that it will result in a textural change and will not create the silky consistency that I intended for this oil cleansing balm.
Cera Bellina wax
Cera Bellina wax (otherwise known as Polyglyceryl-3 Beeswax) is a specially modified beeswax that acts as a thickener and co-emulsifier. It has very unique characteristics that make it unlike any other cosmetic wax.
For one, Cera Bellina wax can “gel” oils, changing their consistency from liquid oils into semi-solid oily gels.
An oil gelled with Cera Bellina is very neat to use. You can find an example in my simple DIY cleansing oil, which uses Cera Bellina wax as a thickener.
Cera Bellina also imparts a rich, ointment-like feel to products and a nice slip.
I added a very small amount of Cera Bellina to this recipe to create a soft texture that melts quickly. However, it’s completely optional. Skipping it may make your balm cleanser less soft, but it will not affect the efficacy of your final product.
Natural purple food colouring
I couldn’t make a lavender cleansing balm without lavender’s characteristic colour. So, I gave the balm a soft shade of purple by adding a few drops of this natural purple food colouring.
I’ve also used these natural food colouring powders and they work well in homemade skincare products. I suggest mixing a small amount of pink and blue until you reach your desired shade.
What oil should I use for this oil cleansing balm?
You might be surprised to hear that I recommend using MCT oil as the base for this recipe. MCT oil gets a lot of play in ketogenic diet circles, but it’s not exactly synonymous with skincare.
But in my opinion, it should be. MCT oil, otherwise known as caprylic/capric triglycerides, is one of my favourite skincare oils for many reasons.
For one, it’s extremely stable. When stored properly, MCT oil can last 2 years or more without going rancid.
And even under improper conditions, MCT oil is very forgiving, as its unique makeup makes it highly resistant to oxidation.
In simple terms, MCT oil does not go bad easily. This all comes down to its fatty acid profile.
Whereas most carrier oils contain a varied blend of fatty acids, MCT is comprised of only two saturated fatty acids: caprylic acid and capric acid.
Saturated fatty acids are very stable, resisting damage even when exposed to light, heat, and oxygen. This is especially important for this recipe, since heat is required to make your lavender-infused oil.
Why MCT oil is good for oil cleansing
MCT oil’s fatty acids are very well tolerated by many skin types. Whereas certain fatty acids like oleic acid can feed yeast and acne-causing bacteria, capric and caprylic acid do not.
And while MCT oil is derived from coconut oil, it doesn’t have the same pore-clogging qualities. The process of fractionating MCT oil removes lauric acid, a fatty acid that helps make coconut oil comodegenic.
This, coupled with its heat stability and low price, makes MCT oil a great choice to use for oil cleansing.
Substitutions for MCT oil
I don’t recommend substituting the MCT oil in this recipe for a non-saturated liquid carrier oil.
Carrier oils such as sweet almond oil and sunflower oil are high in polyunsaturated fatty acids, which are easily oxidized and damaged by heat.
The only other oils suitable for heat infusion are fractionated coconut oil and squalane oil, the latter of which is more expensive.
You can use either one, but keep in mind that fractionated coconut oil contains lauric acid. This can be comedogenic and exacerbate skin issues connected to yeast or fungal overgrowth.
So I recommend using MCT oil, especially if you have skin issues of any kind.
A note on lavender essential oil
You might wonder why I didn’t use the obvious choice to fragrance this recipe: lavender essential oil. However, I intentionally chose to make this oil cleansing balm without essential oils.
While essential oils have wonderful therapeutic uses and benefits, they must be used with care, especially on the delicate facial skin.
Essential oils are incredibly potent. In fact, hundreds and sometimes even thousands of pounds of raw material are needed to produce a single pound of essential oil.
And while it’s true that some essential oils like lavender oil possess skin-calming compounds, unfortunately these properties come bundled with a variety of skin irritants as well.
When used improperly in facial skincare products, essential oils can cause inflammation, contact dermatitis and even chemical burns.
Plus, essential oils can often worsen conditions such as rosacea or eczema by causing further irritation.
Personally, after doing my own research, I try to avoid essential oils in my facial skincare, except for my lip care products. And I occasionally use blue tansy oil, as it doesn’t cause any issues for my skin.
But for these reasons, I formulated this oil cleansing balm with lavender infused oil instead of lavender essential oil. This helps add a subtle, natural fragrance to the balm.
That said, all fragrance ingredients have the capacity to irritate skin, and lavender infused oil is not an exception.
If you have sensitive, inflamed, or irritated skin, or a skin condition of any kind, please do not use this lavender cleansing balm.
And as always, consult your dermatologist or skin expert if you’re unsure if something is safe to use on your face.
If you’re interested in learning more about the downside of essential oils in skincare, this blogger did an excellent job of compiling the information in a succinct way.
DIY oil cleansing balm instructions
For exact measurements and detailed instructions, please see the recipe card at the bottom of this post.
Step 1: How to make lavender infused oil
- First, create a double boiler by placing a heat-safe container such as a Turkish coffee pot into a pan of water.
- Heat dried lavender flowers and MCT oil over medium heat. Once heated, reduce the heat to low and simmer for 20-30 minutes until fragrant.
- Strain the flowers out of the oil before moving onto the next step.
Step 2: How to make lavender-infused oil cleansing balm
- Melt white beeswax and Cera Bellina wax over medium heat.
- Once the waxes have melted, add your lavender infused oil and whisk to incorporate.
- Continue to heat the mixture at medium heat for 5 minutes, whisking frequently.
- Turn off the heat and immediately add CreamMaker FLUID. Mix thoroughly until cloudy.
- If desired, add a few drops of natural food colouring and whisk vigorously to incorporate.
- Transfer your oil cleansing balm to a small glass storage container. Then, carefully place the balm into the fridge to solidify.
- Allow the balm to solidify in the fridge for at least 30 minutes or until completely set.
How to use your oil cleansing balm
This oil cleansing balm is best used at the end of the day to remove a day’s worth of makeup, oil, and sunscreen.
Unless you have very oily skin, it likely won’t be needed in the morning, and a lighter cleanser such as a micellar water will suffice.
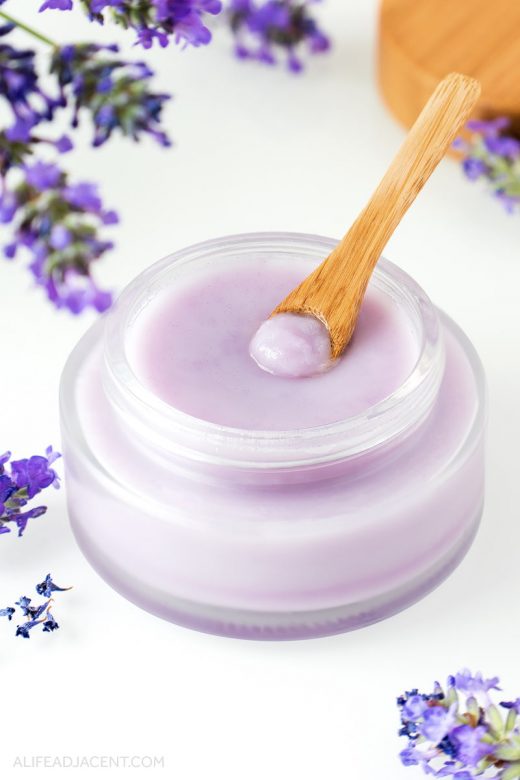
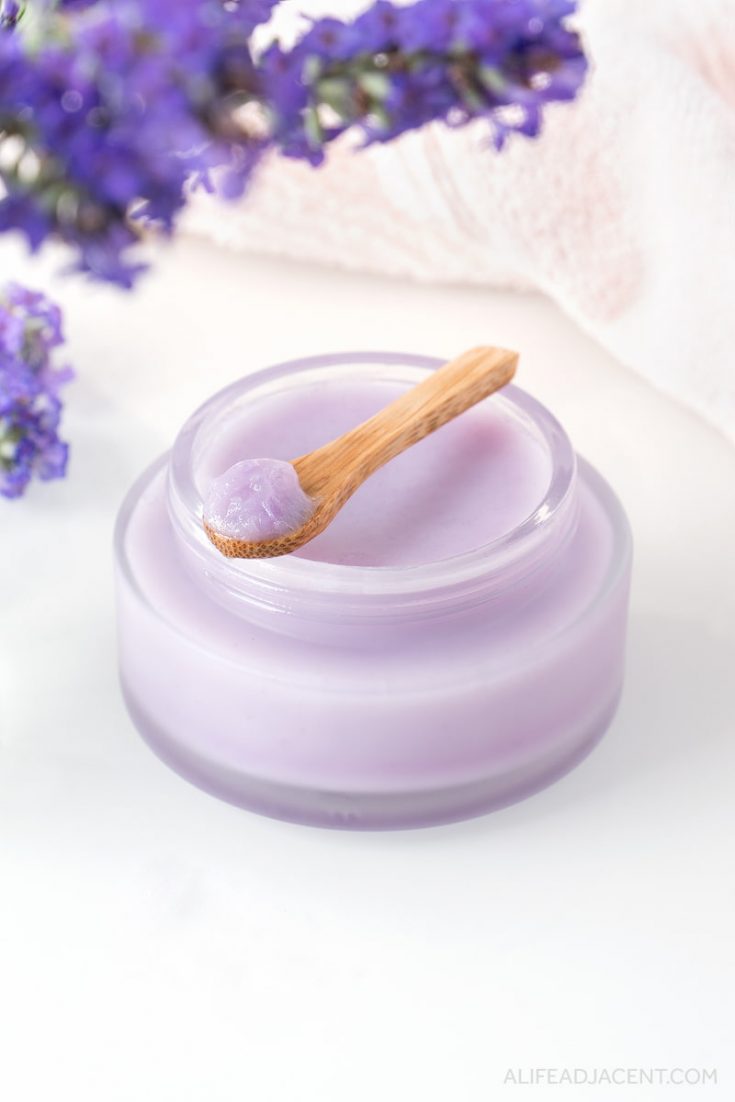
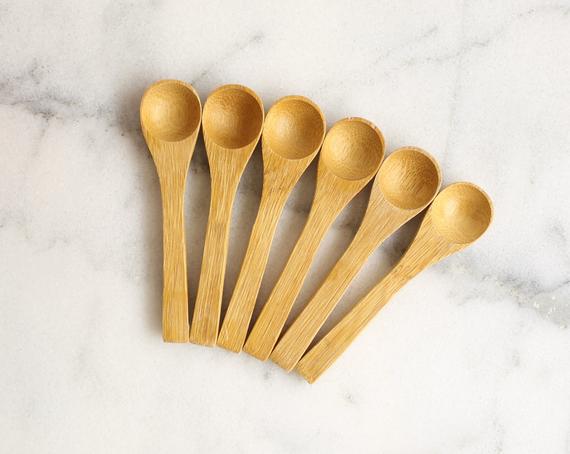
To use your oil cleansing balm, start with dry skin. Scoop out a generous amount with clean, dry fingers or a cosmetic spoon. Once it comes into contact with your skin, it will melt into a viscous oil.
Gently begin to massage the balm into your skin. Watch as it begins to melt and emulsify your makeup and sunscreen.

As you massage, concentrate on oily areas such as the T-zone, as these can benefit most from the balm’s oil-dissolving properties.
Often while oil cleansing you may notice what feels like tiny “grits” appearing on your skin. This is normal and simply means that the balm is dislodging debris from your pores.
Once you’ve finished massaging your face, and your makeup is sufficiently melted, take a small pool of water in your hands and wet your skin. At this point, the oil cleansing balm will turn milky and opaque.
Continue to massage until all of the balm has turned into a milky consistency. Then, rinse with warm water. Thanks to the emulsifier, it will wash off easily.
Those with oily skin may wish to follow the oil cleansing balm with another facial cleanser to remove any residue. However, dry skin types may find that they don’t need it. It’s up to your discretion and what works for your unique skin.
DIY Lavender Cleansing Balm
Learn how to make a lavender-infused DIY oil cleansing balm! This natural makeup remover balm quickly melts away makeup and sebum. It's infused with dried lavender for a soothing fragrance. Plus, it's self-emulsifying, so it washes off with just water.
Materials
Lavender Infused Oil
- 1/4 cup MCT oil or fractionated coconut oil
- 1 tbsp organic dried lavender flowers
DIY Oil Cleansing Balm with Lavender Infused Oil
- 1/4 cup lavender infused oil
- 0.5 tbsp white beeswax pellets (see notes)
- 2 tsp CreamMaker FLUID
- 1/8 tsp Cera Bellina wax pellets (optional)
- A few drops natural purple food colouring (optional)
Tools
- Turkish coffee pot or double boiler
- Mini strainer
- Mini whisk
- Glass container for storage
Instructions
Lavender Infused Oil
- Before beginning, prepare a double boiler by placing a heat-safe container into a water bath. I like to use a Turkish coffee pot over a shallow pan full of water, as its diminutive size is perfect for small batches.
- To make lavender infused oil, place MCT oil and dried lavender flowers into your Turkish coffee pot. Turn the heat to medium to heat the oil. Once heated, reduce the heat to low and allow to simmer for 20 minutes or until fragrant. Stir periodically to help release the flowers' fragrance.
- Once your lavender oil is finished infusing, strain out the flowers using a small strainer or a piece of cheesecloth. The oil is ready to use.
Lavender Infused DIY Oil Cleansing Balm
- Place the white beeswax pellets into your coffee pot or double boiler and melt over medium heat. If using Cera Bellina wax, add it during this step.
- Once the waxes have melted, add your lavender infused oil. Some of the wax will re-solidify at this point. This is normal. Whisk to incorporate the oil and the wax.
- Continue to heat the oil cleansing balm at medium heat, whisking frequently. Hold at medium heat for 5 minutes.
- Once the balm has been heated for 5 minutes, turn off the heat and immediately add CreamMaker FLUID. Mix thoroughly until cloudy.
- Add a few drops of natural food colouring, if desired. Whisk vigorously until the colour is completely incorporated.
- Transfer your oil cleansing balm to a small glass storage container. Then, carefully place the balm into the fridge to solidify.
- Allow the balm to solidify in the fridge for at least 30 minutes or until completely set. Letting the balm set in the refrigerator helps ensure a smooth, gel-like texture with no lumps.
- Once your oil cleansing balm has set, allow it to come to room temperature before use. It can now be stored at room temperature.
Notes
Substitutions
- If you live in a hot climate, you may use 1 tbsp of beeswax to harden the cleansing balm. Otherwise, please follow the recipe and use 0.5 tbsp of beeswax.
- MCT oil is best for this recipe, but fractionated coconut oil and squalane oil can be used as substitutes.
- For more information on why I don't recommend substituting any other type of carrier oil, please see the section in this post titled "which oil should I use for this oil cleansing balm?"
Optional ingredients
- A small amount of Cera Bellina wax creates a softer texture and adds a slippery feel to this oil cleansing balm. However, skipping it won't affect the balm's cleansing ability.
- A few drops of natural food colouring will give your balm a soft lavender shade, but this is completely optional.
Storage & shelf life
- This recipe is free of water, so no preservative or refrigeration is required.
- For best results, use your oil cleansing balm within 1 year.
Recommended Products
As an Amazon Associate and member of other affiliate programs, we earn from qualifying purchases.


More homemade cleanser and makeup remover recipes
If you enjoyed this oil cleansing balm, you may also enjoy these similar recipes:
- Papaya Cleansing Balm Recipe
- DIY Emulsifying Cleansing Oil
- Green Tea Oil Cleanser for Dry Skin
- DIY Micellar Water with Witch Hazel
- Simple DIY Cleansing Balm
- DIY Blue Tansy Cleansing Balm
- DIY Micellar Water Wipes
For even more natural beauty recipes, follow us on Pinterest! You can also find us on Instagram, Facebook, and Twitter.
Lacey
Friday 28th of March 2025
Oh no! I just went to order the cream maker product from Etsy & noticed in the description that it had a “Proposition 65: WARNING: This product can expose you to chemicals including ethylene oxide and 1,4-dioxane, which are known to the State of California to cause cancer or reproductive toxicity. For more information, go to www.P65Warnings.ca.gov”
Am I looking at the wrong product?
Lacey
Sunday 6th of April 2025
@Kyla, Thanks again for taking the time to answer all my questions—I really appreciate you!
I’m so glad to hear the CreamMaker warning was a mistake! I’m trying to keep things as close to natural as possible, with minimal alteration, for my more “purist” clients. I did end up ordering some Olivem 1000 from your link for one of your other cleanser recipes, but I’d love to try another option that rinses off a little more easily while still aligning with my “least amount of processing approach.”
Do you have any suggestions for an emulsifier that might work well for that?
Thanks again for all your support—I’m honestly obsessed with your site (as I’m sure you can tell by now)! 🌿Lacey
Kyla
Tuesday 1st of April 2025
Hi Lacey, I completely understand your concern, but it appears the Prop 65 warning has been mistakenly placed on that product listing. CreamMaker FLUID's safety data sheet (on the MakingCosmetics website) states there is "no ingredient requiring a warning under CA Prop65". That makes sense, as CreamMaker is free of PEGs and ethoxylated ingredients, which are often culprits for ethylene oxide and 1,4-dioxane residue. (I sought it out specifically for that reason, too, as I wanted an emulsifier without ethoxylated ingredients.) I hope this helps put your mind at ease! You can also find the CreamMaker SDS here to check for yourself. 😊
Lacey
Friday 28th of March 2025
Hello again! I was just wondering if I could use either the Bulgarian rose floral wax (I bought it for your rose lip balm recipe) or carnauba wax in place of the Cera Bellini wax pellets? Also wondering if I could use dragonfruit powder for more of a pink color instead of the purple coloring? Thanks so much! Lacey
Kyla
Tuesday 1st of April 2025
Hi again Lacey! The Cera Bellina wax in this recipe helps emulsify makeup while also giving the cleansing balm a silky, gel-like texture. But rose wax and carnauba wax don't possess these unique properties, so unfortunately they can't be used in place of Cera Bellina.
As for dragonfruit powder, because it's water soluble, it won't properly dissolve or infuse its color into an oil-based cleansing balm. But if you'd like a pink color, you could use oil soluble beet powder. Options include ColorKitchen's pink food coloring powder, or if you're looking for an ingredient made specifically for DIY cosmetics, I also love MakingCosmetics oil soluble beetroot extract pigment. I hope this helps!
Caroline S
Thursday 13th of February 2025
How I would love for you to consider providing your formulas in weight measurement instead of volume (preferably in grams). It’s unmatched for accuracy and consistency.
I read this article and felt drawn in and excited, but when I see the instructions giving fractioned cups and tsp measurements I have to admit I was disappointed.
I am going to attempt to calculate these measurements into grams and record it in my log book for future use because it sounds like such a fabulous product, but I would be willing to try more of your recipes if you would consider providing the ingredients in grams (or ounces).
You post wonderful things, I thank you for your time and effort that you put into your site. Kudos!
Kyla
Tuesday 18th of February 2025
Hi Caroline, thanks for your honesty and kind words! I hear you. Some people don't like to weigh ingredients, and when I first started publishing DIY beauty recipes, I wanted to make things easy for them. But now I wish I would've published all my recipes with weight measurements in the first place, or provided both options at the very least. Because you're right, it's the gold standard for accuracy.
Most recent formulas are published by weight, and I'm still in the process of converting the older ones, but it's taking a while with the long to-do list we have for our blog. Sorry for the inconvenience, but I do appreciate your constructive feedback, and plan to fix this soon. Thanks again!
Kristy
Wednesday 27th of November 2024
Hi! I'm going to try making one of your oil cleansers/makeup removers and was curious about why you use different ingredients in the vanilla cleansing balm and this one. I loved what you said about MCT oil and was wondering if you would replace the coconut oil in the vanilla balm with MCT oil?
Kyla
Sunday 8th of December 2024
Hi Kristy, the main reason I used different ingredients is because the vanilla cleansing balm was meant to be an easy recipe for beginners. The simple combination of coconut oil + shea butter solidifies into a balm without any waxes or hardening ingredients. For that reason I don't recommend substituting MCT oil in that particular recipe – since MCT oil is liquid, it won't harden into a balm texture. I hope this answers your question! 😊
Krista
Saturday 30th of December 2023
If no water is in this recipe, why does an emulsifier need to be used?
Kyla
Tuesday 2nd of January 2024
Hi Krista, the emulsifier in this cleansing balm recipe isn't to emulsify anything in the actual formula. It's there to help break down and dissolve makeup and impurities on your skin. Then, it emulsifies with the water used to wash your face so that everything rinses away easily. If the cleansing balm didn't have an emulsifier, it wouldn't cleanse your skin. Hope that makes sense!