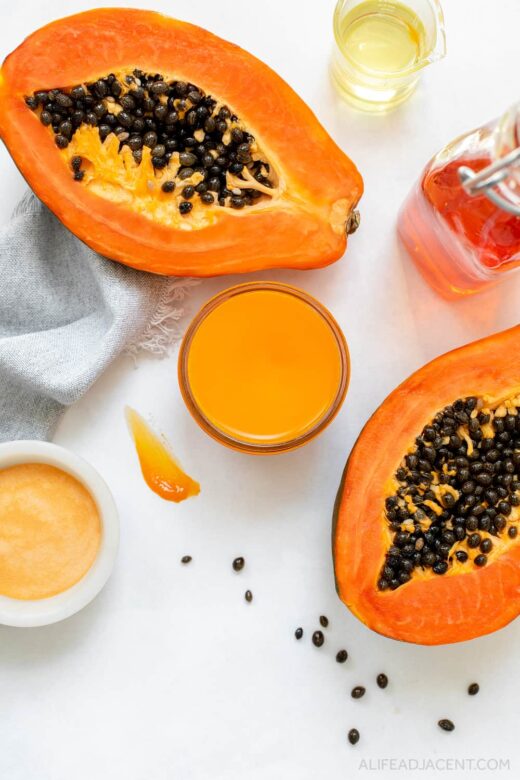
Learn how to make a gently exfoliating DIY cleansing balm for glowing skin. This fruit-infused balm cleanser melts away makeup, while skin-softening papaya enzymes gently exfoliate your skin.

Fruity beauty is trendy. These days, beauty stores are filled with a veritable skincare fruit salad.
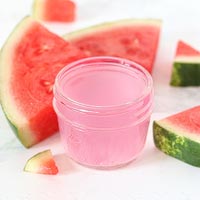
Colourful, sweet-smelling concoctions in pretty jars line the shelves, infused with everything from watermelon to cherry fruit extracts.
While there are many enticing options, you’re not limited to what you can find at the store. It’s easy to make your own fruit skincare at home – and unlike in-season fruit, fruit beauty products are a pleasure you can enjoy any time of the year!
I have a long list of fruit skincare ideas to share with you, and my watermelon face mask and watermelon face mist are just a couple of those published recipes.
Now I’m sharing a DIY exfoliating cleansing balm to leave your skin soft, smooth, and glowing. Did I mention it’s infused with tropical fruit?
- Exfoliating cleansing balm with papaya enzymes
- Glow Recipe Papaya Sorbet Enzyme Cleansing Balm Dupe?
- Benefits of papaya for skin care
- Papaya cleansing balm benefits
- DIY exfoliating cleansing balm ingredients
- Papaya Exfoliating Cleansing Balm Recipe
- How to make exfoliating DIY cleansing balm
- How to use your papaya enzyme cleansing balm
Exfoliating cleansing balm with papaya enzymes
A good cleansing balm is a true skincare multitasker, but this one does even more.
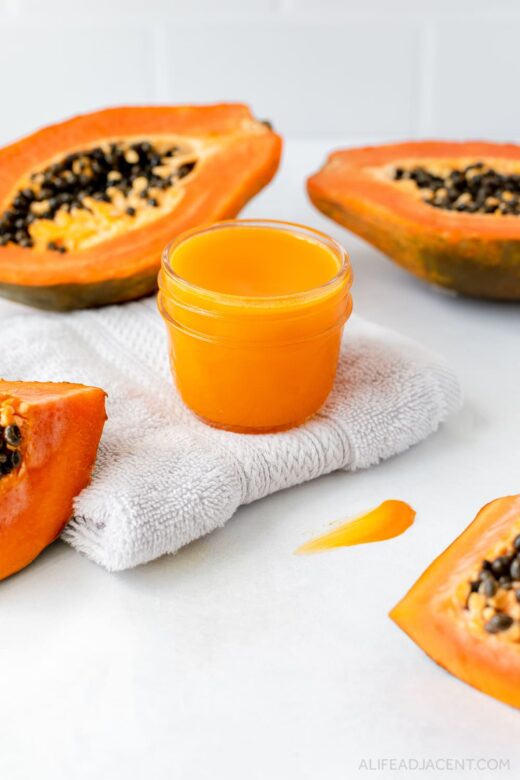
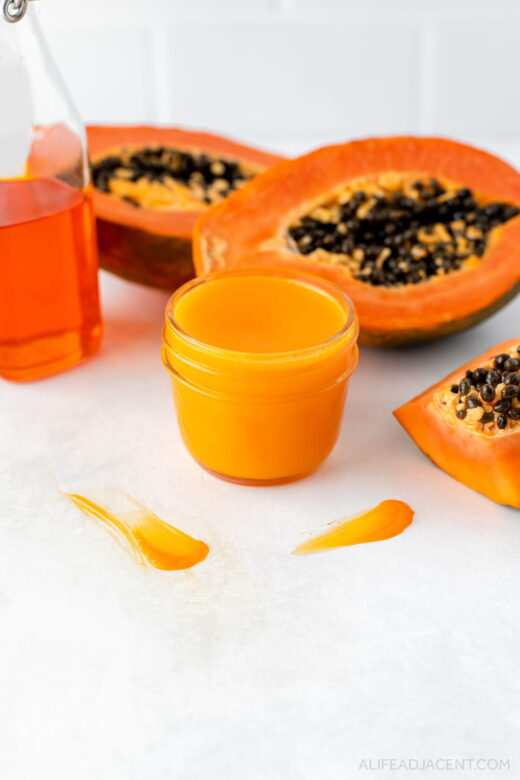
Equal parts makeup remover and gently exfoliating face cleanser, this papaya cleansing balm recipe will help make your skin glow.
Skin-smoothing papaya enzymes combine with a silky, sorbet-like balm to help clear pores, melt away makeup, and reveal softer, more glowing skin.
This cleansing balm is self-emulsifying, too. Like my lavender cleansing balm, it’s made with a natural emulsifier that makes it completely water-soluble. So once you’re finished cleansing, the balm simply rinses off with water.
It feels a but like something from a fancy skincare line, but it’s easy to make in your own kitchen.
If you’re interested, I also have a soothing blue tansy cleansing balm and a simple 2-ingredient makeup remover balm. But lately, this papaya cleanser is the one I’m reaching for the most.
Is this a Glow Recipe Papaya Sorbet Enzyme Cleansing Balm Dupe?
Before getting into the recipe, I wanted to address one thing. If you’re a beauty connoisseur, you may already have noticed this DIY’s resemblance to a store-bought papaya cleansing balm product.
I’m sure no one will believe me on this one, but an exfoliating cleansing balm recipe with papaya has been on my list ever since my watermelon face mask post.
So I couldn’t believe it when Glow Recipe released their Papaya Sorbet Enzyme Cleansing Balm right around the time I was getting ready to publish my own recipe.
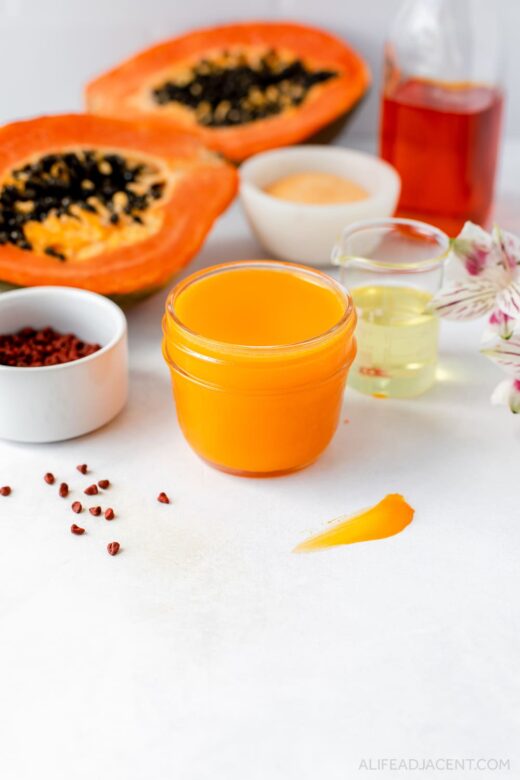
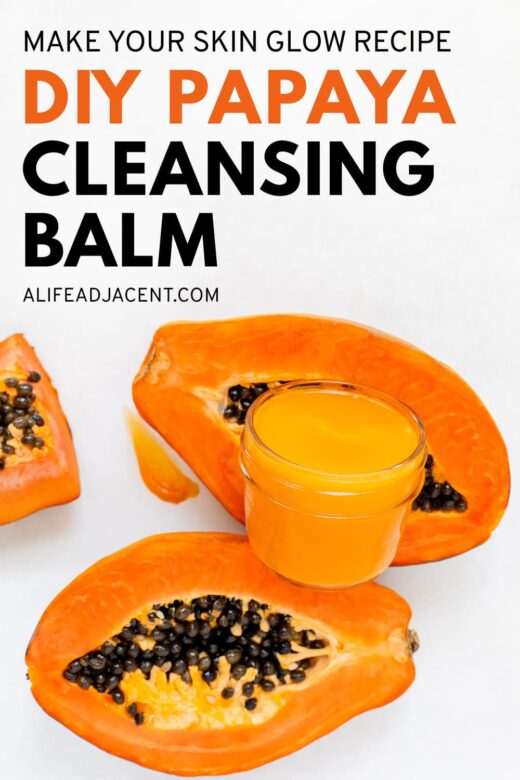
The ideas were just too similar, right down to the soft papaya sorbet texture that I intended. It’s firm in the jar but melts on skin contact, just like this other cleansing balm recipe of mine.
And even if I said I’d had this idea before, I figured no one would believe me anyway. Especially after making a watermelon mask that resembled a Watermelon Glow dupe!
So I decided to wait a little while to publish this recipe, as I didn’t want it to look like I trying to capitalize on Glow Recipe’s new launch.
To be clear, this is not meant to be a Glow Recipe papaya cleansing balm dupe. I just share the company’s affinity for fruit-infused skincare. This is my own make your skin glow recipe, if you will.
With only 6 ingredients, my DIY papaya cleansing balm is also a much more basic recipe than Glow Recipe’s product. So with that aside, let’s get into it.
Benefits of papaya for skin care
Papaya is just as much of a healthy treat for your skin as it is for your body. For one, it’s rich in vitamins A, B and C, all of which promote skin health.
It’s also high in free-radical scavenging carotenoids such as lycopene, beta carotene, and cryptoxanthin, all of which help protect our skin from UV damage and oxidative stress1.
But what really sets papaya apart is its natural enzyme content. Papaya is rich in proteolytic enzymes, namely papain and chymopapain2.
These powerful enzymes are what give papaya its exfoliating action. They break down proteins, helping to leave the skin’s surface softer, smoother, and more even toned3.
There’s also evidence that papain can decrease inflammation, help improve scarring, and possibly aid in preventing acne4,5.
That’s because regular exfoliation helps keeps pores clear, making pimple formation less likely.
Papaya cleansing balm benefits
While it’s clear that papaya has many skin benefits, this isn’t to say this homemade cleansing balm will magically clear your skin.
It’s also not going to give you the baby-smooth feeling of a chemical peel. But its gentle enzymatic action is a welcome addition to your cleansing routine, and just might help you achieve a subtle glow.
As well, fruit enzymes are chemical exfoliants, so this exfoliating cleansing balm is much more gentle on your skin than face scrubs and physical exfoliation methods like coffee grounds, sugar, or jojoba beads.
But if you are looking for something a little more abrasive, I also have a couple gentle face scrub recipes.
At the end of the day, papaya enzymes don’t replace my holy-grail BHA toner, but I enjoy the feeling of gentle resurfacing and softer skin after using this balm during my nightly cleanse.
And I think you will appreciate the way this silky, papaya-infused make up remover enhances your DIY skincare routine.
Ingredients for DIY exfoliating cleansing balm
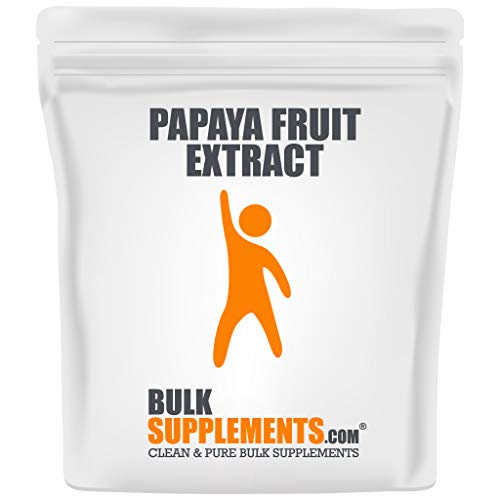
Papaya powder
This enzyme cleansing balm recipe gets its gently exfoliating properties from papaya fruit powder extract.
As you can probably guess, papaya powder is simply papaya fruit that has been dried and processed into a fine powder.
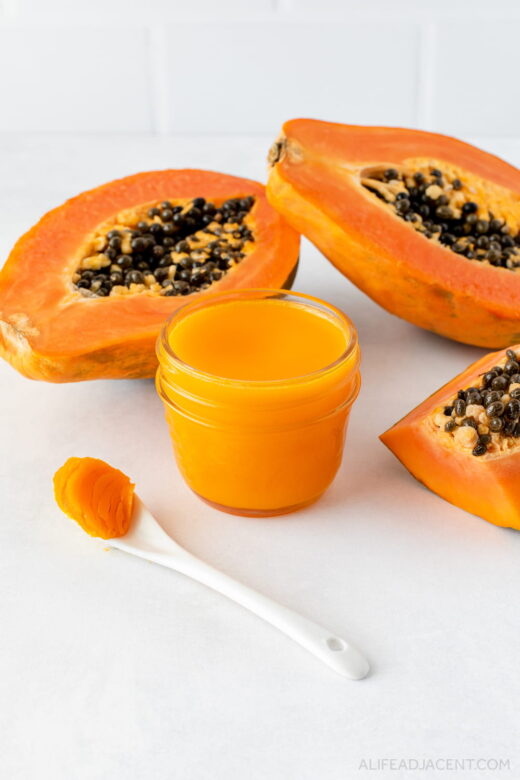
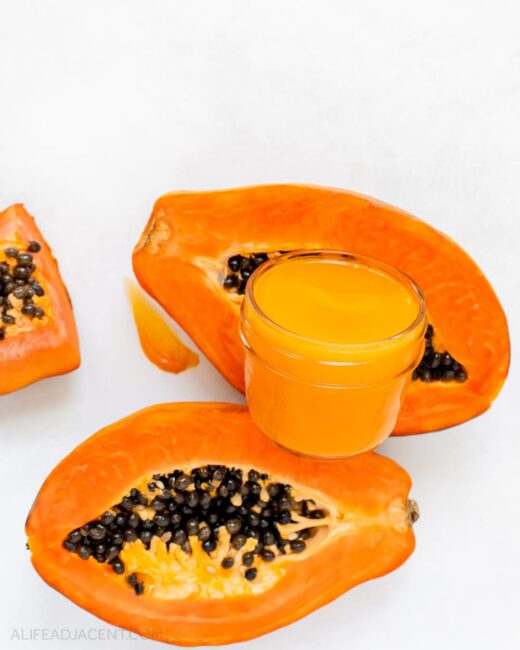
The resulting product is light orange and smells faintly of papaya, but the scent’s potency will depend on the brand you use.
You can use papaya fruit extract powder that’s made for cosmetics, or you can also use the food grade kind. Just be sure that whatever papaya powder you choose is free of added sugars or other ingredients.
How much papaya powder should you use in this DIY cleansing balm?
If you’re expecting a fragrant, tropical-scented treat, you might be disappointed by the small amount of papaya powder used in this recipe.
It’s all too tempting to use more, because what could go wrong by using a little extra fruit powder, right?
But, as I mentioned in my watermelon mask post, it’s very important to make sure you only use powdered fruit extracts at their suggested percentage.
Fruit might seem innocuous, but the recommended maximums are there for a reason. And it turns out this is especially important when working with papaya.
Papain is actually double-edged sword. It’s an effective natural exfoliator that leaves skin smooth and glowing, but it can also be a potent dermal irritant6.
Using papaya powder for skin care at a concentration is higher than 0.5% is not recommended and can lead to skin irritation. So when making your papaya balm cleanser, please be sure to stick to the recipe.
MCT oil or Caprylic/capric triglycerides
Caprylic/capric triglycerides, also known as MCT oil, is my oil of choice for most of my homemade skin care products.
With so many fancy plant oils out there, you may be wondering why I chose something so plain. But I have good reasons!
Put simply, MCT oil’s fatty acid profile makes it well-tolerated by many skin types. It’s unlikely to cause breakouts and it also won’t feed yeast, which can be a silent issue for many people.
If you’re interested, I go into more detail about why MCT oil is ideal for oil cleansing in my post on DIY cleansing oil.
What about papaya seed oil?
You might also be wondering why I didn’t use papaya seed oil, which seems like an obvious choice.
I think papaya oil would make a lovely addition to this homemade cleansing balm, if you wanted to use it. Papaya seed oil has a rich golden hue and is said to possess the sweet aroma of fresh papayas.
However, I chose basic MCT oil for the purpose of making this recipe suitable for more people.
Papaya seed oil is very high in monounsaturated fatty acid oleic acid, which can be acne-causing for some skin types. It can also feed excess yeast if your skin flora is out of balance.
That being said, if your skin reacts well to richer oils such as as jojoba oil, marula oil and camellia oil, you could definitely make this cleansing balm with papaya oil.
I would recommend adding a small amount of vitamin E to the oil before heating to help prevent its unsaturated fatty acids from breaking down.
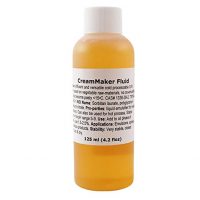
CreamMaker FLUID
This is the ingredient that makes this makeup remover work. If you’ve spent any time on this blog, it needs no introduction, as I’ve now used it in multiple cleansing oil and cleansing balm recipes.
For those not familiar, CreamMaker FLUID is a naturally-derived liquid emulsifier that creates excellent rinse-off cleansing oils, cleansing balms, and oil-based facial cleansers of all kinds.
It rinses off with just water with minimal to no residue, making it the closest natural emulsifier I found to mimic the feeling of store-bought cleansing balms.
It’s been so useful in my DIY beauty routine that I intend to do an entire information post on it, but until then you can find more information on this page of CreamMaker FLUID recipes.
CreamMaker FLUID can be elusive and hard to find, but you can usually purchase it on Etsy or Amazon.ca.
Cera Bellina wax
Cera Bellina wax is a unique ingredient with irreplaceable texture-enhancing qualities.
It also has emulsifying properties, so it works as a co-emulsifier that helps this cleanser rinse off easily with water.
But what really sets it apart is its unique ability to gel oils. Cera Bellina wax helps give this papaya cleansing balm a silky, gel-like quality and a consistency similar to sorbet.
It also helps prevent any beeswax granules in your balm. In simple terms, Cera Bellina wax helps stabilize fatty acids, so you end up with a nice, uniform texture in your final product.
Unfortunately there is no substitute for this unique wax, which means that this balm cleanser is certainly not vegan. However, I do plan to publish a collection of vegan cleansing balm recipes in the future.
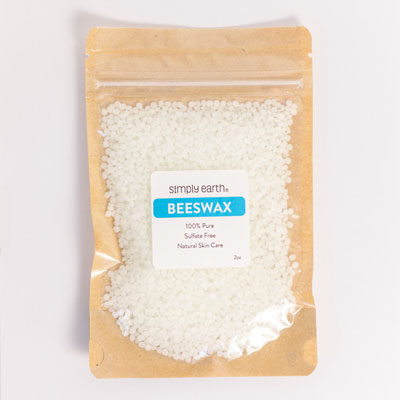
White beeswax
This is another one of those ingredients integral to my homemade skincare routine, and especially my cleansing balm recipes.
White beeswax has been specially filtered to remove all of the leftover pollen and other matter found in yellow beeswax. This gives it a smoother texture, which allows that to create some truly lovely creams and balms.
Don’t be put off by it’s unnatural appearance, because it’s easy to find white beeswax that has been filtered through charcoal and not by some chemical means.
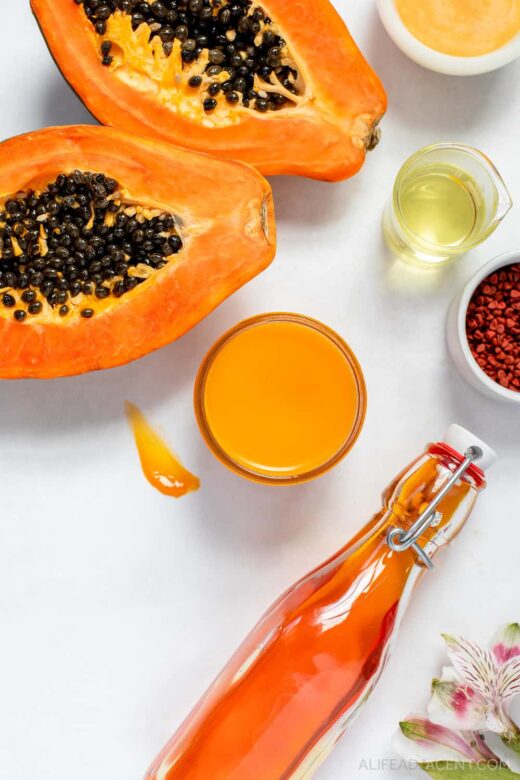
Annatto seeds
I was determined to give this cleansing balm a vibrant orange papaya glow. However, powdered ingredients like beet powder and turmeric yielded underwhelming results, as they were too difficult to incorporate into the oil.
So I found an oil-soluble pigment: annatto seeds. Annatto is a condiment from the seeds of the achiote tree. It’s commonly used as a natural food colouring, but it also has surprisingly benefits for your skin.
Bixin is the carotenoid is responsible for annatto’s potent orange-red pigment. Like all carotenoids, bixin is a potent antioxidant.
It’s been studied for its anti-inflammatory and skin-repairing effects, as well as its potential role in protecting the skin from UV damage7. So, it’s a natural skincare colourant with benefits!
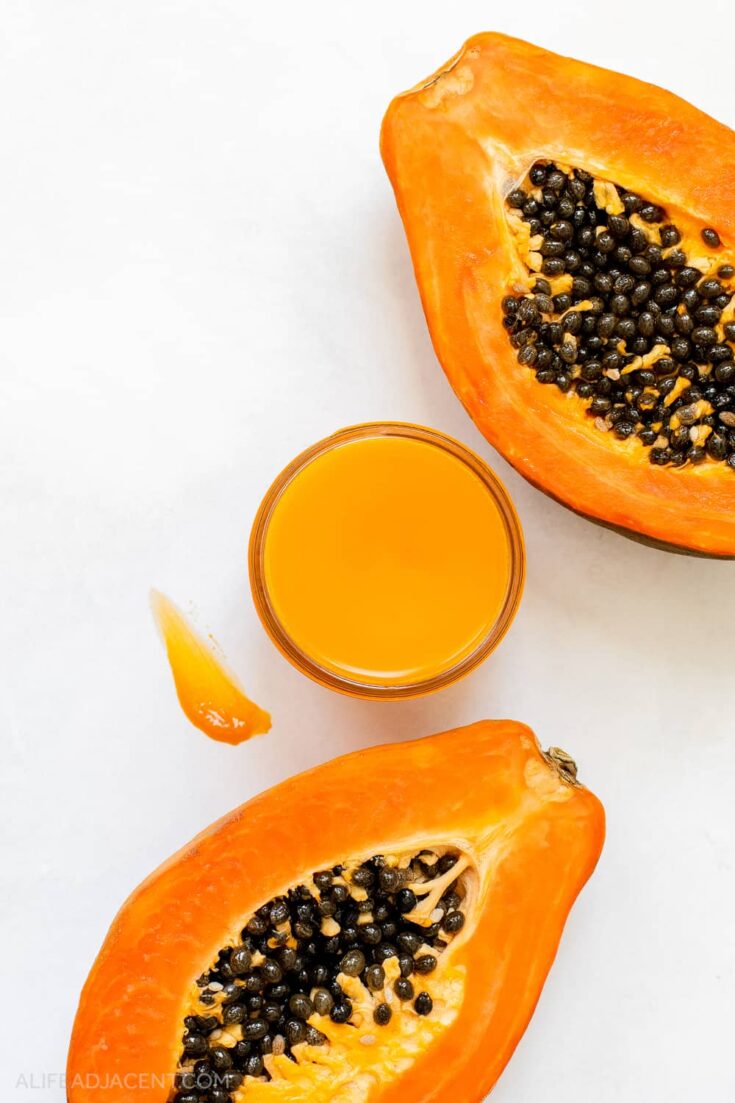
You can use as many annatto seeds as you like, but you only need a small spoonful to infuse your cleansing balm with a gorgeous red-orange bixin pigment that mimics the colour of fresh papaya fruit.
So now that we have our ingredients down, it’s time to get into how to actually make this exfoliating cleansing balm.
How to make annatto infused oil for skin
Before making your papaya cleanser, you will need to make your annatto infused oil. You will need:
- 82g MCT oil
- Annatto seeds, as desired
- To begin, weigh your MCT oil into a glass lab beaker, Pyrex cup, or another heat-safe container. Then, measure out 1/4 teaspoon or so of anatto seeds and place them into your oil.
You can use more or less depending on how vibrant you’d like your papaya balm to be. Use more anatto seeds for a more vibrant papaya orange, or less for a more subtle orange glow.
- Create a stovetop water bath by filling a shallow pan with a few inches of water. Place your container of oil into this water bath and heat on medium low. It won’t take long for the anatto seeds to release their potent pigment.
- Once you’re satisfied with the colour of your oil, remove it from the heat. Your anatto infused oil will have a bright red colour, but it will take on an orange tone after being incorporated into the cleansing balm.
- All that’s left is to simply strain out the anatto seeds which can be done using a small mesh strainer or cheese cloth.
If desired, you can also infuse your annatto oil at room temperature. Simply place your anatto seeds and your oil in a sealable container such as a mason jar or swing-top bottle.
Seal the jar tightly and place it in a cool, dark place to infuse overnight. By morning your oil will be tinted red, but the colour will be more vibrant if using the heat in infusion method.
Once you are satisfied with the colour of your anatto oil, you can move onto making your papaya cleanser.
Papaya Exfoliating Cleansing Balm Recipe
Ingredients
82g MCT oil infused with annatto seeds
10g CreamMaker FLUID
6.5g white beeswax pellets
1g Cera Bellina wax
0.5g papaya powder fruit extract
Equipment
Cosmetic scale
Heat-safe glass lab beakers
Mini steel whisks
Mini steel mesh strainer
Shallow pan for water bath
Heat-protective gloves
Glass container for storage (I used a 4oz mason jar)
How to make exfoliating DIY cleansing balm
- Before making your cleansing balm, make your anatto infused oil (see the instructions above).
- First, prepare your water bath like you did for your anatto oil.
- Using your cosmetic scale, weigh your anatto oil into a heat safe container. Tip: if any oil was lost when you strained out the annatto seeds, simply top it up with some more MCT oil until you reach 82g.
- Weigh your beeswax and your Cera Bellina wax into small glass beakers. Then, add both to your annatto oil.
- Place your container into your stovetop water bath on medium heat. Stir your cleansing balm periodically to help the waxes melt and to ensure even heating. Small steel whisks come in handy for this purpose, as they also conduct heat. It’s important to ensure that your beeswax and Cera Bellina wax are completely melted, as uneven melting will result in a lumpy balm consistency.
- While your balm melts, carefully measure out your exfoliating papaya powder into a separate beaker. I use these tiny 10ml beakers for small ingredient amounts such as these.
- Once your balm is completely liquified and melted, you can remove it from the heat. (Don’t forget to use oven mitts or heat-protective gloves!)
- Slowly sprinkle your papaya powder in short bursts, whisking well in between to avoid clumping.
- Place the beaker back onto your scale. Then, weigh your CreamMaker FLUID into your balm and whisk gently to combine. Don’t whisk too hard, as this may create bubbles, meaning you won’t get a nice smooth top once the balm hardens.
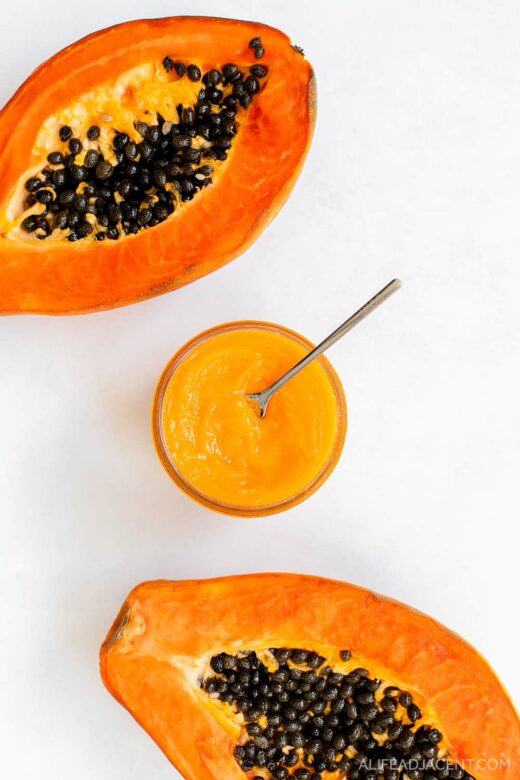
- Carefully pour your papaya balm into your desired container. I used a 4oz mason jars, but you can find more packaging ideas for homemade beauty products here.
Very carefully, place it into the fridge to harden in an area where it will not be disturbed. It’s very important to harden your balm cleanser in the fridge and not at room temperature, as this will ensure that the waxes and fatty acids cool evenly. This results in a nice smooth and silky texture with no lumps. - After about 30 to 40 minutes the balm should be completely hardened. Remove it from the fridge and allow it to come to room temperature before use.
How to use your papaya enzyme cleansing balm
This cleansing balm recipe is extremely versatile – it rinses off with water, so you can opt use it as a makeup remover balm or as a standalone, gently exfoliating facial cleanser.
If you double cleanse, you can follow the balm with your usual face wash. But depending on how much makeup or sunscreen you were wearing, you may find that your skin feels clean enough that you don’t even need a second cleanse after.
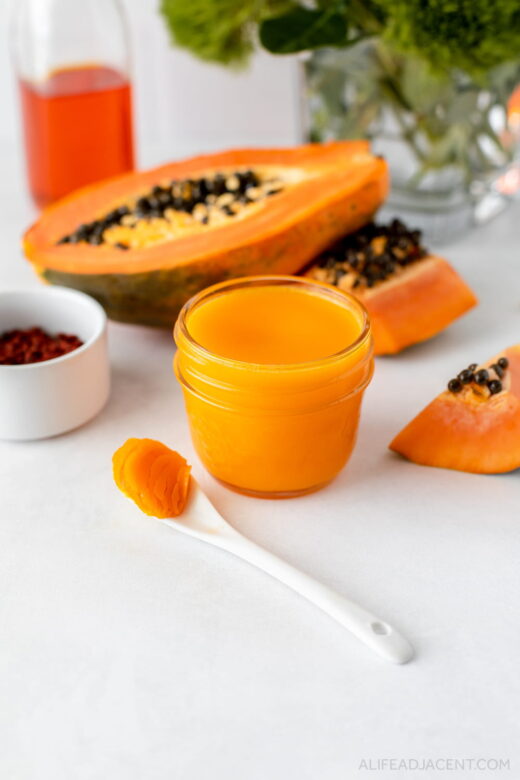
To use your papaya cleansing balm, start with dry skin. Scoop out your desired amount with clean fingers or a clean cosmetic spoon (I like the NIOD spoon).
Massage gently into your face using circular motions, concentrating on the most oily areas to help clear your pores of makeup, oil and debris. The papaya balm’s soft sorbet texture will melt on contact with your skin.
You can also use it around the delicate eye area to remove eye makeup, but be gentle and take care not to get it into your eyes, as it will irritate them.
Collect a small puddle of water in your hands and massage the balm into your skin again. The cleansing balm will turn milky as it emulsifies with water, dissolving and melting away your makeup.
Once your face is wet, the papaya powder will dissolve, activating the cleansing balm’s enzyme exfoliating properties. You can choose to rinse it off right away, or you can wait a couple minutes to allow the papaya enzymes to work on gently exfoliating your skin.
Rinse your face with lukewarm water and enjoy clean, soft, smooth skin. Proceed with your skincare routine as normal.
DIY Papaya Enzyme Exfoliating Cleansing Balm
Make your skin glow with this papaya enzyme cleansing balm recipe! Learn how to make a DIY exfoliating cleansing balm with papaya enzymes. This fruit-infused balm cleanser melts away makeup, while skin-softening papaya gently exfoliates your skin.
Materials
Annatto-Infused Oil
- 82g MCT oil
- ~1/4 tsp annatto seeds
Papaya Cleansing Balm
- 82g annatto-infused MCT oil
- 10g CreamMaker FLUID
- 6.5g white beeswax pellets
- 1g Cera Bellina wax
- 0.5g papaya powder fruit extract
Tools
- Cosmetic scale
- Heat-safe glass lab beakers
- Mini steel whisks
- Mini steel mesh strainer
- Heat-protective gloves
- Shallow pan for water bath
- Glass container for storing the cleansing balm (I used a 4oz mason jar)
Instructions
How to make annatto infused oil
- First, you will need to make annatto-infused oil to give your exfoliating cleansing balm a vibrant papaya orange colour. To begin, weigh your MCT oil into a glass lab beaker, Pyrex cup, or another heat-safe container.
- Measure out 1/4 teaspoon or so of anatto seeds and place them into your oil. You can use more or less depending on how vibrant you'd like your papaya balm to be. Use more anatto seeds for a more vibrant papaya orange, or less for a more subtle orange glow.
- Create a stovetop water bath by filling a shallow pan with a few inches of water. Place your container of oil into this water bath and heat on medium low. It won't take long for the anatto seeds to release their potent pigment.
- Once you're satisfied with the colour of your oil, remove it from the heat. Your anatto infused oil will have a bright red colour, but it will take on an orange tone after being incorporated into the cleansing balm.
- All that's left is to simply strain out the anatto seeds which can be done using a small mesh strainer or cheese cloth. Then you can move onto making your papaya cleanser.
How to make exfoliating DIY cleansing balm
- Before making your cleansing balm, make your anatto infused oil (see the instructions above). Prepare your water bath like you did for your anatto oil.
- Using your cosmetic scale, weigh your anatto oil into a heat safe container. Tip: if any oil was lost when you strained out the annatto seeds, simply top it up with some more MCT oil until you reach 82g.
- Weigh your beeswax and your Cera Bellina wax into small glass beakers. Then, add both to your annatto oil.
- Place your container into your stovetop water bath on medium heat. Stir your cleansing balm periodically to help the waxes melt and to ensure even heating. Small steel whisks come in handy for this purpose, as they also conduct heat. It's important to ensure that your beeswax and Cera Bellina wax are completely melted, as uneven melting will result in a lumpy balm consistency.
- While your cleansing balm melts, carefully measure out your exfoliating papaya powder into a separate beaker. I use these tiny 10ml beakers for small ingredient amounts such as these.
- Once your balm is completely liquified and melted, you can remove it from the heat. (Don't forget to use oven mitts or heat-protective gloves!)
- Slowly sprinkle your papaya powder in short bursts, whisking well in between to avoid clumping.
- Place the beaker back onto your scale. Then, weigh your CreamMaker FLUID into your balm and whisk gently to combine. Don't whisk too hard, as this may create bubbles, meaning you won't get a nice smooth top once the balm hardens.
- Carefully pour your papaya balm into your desired container. I used a 4oz mason jars, but you can find more packaging ideas for homemade beauty products here.
- Very carefully, place it into the fridge to harden in an area where it will not be disturbed. It's very important to harden your balm cleanser in the fridge and not at room temperature, as this will ensure that the waxes and fatty acids cool evenly. This results in a nice smooth and silky texture with no lumps.
- After about 30 to 40 minutes the balm should be completely hardened. Remove it from the fridge and allow it to come to room temperature before use.
Notes
Infusing annatto oil
If desired, you can also infuse your annatto oil at room temperature. Simply place your anatto seeds and your oil in a sealable container such as a mason jar or swing-top bottle.
Seal the jar tightly and place it in a cool, dark place to infuse overnight. By morning your oil will be tinted red, but the colour will be more vibrant if using the heat infusion method.
Storage & shelf life
- This recipe is free of water, so no preservative or refrigeration is required.
- Store in a cool, dry place, preferably in darkness.
- For best results, use your papaya cleansing balm within 1 year.
Recommended Products
As an Amazon Associate and member of other affiliate programs, we earn from qualifying purchases.


More cleansing balm recipes for glowing skin
- Lavender Cleansing Balm
- Emulsifying DIY Cleansing Oil
- Green Tea Cleansing Oil
- Blue Tansy Emulsifying Cleansing Balm
- Simple Makeup Remover Balm
For more homemade skincare recipes, follow us on Pinterest, Instagram, YouTube, Facebook, TikTok, and Twitter.
Pin it for later
- Schweiggert, Ralf M et al. “Carotenoids are more bioavailable from papaya than from tomato and carrot in humans: a randomised cross-over study.” The British journal of nutrition vol. 111,3 (2014): 490-8. doi:10.1017/S0007114513002596
- “Papaya.” Drugs and Lactation Database (LactMed), National Library of Medicine (US), 15 February 2021.
- Smith, W P et al. “Topical proteolytic enzymes affect epidermal and dermal properties.” International journal of cosmetic science vol. 29,1 (2007): 15-21. doi:10.1111/j.1467-2494.2007.00354.x
- Rakhimov, M R. “Izuchenie protivospalitel’noĭ aktivnosti otechestvennogo papaina” [Anti-inflammatory activity of domestic papain]. Eksperimental’naia i klinicheskaia farmakologiia vol. 64,4 (2001): 48-9.
- Chen, Yan-Yan et al. “A novel elastic liposome for skin delivery of papain and its application on hypertrophic scar.” Biomedicine & pharmacotherapy = Biomedecine & pharmacotherapie vol. 87 (2017): 82-91. doi:10.1016/j.biopha.2016.12.076
- “Enzyme in Cosmetic Products Can Act as Allergen via the Skin.” ScienceDaily, ScienceDaily, 10 Apr. 2015, www.sciencedaily.com/releases/2015/04/150410083304.htm.
- Rojo de la Vega, Montserrat et al. “Targeting NRF2 for Improved Skin Barrier Function and Photoprotection: Focus on the Achiote-Derived Apocarotenoid Bixin.” Nutrients vol. 9,12 1371. 18 Dec. 2017, doi:10.3390/nu9121371
Kristie
Tuesday 4th of June 2024
Is this safe for all skin types?
Kyla
Wednesday 5th of June 2024
Hi Kristie, I've done my best to use ingredients that are compatible with many skin types, from dry to oily. Oils in particular can be tricky to make work for everyone, but MCT oil (caprylic/capric triglycerides) is known to be non-comedogenic, anti-bacterial and unlikely to aggravate acne. I have dry/sensitive skin and this recipe works well for me, and I've also tested it on friends with oilier skin who like it too. But of course it will always depend on your own unique skin and its sensitivities. I hope this helps!
Emily B
Tuesday 4th of July 2023
I’m definitely going to try this! I hate the clunky plastic containers my usual face wash comes in. But I do always keep them. Is there any issue with putting this in a clean plastic container? Secondly, you mention leaving the face wash on after getting it wet to let it exfoliate but also that papaya can be irritating. Is there an amount of time you’d recommend not exceeding? Like would a couple minutes be fine?
Thank you for this amazing recipe!
Kyla
Wednesday 5th of July 2023
Hi Emily, thanks for the kind words! Since this recipe requires heating, I do recommend a glass jar for storage if possible, just to avoid any toxins leeching when pouring the heated balm into a plastic jar.
And yes, I typically only leave the balm on for a minute or two. It depends on how sensitive your skin is, so I always recommend a patch test with any new ingredients, and to start slow to see how your skin responds to the papaya enzymes.
I hope this helps, and please let me know if you have any more questions. And I would love to hear how making the cleansing balm goes for you! 😊
Susie
Saturday 8th of January 2022
Hi there! I tried to make the papaya cleansing balm! The texture is great. But I found that when I added the papaya it all just sunk to the bottom! Not sure there Im getting any benefit from the papaya in my formula! Is there something I can do to get it to mix properly? Thanks!
Kyla
Monday 10th of January 2022
Hi Susie, I'm so glad you like the texture! I'm sorry to hear about the papaya powder issue though! I haven't run into that problem with this particular recipe, but I'll do my best to help.
I'm thinking that you may need to keep whisking the balm a little longer as it cools. Once it reaches more of a semisolid state, the powder should stay suspended. So I would try whisking gently until the cleansing balm begins to congeal, then pour into your container and pop in the fridge. Thank you for sharing your experience, and please let me know how it goes. If this is a common issue, I want to make sure I provide a solution in the article. 😊