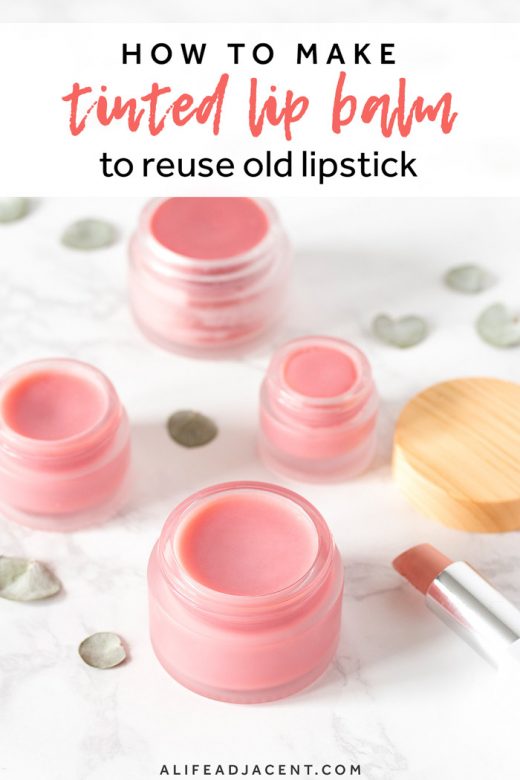
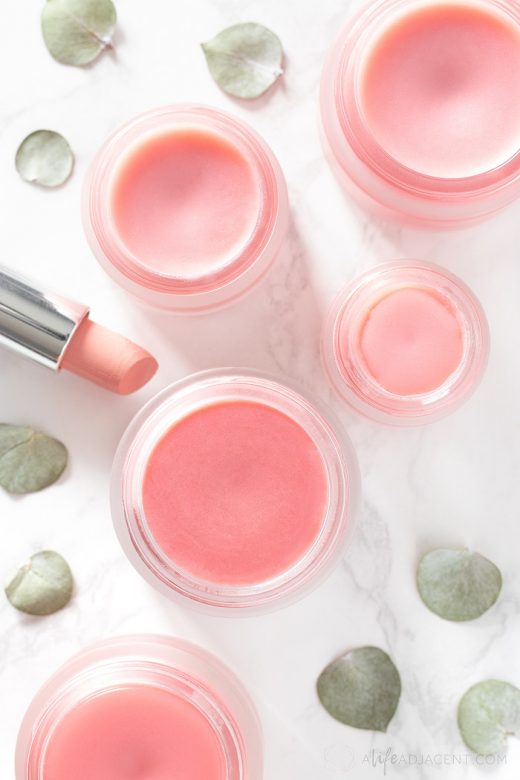
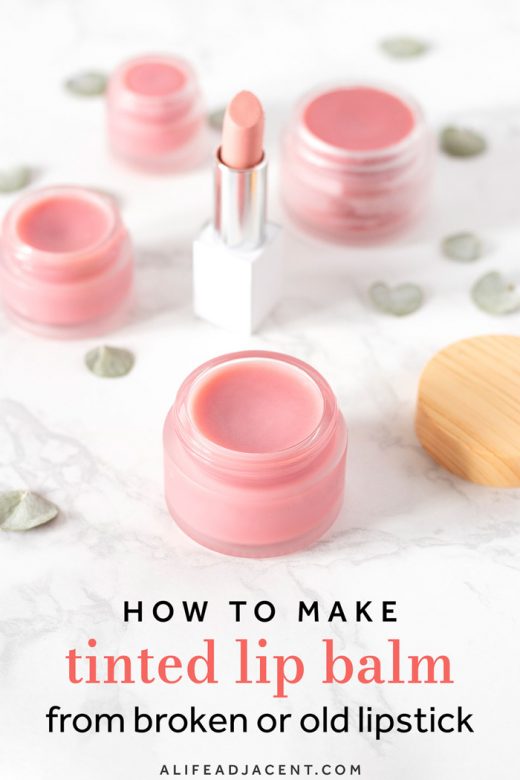
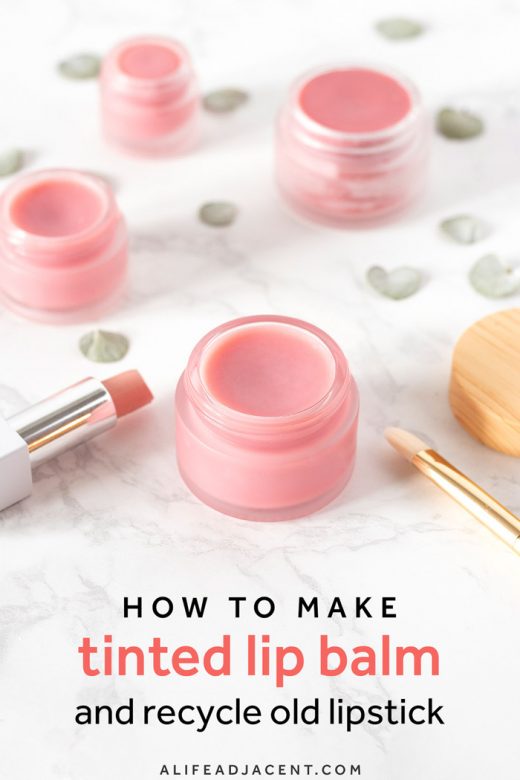
Don’t throw away old or broken lipsticks or that color that just doesn’t work for you any longer – learn how to craft your own DIY lip balm made with lipstick! This easy homemade lip balm is made with beeswax, shea butter and coconut oil. It’s tinted with non-toxic lipstick, and leaves your lips soft and supple with just a hint of color. Read on to learn how to upcycle your old lipstick, and create a lightly pigmented, moisturizing lip balm that relieves dry lips.
Have you ever ended up with a lip color that just didn’t work for you? Maybe it was too dark, too bright, or just not your perfect shade. Or maybe you’re holding onto a lipstick that’s past its prime, broken, or just not going on as smoothly as it used to.
You don’t have to throw these lip colors away or toss them in the back of your makeup drawer. You can give your old lipsticks new life by using them to tint your own homemade lip balm.
Making lip balm with old lipstick
Lipstick is an easy and inexpensive way to color your homemade lip balm. Of course you can use other natural tinting options for your balm, such as beetroot or cosmetic mica, but I wanted to create a balm specifically that utilized old lipsticks.
Not only does this save money, but it’s also a good way to salvage a broken or otherwise unusable lipstick. You can upcycle something that might have otherwise been wasted. So if you’re wondering what to do with old lipsticks, this is an idea!
You might even be surprised to find that, once incorporated into a lip balm, you end up liking the lipstick shade that just didn’t work for you before. By diluting a dramatic color, you can turn it into a lighter, more wearable shade.
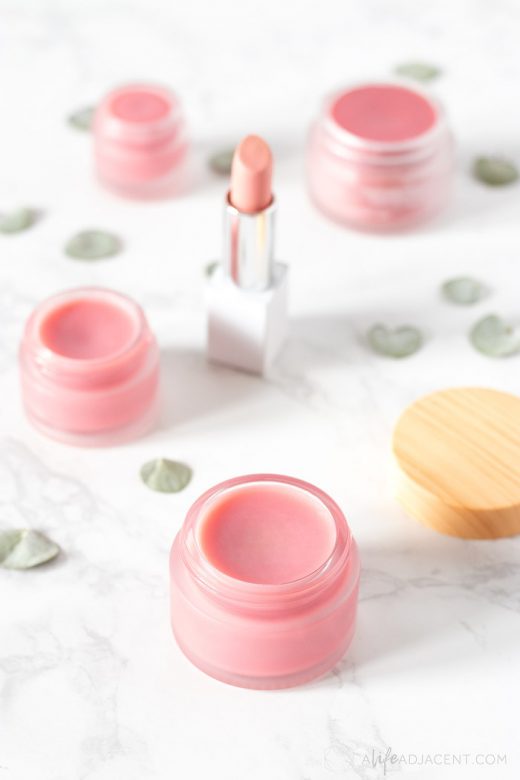
For instance, the deep fuchsia lipstick I used for this DIY created a light pastel pink lip balm. So even the brightest red lipsticks can be turned into soft pink lip balms.
How to tint homemade lip balm with lipstick
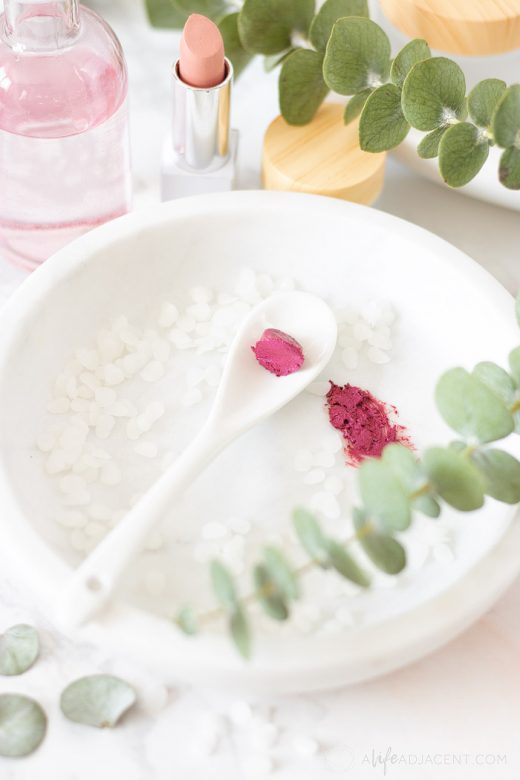
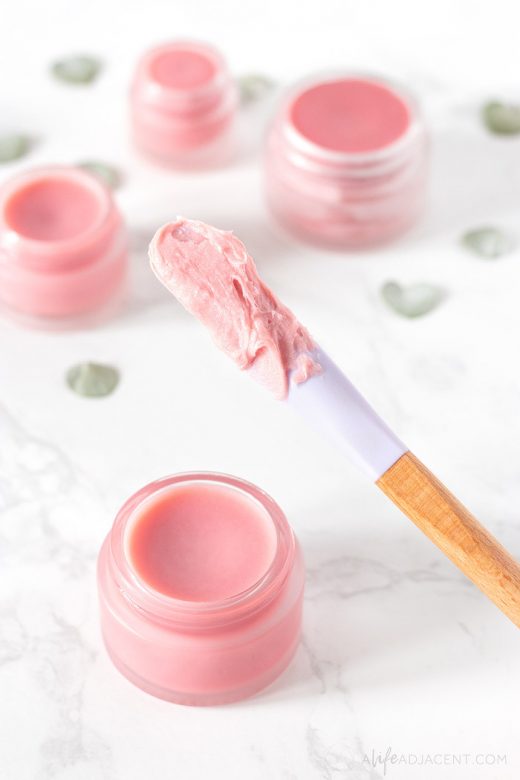
Tinting your homemade lip balm with lipstick is as easy as melting a small piece of it into your base. You can create a variety of colors and shades depending on how much pigment you use. Plus, you can even mix multiple lipsticks to create a unique new color.
If once the balm has set, you find that it still isn’t your desired shade, simply melt it down and try again. If it’s too light, you can add more lipstick. If it’s too dark, you can mix in more shea butter and beeswax to mute the color.
You can use whichever lipstick you wish. But to keep this homemade lip balm natural, ethical and non-toxic, I recommend using a natural and lead-free lipstick, such as one from the list below. (For the balm pictured, I used Zorah Lipstick in the shade New York.)
Natural lipstick brands that are non-toxic and good for tinting include:
- RMS Beauty
- Bite Beauty
- Gabriel Cosmetics
- Clove + Hallow
- Crunchi
- Kosas
- Ilia
- Zorah
- Beautycounter
Other natural color additives for lip balm
If after experimenting your lip balm’s tone is still not quite what you had in mind, you can opt to use a small amount of natural colorants to tweak it, including the following:
- Mica powder
- Beetroot powder
- Turmeric powder
- Blue spirulina
- Red clay
- Yellow clay
For example, you can add a pinch of beet powder or red mica if you’re looking for a redder lip balm. If your balm turns out too red, you can add a pinch of blue spirulina to bring the color to a more cool-toned pink. As well, a small spoonful of turmeric powder or yellow clay can take a pink balm to a more coral-toned shade.

Benefits of making your own lip balm
Besides controlling the color, there are many other reasons to make your own homemade lip balm.
You control the ingredients
The primary benefit to making your own lip balm is that you can customize your ingredients and avoid potentially toxic additives, such as petroleum by-products, artificial dyes, and synthetic fragrances.
If you haven’t already make the switch to more natural beauty products, drugstore lip balms and lipsticks should be the first on your list to go as lip products are of course more likely to be ingested.
You can choose your desired texture
Additionally, by making your own lip balm, you can customize the texture of your balm depending on the ratio of oils, butters, and waxes that you use. You can create a softer, creamier balm or a firmer more solid balm. (More on this later).
They’re eco-friendly and economical
Another advantage of homemade balms is that they’re frequently more eco-friendly than their store bought counterparts. And by reusing your packaging, you can cut down on waste.
I used small glass jars such as these for this recipe. But you can also use small tins or recycle small glass jars from your eye cream or other skincare products that come in small containers.
Finally, making your own lip balms is economical and can save you money in the long term, especially if you go through a lot of balm. We certainly do!
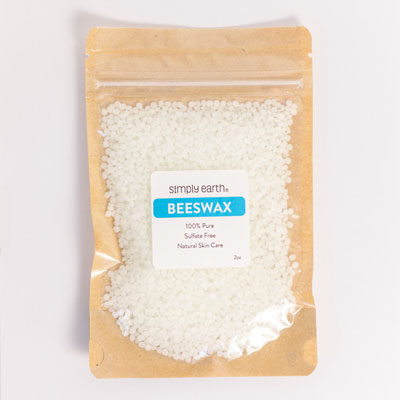
Ingredients for making homemade lip balm
Lip balms are commonly crafted from a mixture of waxes, butters or oils. The butters and oils create a moisturizing base, and the wax is what helps your lip balm harden.
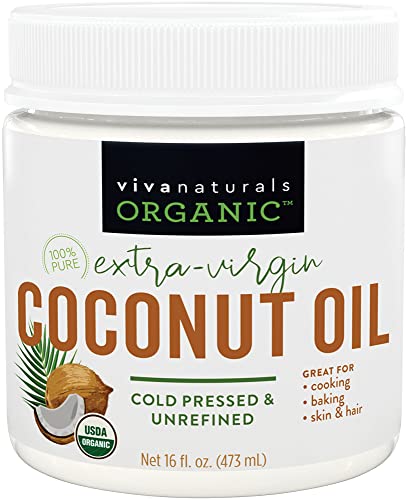
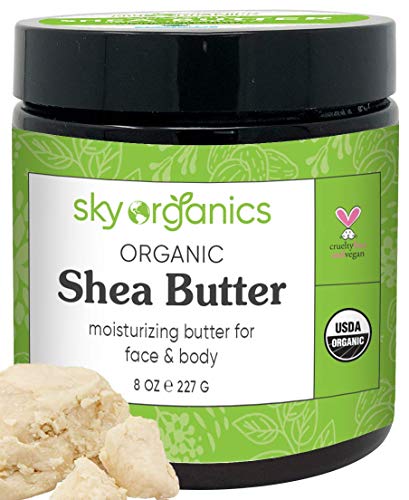
I used a combination of virgin coconut oil, shea butter and beeswax for this lip balm recipe. However, you can feel free to mix and match your favorite oils and butters, or choose from the following list.
Other ingredients often used in lip balm include:
- Cocoa butter – Cocoa butter is one of my favorite butters but it can change the scent of your balm. If you’re going for a chocolate scent, it’s a great choice.
- Mango butter – This butter is somewhat akin to shea in that it shares a fairly similar melting point. However, mango butter surprisingly doesn’t have a strong smell, unlike shea butter. Mango butter is also rich in vitamins, oleic acid and stearic acid which makes it wonderful for nourishing dry, chapped lips.
- Lanolin – A thick natural wax harvested from sheep’s wool, lanolin makes a nourishing lip balm base. It mimics our skin’s natural lipids and is great for extremely dry, chapped lips. Lanolin is cruelty-free as long as you get it from an ethical, reputable source.
- Babassu oil – Babassu oil in similar in texture to coconut oil but without its characteristic scent. It’s a good alternative to virgin coconut oil for those who are allergic or don’t like the scent of coconut.
Alternatives to beeswax in lip balm
If you’re vegan or would like to create a tinted lip balm without beeswax, you can substitute a plant-based wax of your choice. Some vegan wax options include:
- Candelilla wax
- Carnauba wax
- Castor wax
- Japan wax (sumac wax)
How to flavour your tinted lip balm
You can use any kind of oil-soluble, food-grade flavouring for your lip balm, such as a natural flavour extract. For this balm, I used a 100% natural food-grade and oil-soluble cherry flavour that is vegan and safe for use in lip balms.
If you’d prefer a flavour option that’s closer to nature, you can also use essential oils to give your balm a hint of flavour and scent.
My favorite essential oils for lip balm include:
- Peppermint essential oil – A common lip balm flavour, this essential oil adds a tingly sensation, gentle plumping action, and just might make your breath smell a bit fresher.
- Sweet orange essential oil – Adds a pleasant, fruity scent. Most citrus oils are phototoxic so make sure you use sweet orange oil and not orange. It also pairs well with vanilla for a creamsicle-like flavour.
- Vanilla oleoresin – Adds a warm, delicious scent and flavour to your lip balm.
- Lavender essential oil – Is both soothing and known for its calming qualities.
- Cinnamon essential oil – Good for subtle plumping (but proceed with caution and only use a drop or two!)
- Lime essential oil – Adds an energizing citrus scent. Please only use steam-distilled lime oil, as regular cold-pressed lime essential oil has photosensitizing properties.
How to make tinted lip balm with lipstick
Making your own lipstick-tinted lip balm is easy. For more detailed instructions, please see the recipe card at the bottom of this post.
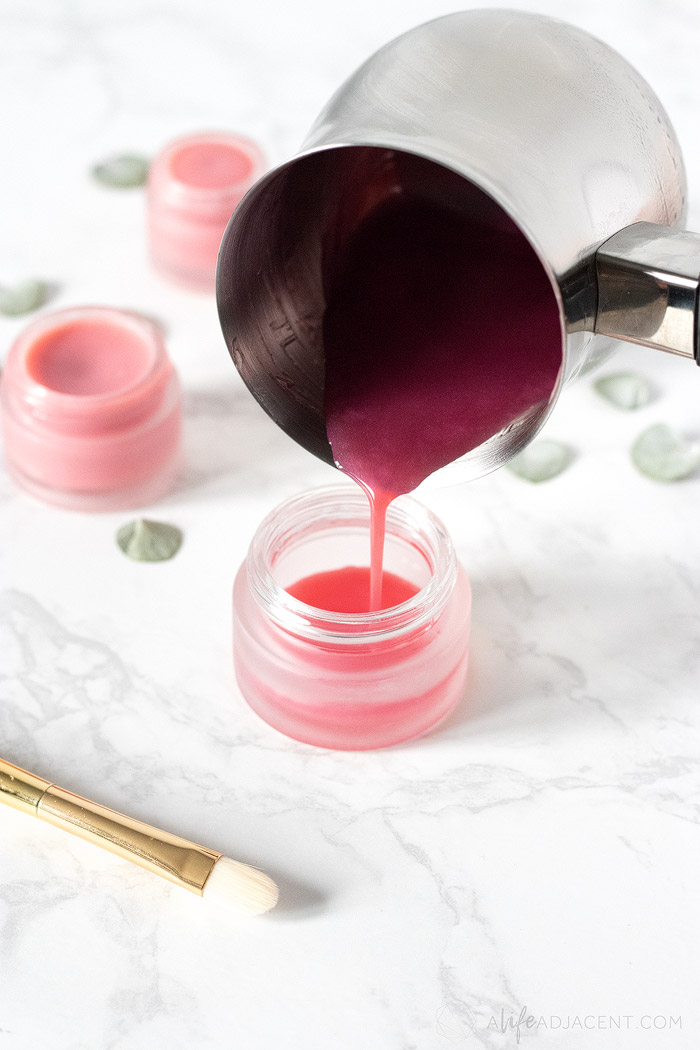
- Melt your butters, oils and waxes in a Turkish coffee pot over a water bath.
- Add your lipstick, melt and stir. Repeat until you achieve your desired color.
- Once your lipstick has been melted and incorporated, turn off the heat and remove your pot from the stove.
- Allow to cool before adding essential oils and/or lip balm flavouring.
- Pour your lip balm into small jars or tins and allow to harden.
How to use your lip balm
Before using a lip balm, I recommend using a lip scrub. Exfoliating your lips a couple times a week, or before using a tinted balm, can help your lips appear smoother and remove any dry flakes.
We have a couple of lip scrub recipes on the blog. Or you can use a mixture of honey, fine sugar and a carrier oil of your choice to create a quick and easy lip scrub. Use equal parts of each and massage gently into lips.
DIY Tinted Lip Balm with Old Lipstick
Learn how to make your own tinted DIY lip balm with lipstick! Don’t throw away broken or old lipsticks or that color that just doesn’t work for you anymore. Upcycle them with this easy homemade lip balm recipe.
Materials
- 2 tbsp coconut oil (or babassu oil)
- 2 tbsp shea butter (or other plant butter)
- 1 1/2 tbsp beeswax pellets
- A dollop or more of natural lipstick
- 10 drops natural cherry flavouring (optional)
- 2-3 drops of essential oils
Tools
- Turkish coffee pot or glass measuring cup with spout
- Shallow pan for water bath
- Small silicone spatula
- Small glass jars or tins for storage
Instructions
- Place shea butter, coconut oil and beeswax in a small saucepan or Turkish coffee pot. Fill a shallow pan with a few inches inches of water and turn the heat to medium to create a water bath. Bring to a simmer.
- Place your smaller pot in the bath and slowly melt the ingredients, mixing as you go. You can also use a glass measuring cup with a spout for this step as well. Take care not burn your ingredients or bring them to a boil.
- Once the ingredients are soft, you can add your lipstick. I added about a quarter inch off the top of my tube, but you can experiment with more or less colour. Add some lipstick, melt and stir. If you like the colour, you’re ready for the next step. If not, add more lipstick. Remember that the colour will lighten as it hardens, and it might even shift in tone. The colour in the pot will be darker than the final product.
- Once your lipstick has been melted and thoroughly mixed, turn off the heat and remove your pot from the stove.
- Allow to cool slightly, then add your essential oils or flavouring and again mix thoroughly.
- If your melting container doesn’t have a spout, use a tiny funnel to fill your glass jars, making sure to complete this step quickly before your ingredients begin to harden. If using a Turkish coffee pot or measuring cup with a spout, you can skip the funnel.
- Let your jars cool for approximately an hour.
- Put the lids on your cooled lip balms and store in a cool, dry place. Your tinted lip balm should last for about a year or more if stored correctly.
Notes
For a thicker, richer lip balm, you can add more shea butter or beeswax. If you prefer a thinner texture, you can up the ratio of coconut oil to shea butter.
If you lip balm turns out too hard or too soft, simply melt it down again and adjust your ingredients – adding more beeswax to make it firmer, or more coconut oil if it turned out too soft.
If you are using a block of beeswax, be sure to grate it before measuring.
Recommended Products
As an Amazon Associate and member of other affiliate programs, we earn from qualifying purchases.


More DIY lip care recipes
If you enjoyed this tinted lip balm recipe, you might also like:
- DIY Cola Lip Balm with Essential Oils
- DIY Rose Petal Lip Mask
- Rose Lip Scrub Recipes
- DIY Green Tea Lip Balm
- 4 DIY Holiday Lip Scrubs
- Rose Lip Balm Recipes
For even more natural DIY beauty ideas, follow us on Pinterest! You can also find us on Instagram, Facebook, and Twitter.
Pin it for later
Anna
Friday 14th of February 2020
Thanks for the good idea!
Kim
Friday 14th of February 2020
You're very welcome, Anna!
Heidi | The Frugal Girls
Tuesday 4th of February 2020
What a great idea... this is brilliant! I've always loved tinted lip balm!
Kim
Tuesday 11th of February 2020
Thanks, Heidi! We love reusing things in new ways!
Cyna
Thursday 30th of January 2020
What a stunning recipe, Kim! Now I know what to do with leftover lipstick.
Kim
Friday 7th of February 2020
Thanks so much, Cyna! And yes, it's really a handy way to reuse those old lipsticks.
Cari
Tuesday 28th of January 2020
This is a great idea! I have some Burt's Bees lippies that would be perfect for this.
Kim
Friday 7th of February 2020
Thanks, Cari! Those lippies would be perfect for tinting!
Michelle
Monday 27th of January 2020
This is such a great idea!!
Kim
Friday 7th of February 2020
Thanks, Michelle!