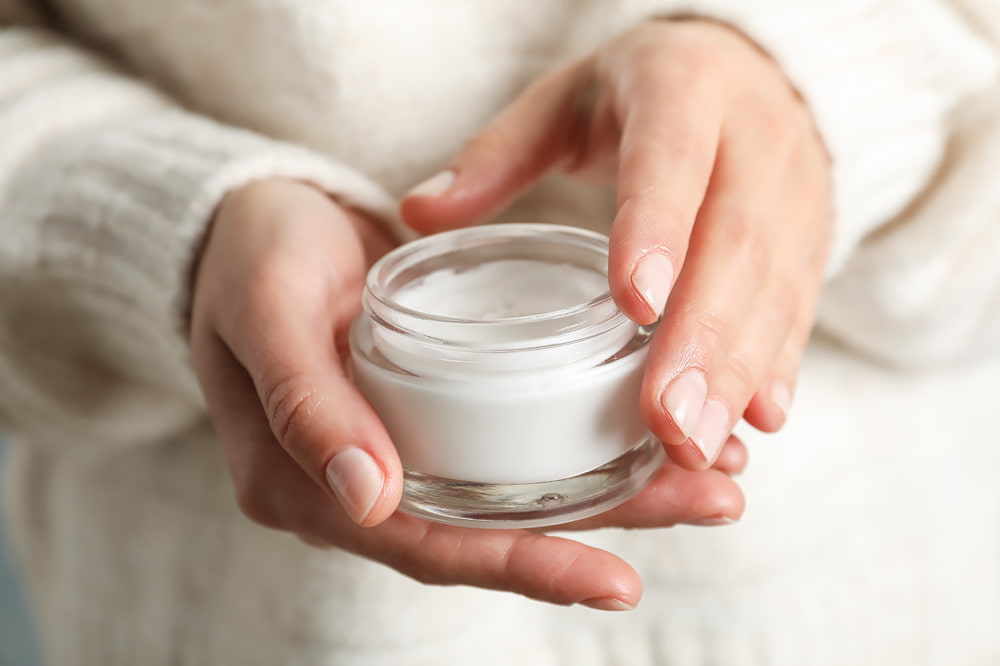
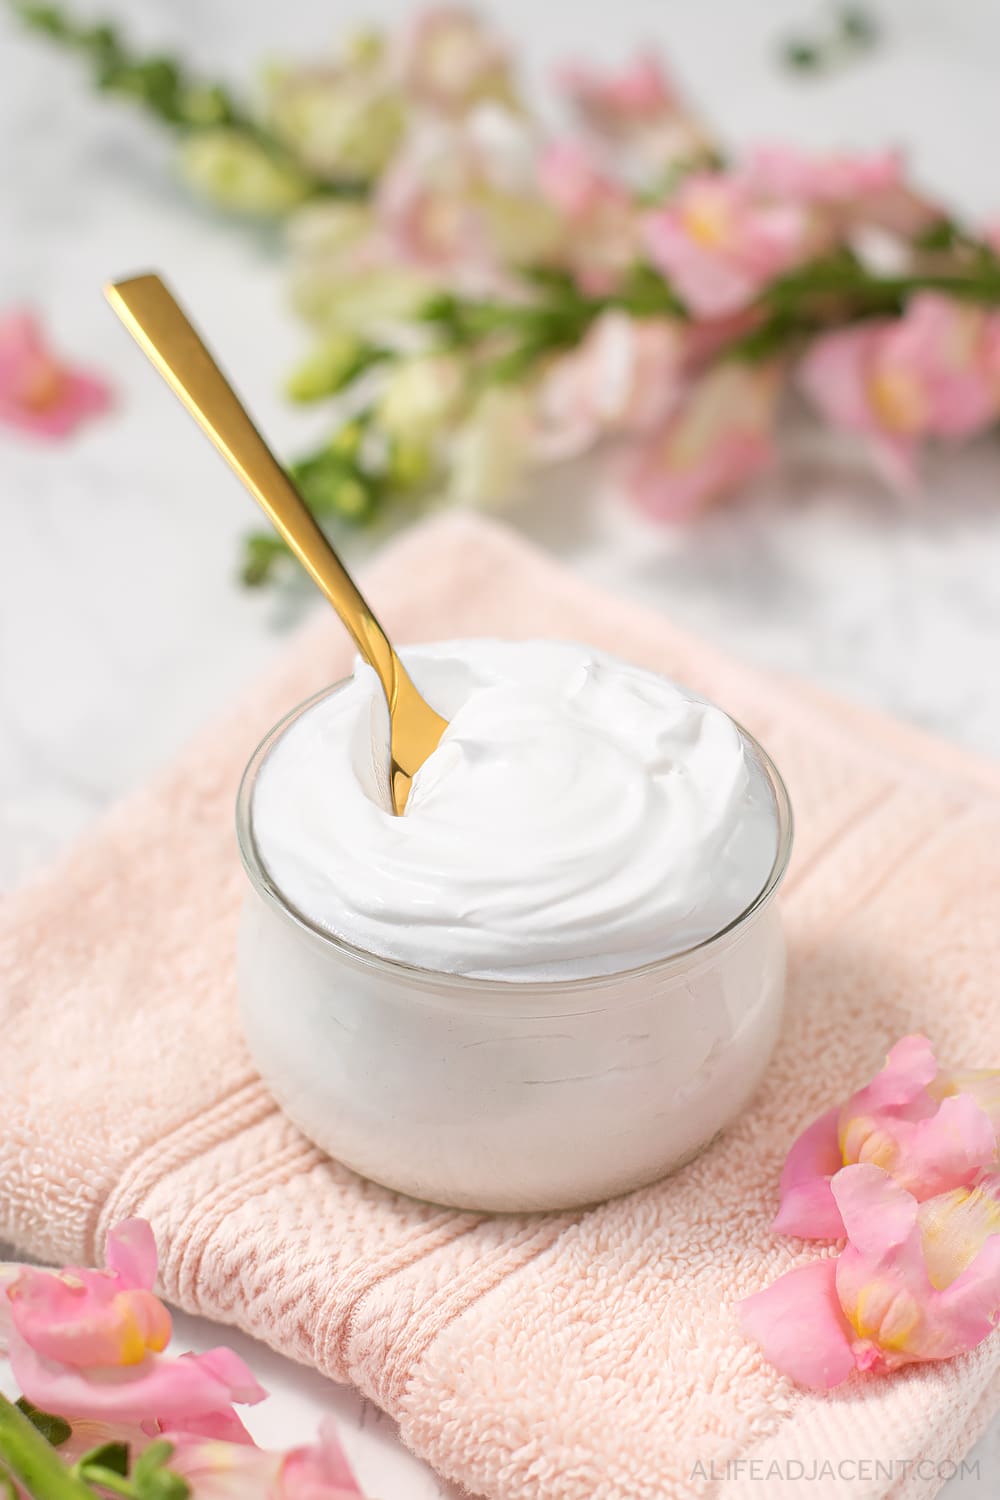
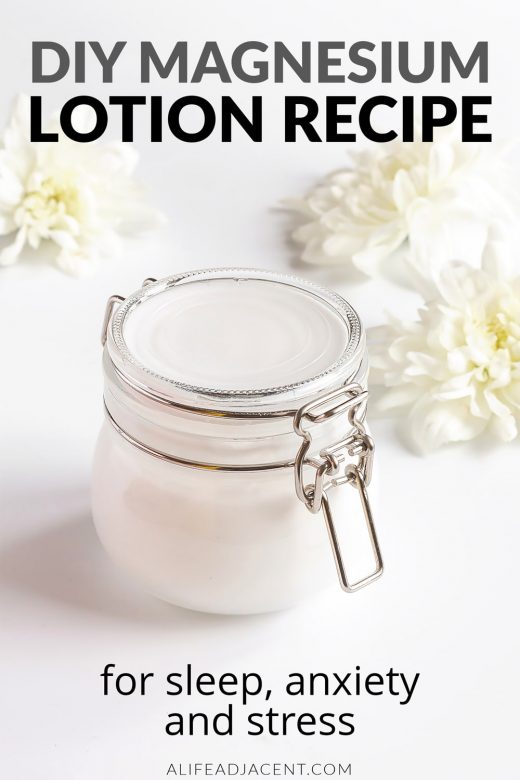
Learn how to make your own DIY magnesium lotion. This simple homemade recipe requires only a few ingredients, and can be customized for your unique needs: sleep aid, anxiety, pain relief and more. Reap the benefits of topical magnesium without the itching and discomfort!
I likely don’t have to try too hard to convince you of magnesium’s benefits. After all, if you’re interested in making your own magnesium lotion, you probably already have an idea of how beneficial it is.
But if you’ve ever used magnesium topically, you may also be familiar with its unpleasant side effects – stinging, burning, and at times unbearable itching.
I don’t know about you, but for me, using magnesium oil simply wasn’t worth the discomfort. I only wish I’d known about magnesium lotion sooner.
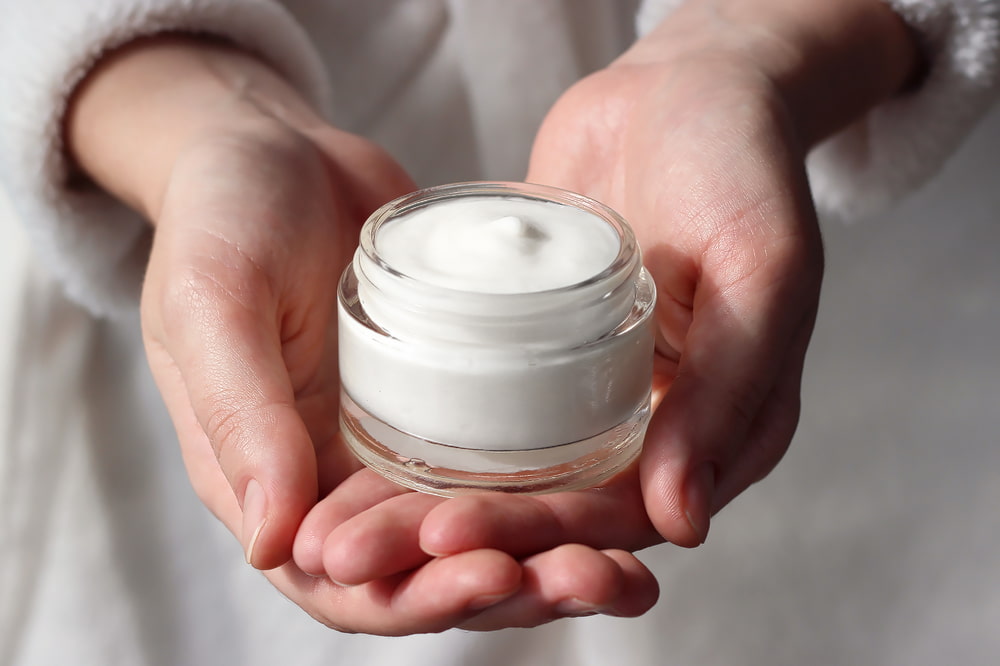
Using magnesium lotion is a convenient way to enjoy the benefits of topical magnesium while significantly reducing skin irritation. And if you’re the DIY type, it’s also incredibly easy and inexpensive to make yourself.
A simple magnesium lotion recipe
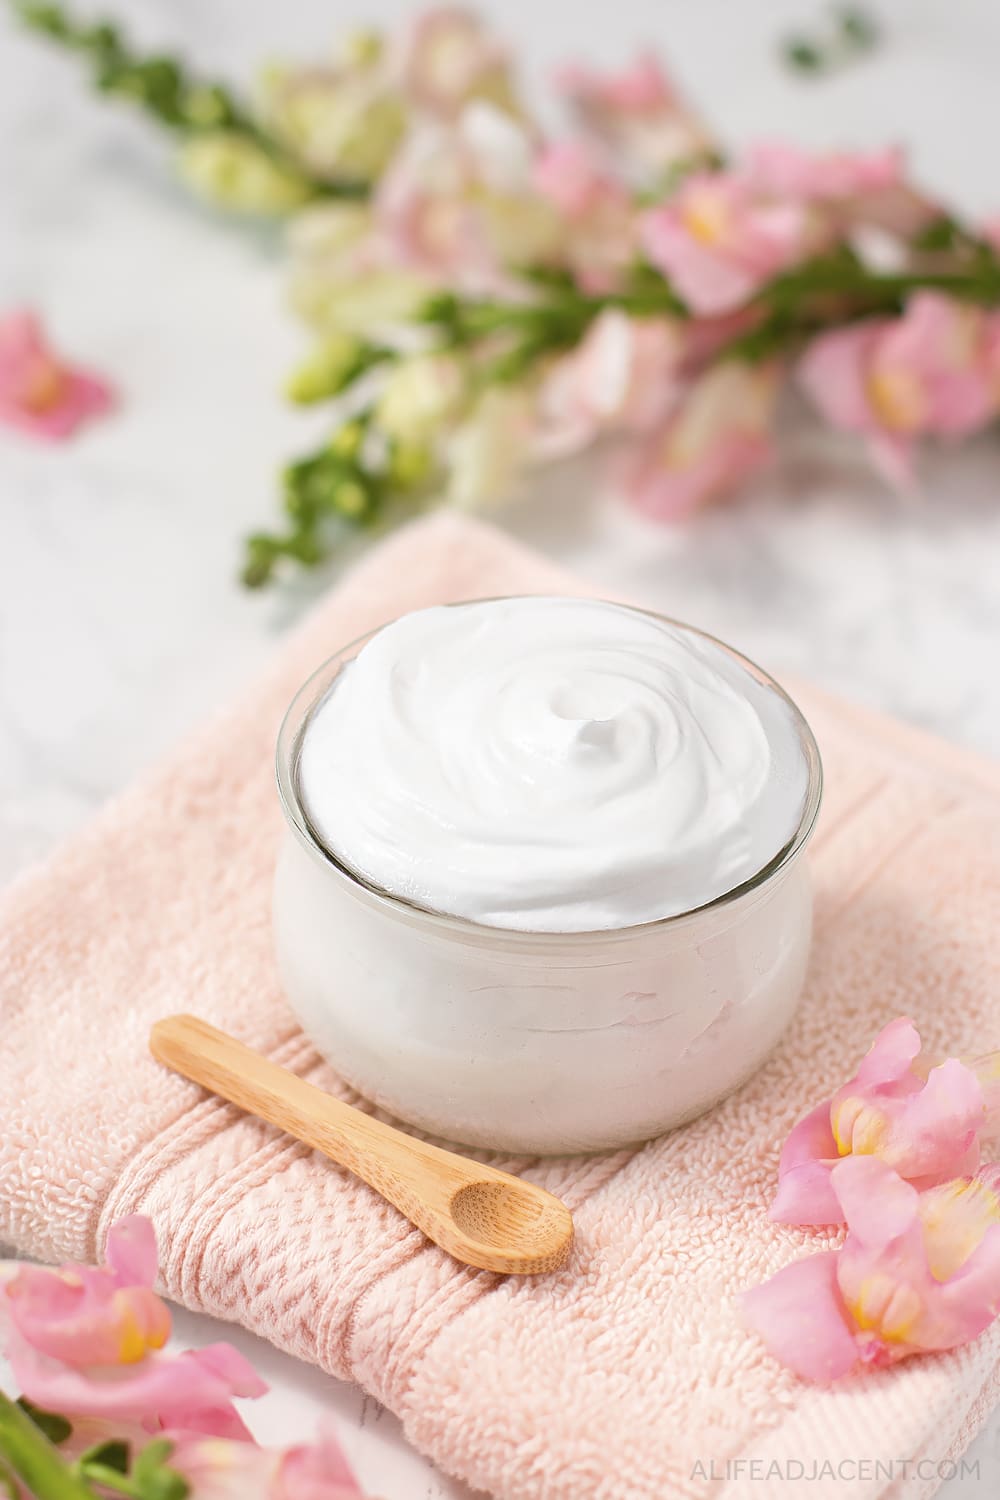
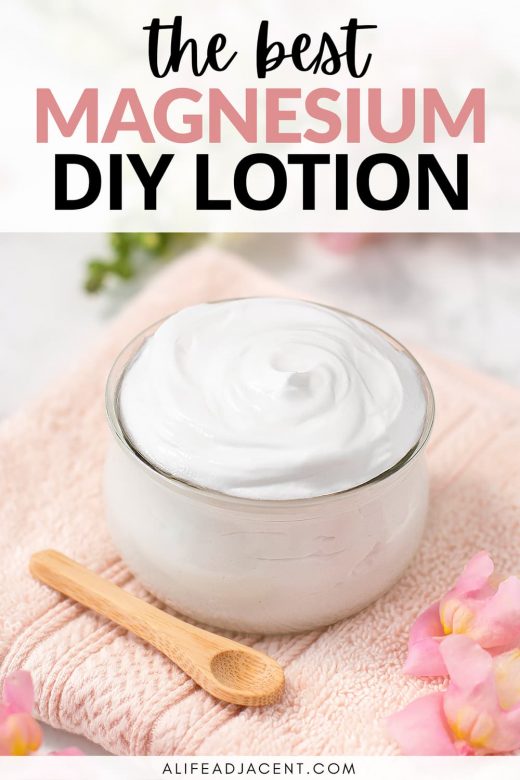
In this post, I will show you how to make a simple, all-natural DIY magnesium body lotion with a silky, luxurious texture. It can be made 4 ways, depending on your particular needs.
The basic lotion recipe is the easiest and requires the fewest ingredients.
However, I’ve also included recipes with essential oils to help with sleep, anxiety, and stress relief, as well as a lotion for pain relief that can aid in soothing restless legs, cramping, muscle pain and more.
I’ve also provided detailed, step-by-step instructions and tips so that anyone can make this recipe. So even if you’ve never made lotion before, this easy magnesium lotion would be a good starting point for beginners.

Before we get into the how-to, I’m going to discuss what makes this recipe different from others. I will also touch on magnesium’s benefits and go into detail about this lotion’s ingredients, for those who are interested.
You’re welcome to skip straight to the recipes using the jump button. However, I recommend reading the entire post for tips and tricks on the lotion-making process.
What makes this recipe different
At this point you may be wondering what makes this magnesium lotion different from any of the other recipes you see online. Of course there are a lot of good recipes out there, but unfortunately, there are also many recipes that aren’t properly formulated.
For instance, many aren’t preserved, which opens you up to bacterial growth and skin infections. Yikes.
Others contain beeswax as their only emulsifier. But unfortunately, beeswax lotions are destined to fall apart, because beeswax isn’t actually an emulsifier at all.
Don’t get me wrong – it’s not my intention to call anyone out, and I know that everyone means well with their recipes. But I wanted to make sure I created a recipe that was safe and properly formulated.
In the end, I tested about a dozen different formulas of this recipe to ensure it was stable, moisturizing, and effective.
My magnesium lotion recipe is properly preserved, which is important for safety. And unlike beeswax-based recipes, this lotion is also truly emulsified. It contains a natural emulsifying wax, so it won’t fall apart or separate during storage.
Using an emulsifier is the only way to get oils and water to mix, and to achieve the thick, luxurious, yogurt-like texture of this lotion.
While too light to be a whipped body butter, I’d say this recipe is more comparable to a body cream or body yogurt.
As an added benefit, using an emulsifier also makes the mixing process a cinch, so you will have no problem blending your lotion together.
For more information on each of these points, you may wish to skip to the FAQ section at the bottom of this post. There, I go into more detail on emulsifying waxes and preservatives.
Benefits of magnesium lotion
Magnesium is vital for health, and unfortunately, many of us are no longer getting enough1.
As a cofactor for more than 300 enzymatic reactions in the body, it’s difficult to find a bodily function that doesn’t depend on magnesium in some way.
Magnesium deficiency’s full range of effects are too numerous to mention here, but include sleep disorders, anxiety, and stress1. And since stress depletes magnesium levels, this can create a cycle of deficiency and even more stress2.
Low magnesium is also linked to many kinds of pain, including pain resulting from injuries, exercise, or chronic pain conditions like fibromyalgia, headache disorders, and myofascial pain3,4,5,.
The research is still inconclusive on transdermal magnesium’s efficacy1. But there are many anecdotal accounts of its benefits, and many people use magnesium lotion for sleep aid, stress relief, and relief from all kinds of pain.
As well, studies have shown that transdermal magnesium may play an important role in treating the symptoms of low magnesium status6. Therefore, using magnesium lotion may moisturize the skin and help replenish magnesium stores at the same time.
However, please note that magnesium lotion can not make up for a dietary deficiency. It also does not cure any disease. For more information, please be sure to consult the health disclaimer at the bottom of this article.
What you need to make DIY magnesium lotion
To make this simple magnesium lotion, you will need the following ingredients:
- Distilled water
- Magnesium oil (also known as magnesium brine)
- Liquid oil of choice (I use MCT oil)
- Natural emulsifying wax (I use ECOMulse or Olivem 1000)
- Broad-spectrum preservative (I use Geogard ECT)
You can also choose to add optional allantoin powder for anti-inflammatory and anti-itch properties.
I will explain more about each ingredient and possible substitutions in the section below. Please note that the preservative is not optional! It’s a misconception that magnesium lotion doesn’t need a preservative. More on this later.
Finally, you will also need the following equipment to make your lotion:
- Glass measuring cups and beakers
- Immersion blender
- Digital scale*
- Silicone spatula
*If you’re serious about making any DIY beauty, bath or body products at home, I highly recommend investing in a digital scale. They’re easy to use and eliminate any guesswork while formulating.
Especially when using preservatives and other active ingredients, you want to be sure that you’re adding them at the correct percentage for safety and efficacy.
However, for those who don’t have a scale, I will be updating this post to add comparable measurements shortly.
Magnesium lotion ingredients
Magnesium oil or brine
The main ingredient in magnesium lotion is of course, the magnesium itself. For the purpose of this recipe, we’ll be using easily accessible magnesium oil, also sometimes called magnesium brine.
Magnesium “oil” is not technically an oil at all – it’s simply a mixture of magnesium chloride in water. The resulting mixture feels oily and slippery thanks to the high concentration of magnesium chloride.
While it’s possible to make your own magnesium oil using magnesium chloride flakes and distilled water, I recommend using a store bought magnesium oil.
Why? For one, it’s simply easier. It’s less time, and less tools to have to sterilize. But it’s also more precise, as you know exactly how much magnesium you’re using.
This is important, as too much magnesium will break your lotion’s emulsion, causing it to separate.
Distilled water
I tested about a dozen different formulas of this recipe with various concentrations of magnesium. Unfortunately, lotions using straight magnesium oil caused stinging and itching every time. (And don’t even bother trying to use double strength magnesium oil – ouch!)
Lotions that are too high in magnesium are also more likely to fall apart, as electrolytes (like magnesium) are difficult to emulsify.
For better skin tolerance, we’ll be diluting the magnesium oil with distilled water. But you can also use hydrosols or rosewater for extra therapeutic benefits.
For instance, my magnesium lotion for sleep contains lavender hydrosol for a calming fragrance.
MCT oil
Lightweight and non-comedogenic, MCT oil my go-to for many of my DIY skincare recipes. It’s derived from coconut oil, but it’s far less likely to clog pores.
Not only is MCT oil well tolerated by many skin types, but it also has an extremely long shelf life (2 years or more). As well, its fatty acids are mostly saturated, so they wont break down during heating.
Overall, MCT oil resists rancidity and spoilage, meaning your magnesium lotion will last a long time.
However, I know some people may wish to use a different carrier oil instead. The beauty of this recipe is that you can substitute the MCT oil for any liquid oil you choose, such as olive oil, jojoba oil or fractionated coconut oil.
But I would recommend not using oils high in polyunsaturated fats, like almond oil. When heated, high-PUFA oils oxidize readily, which will make your lotion go rancid more quickly.
Though controversial, some research suggests that polyunsaturated oils can age the skin.
Natural emulsifying wax
I tested this homemade magnesium lotion with 2 different kinds of natural emulsifying wax:
- Olivem 1000 (also known as OliveMulse or Olive Wax)
- ECOMulse (also known as Ritamulse SCG or Emulsimulse)
I chose these particular emulsifiers for their non-toxic, naturally-derived ingredients, as well as their electrolyte tolerance (in this case, magnesium chloride). Both make wonderful alternatives to emulsifying wax.
Both have similar characteristics, creating lotions that look identical to the eye: thick, creamy, and bright white. They each have a silky skin feel and luxurious consistency, without much discernible difference between the two.
As well, both possess skin-conditioning, moisturizing properties that make this magnesium lotion wonderful for dry skin.
However, there are a few differences worth noting:
- Ritamulse SCG (ECOMulse) thickens faster, whereas Olivem 1000 takes a day or two to reach full thickness.
- Olivem 1000 doesn’t impart any noticeable scent. On the other hand, ECOMulse smells faintly like vanilla. Its sweet aroma is definitely welcome in a body lotion.
- ECOMulse dries down to a powdery skin finish. Olivem 1000 has a silkier finish that feels more hydrating.
Personally, I prefer Olivem 1000 for its skin feel. But it doesn’t really matter which emulsifier you use, as they both work equally well for this recipe. Use whichever one most accessible to you. You can find them at many cosmetic or soap supply stores.
For more information on emulsifiers, you may wish to consult the FAQ section. There, I explain why I didn’t make this lotion with emulsifying wax or beeswax.
Broad-spectrum preservative
I used Geogard ECT to preserve my magnesium lotion.
Geogard INCl: Benzyl Alcohol & Salicylic Acid & Glycerin & Sorbic Acid.
Also known as Preservative Eco, Geogard ECT is naturally-derived and ECOCERT approved. It’s free of parabens, phenoxyethanol, and formaldehyde. Instead, its combination of organic alcohols and acids offers broad-spectrum protection against bacteria, yeast, and mold.
As an added bonus, it has a light almond scent.
While we’re on the topic – if you have any reservations about preserving your lotion, I recommend reading the section called “does magnesium lotion really need a preservative?“. The answer may surprise you.
Allantoin powder
Last but not least, I added a small amount of allantoin powder to this recipe.
Allantoin is a natural compound found in plants like chamomile. It has soothing and healing properties that make it a useful addition to calming skincare products.
Adding it is completely optional, but allantoin helps provide even more therapeutic benefits to this lotion. It also helps offset magnesium’s tendency to irritate the skin.
For more recipes with allantoin, check out our aloe vera face mask.
Homemade magnesium lotion recipes
Basic Magnesium Lotion Recipe
This magnesium body lotion is the best choice for those with more sensitive skin types. It’s unscented, free of essential oils, and has a silky, moisturizing texture that sinks into skin. Apply it to dry skin or anywhere that can benefit from more magnesium.
Ingredients
35.5g distilled water
35.5g magnesium oil
20g MCT oil (or liquid oil of choice)
8g natural emulsifying wax (ECOMulse or Olivem 1000)
0.7g Geogard ECT preservative
0.3g allantoin powder (optional)
Magnesium Lotion for Sleep
This lavender magnesium lotion is ideal for sleep aid and nighttime stress relief. It’s naturally scented with a combination of lavender and vanilla essential oils. Apply it at bedtime to help promote a more restful sleep.
Ingredients
- 35.5g lavender hydrosol
- 35.5g magnesium oil
- 20g MCT oil (or liquid oil of choice)
- 8g natural emulsifying wax (ECOMulse or Olivem 1000)
- 0.7g Geogard ECT preservative
- 0.3g allantoin powder (optional)
- 10 drops lavender essential oil
- 30 drops vanilla oleoresin
Magnesium Lotion for Pain Relief
This magnesium lotion contains essential oils of ginger, wintergreen and copaiba, which have analgesic effects that can help relieve chronic pain7,8,9.
Apply this lotion to areas in need of pain relief, such as sore muscles and areas prone to cramping. This magnesium lotion can potentially be useful for back pain, wrist pain, restless legs, leg cramps, and tired, achy feet.
If desired, you can also use your favourite essential oil blend for pain, such as Simply Earth’s Relief blend.
Ingredients
- 35.5g peppermint hydrosol
- 35.5g magnesium oil
- 20g MCT oil (or liquid oil of choice)
- 8g natural emulsifying wax (ECOMulse or Olivem 1000)
- 0.7g Geogard ECT preservative
- 0.3g allantoin powder (optional)
- 10 drops ginger essential oil
- 10 drops wintergreen essential oil
- 20 drops copaiba essential oil
Magnesium Lotion for Anxiety & Stress Relief
This magnesium lotion combines rose and vanilla essential oils for a relaxing aromatherapy experience that can help ease stress and anxiety.
In aromatherapy, rose oil is well known for its anti-anxiety effects, which have been proven in multiple studies10. Vanilla has also been linked to promoting calm and reducing stress.
Apply at bedtime for a more restful sleep, or apply during times of stress and anxiety, before meditation, or any time you need to relax. This lotion can also be used to help promote sleep for those who dislike lavender’s fragrance.
Ingredients
- 35.5g rosewater
- 35.5g magnesium oil
- 20g MCT oil (or liquid oil of choice)
- 8g natural emulsifying wax (ECOMulse or Olivem 1000)
- 0.7g Geogard ECT preservative
- 0.3g allantoin powder (optional)
- 20 drops rose otto or rose absolute
- 20 drops vanilla essential oil
Equipment list
- Large pan for water bath
- Glass measuring cups
- Small beakers
- Immersion blender
- Digital scale
- Silicone spatula
- Oven gloves
- Glass jar or silicone squeeze tube for storage
How to make magnesium lotion
Before you start, please be sure to thoroughly clean and sanitize all tools, containers and equipment, including your immersion blender shaft. See recipe notes for tips.
1. Prepare your water bath
Prepare a water bath by filling a shallow pan with a few inches of water. Heat gently over medium-low heat. It does not need to be too hot, as you don’t want to burn your ingredients.
2. Measure and heat your lotion’s oil phase
Using a digital scale, carefully measure your oil into a heat-proof glass measuring cup. This will be the cup you use for your oil phase (oil-based ingredients).
Tip: If not using a scale, use the markings on the side of your cup as a guide.
Zero the scale. Then, weigh your Olivem 1000 or Ritamulse SCG/ECOMulse into your cup of oil. If not using a scale, measure the emulsifier and add to your oil.
Place the cup into the water bath to heat.
3. Measure and heat your lotion’s water phase
While your oil-based ingredients are heating, measure or weigh your distilled water (or hydrosol) into your other measuring cup. This will be the cup you use for your water phase (water-based ingredients).
Then, measure or weigh your magnesium oil into the same cup.
If adding allantoin powder, add it into your water and magnesium oil mixture.
Tip: It’s difficult to measure such a small amount of allantoin powder without using a small scale that can measure down to 0.01g. I use this scale and a tiny glass beaker. However, you can also use a miniature measuring spoon that measures 1/16 tsp.
Place the cup containing your water phase into the water bath.
4. Heat your lotion phases
Allow your ingredients to heat gently. Gently stir both phases once during the heating process to ensure even heating.
Tip: You will know when both phases are finished heating when the emulsifier has liquified and your oil phase mixture is completely clear. Depending on your stove and the size of your lotion batch, this may take 10-20 minutes. There’s no need to use a thermometer, as both phases should be close enough in temperature to ensure a successful emulsion.
5. Measure your preservative and essential oils
While you wait for your lotion phases to heat, it’s a good idea to prepare your preservative and essential oils (the cool down phase). Weigh or measure them into separate containers – tiny beakers work well for this purpose.
Tip: Accuracy is important, especially when measuring preservatives. So I highly recommend using a pocket scale that can measure small increments. But if you don’t have a scale, you can also use a glass dropper with markings to measure the correct amount.
Once you’ve measured your preservative and your essential oils, cover each beaker with cling wrap and set aside.
6. Combine oil phase with water phase and heat through
Once the oil phase has liquified, put on your oven gloves to avoid burning your hands. Carefully lift the cup containing the oil phase out of the water bath. Dry the bottom of the cup with a towel.
Then, pour the oil phase into the water phase. Stir gently with a sanitized spatula. At this point, the mixture should turn white – this is a sign the emulsion is working.
Allow to heat for a couple more minutes for good measure, but there’s no need to overheat.
Carefully remove the cup from the water bath. (Don’t forget your gloves!) Place the cup onto the counter where you’ll be mixing your magnesium lotion.
7. Blend your magnesium lotion
Give the liquified mixture a quick burst with your immersion blender to kickstart the emulsion. Only a second or two is needed, but be careful, as the liquid will be prone to splashing. Then, allow to cool for a couple minutes.
Tip: be sure that any surface your blender touches is properly sanitized. You may wish to place it down on a sanitized plate while you wait.
Once your lotion mixture has cooled for a couple minutes, it’s time to begin the emulsion process. Begin to emulsify the lotion using your immersion blender. Be careful and go slow to avoid splashing.
If your lotion begins to turn white, creamy, and opaque, keep blending. On the other hand, if your lotion thickens, but looks a little gloopy and gelatinous, don’t panic. This simply means it’s still too hot. Pause and allow it to cool for a couple more minutes before continuing.
Continue to blend until your magnesium lotion turns thick and creamy, like full-fat yogurt. Once it reaches this point, pause and allow it to cool for about 10 minutes before blending again.
You’ll need to blend your lotion periodically as it cools, as this will help maintain the emulsion. However, there’s no need to obsess over it. Simply go back every 10 minutes or so to blend it again. You will notice that your lotion will thicken even more as it cools down.
After about 30 minutes or so, your lotion should be cool enough to incorporate the cool-down phase (your preservative and optional essential oils).
Tip: a laser thermometer helps you know when your lotion is close to room temperature. However, this isn’t necessary. You’ll easily be able to tell it’s ready when your container is no longer hot. It should be barely warm to the touch.
8. Add the lotion’s cool down phase
Add your Geogard ECT (and essential oils, if desired) to the cooled lotion and blend again to incorporate.
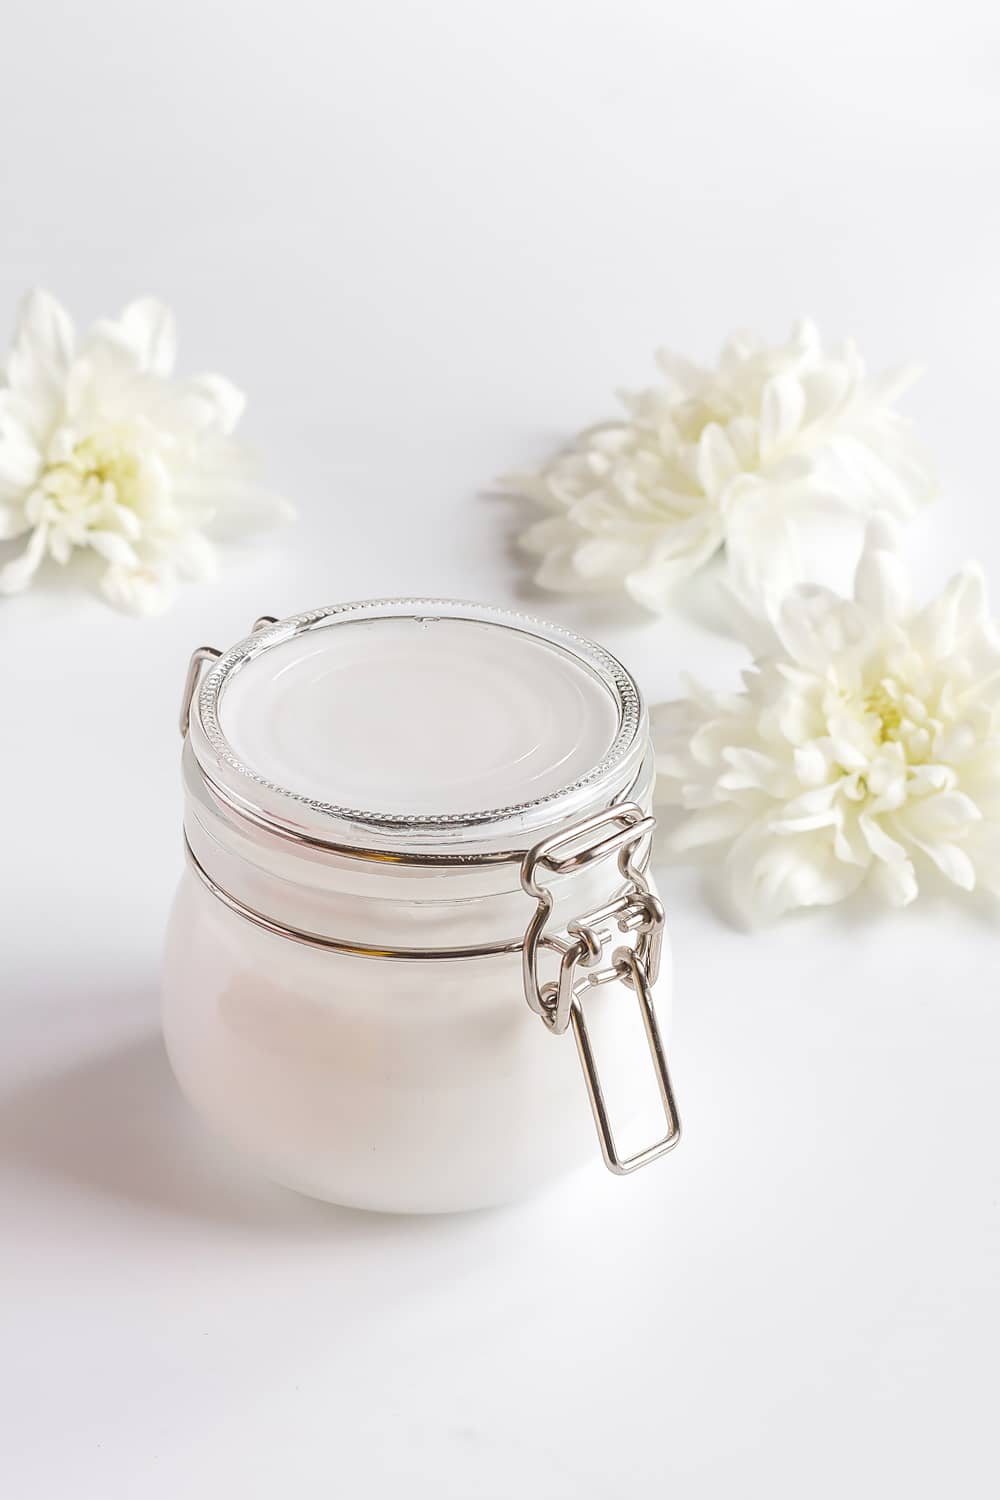
Your magnesium lotion is finished and ready to be packaged in the container of your choice. I like putting it into glass jars or reusable silicone squeeze tubes.
Feel free to reuse any jar you have on hand, but be sure to thoroughly clean and sanitize it first.
Tips & tricks for making magnesium lotion
Shelf life & storage
- Store your lotion tightly sealed in a cool, dry place.
- Since this recipe is preserved, it’s stable at room temperature. However, preservatives aren’t foolproof. You should always aim to use homemade products quickly, and discard them if you notice any changes in colour, scent, or texture.
- If storing your lotion in a jar, it’s best to use a sanitized spoon to scoop it out. This helps avoid contamination.
Helpful tips
- As previously mentioned, digital scales are ideal for the most precise measuring. I use a larger kitchen scale for most ingredients, and a tiny digital scale for smaller measurements, like preservatives.
- This recipe creates approximately 100g of magnesium lotion. However, doubling the recipe may make it easier to measure. More product is also easier to mix with your immersion blender.
- There’s no need to heat and hold your ingredients. Not only can it damage your ingredients, but it can also result in too much water evaporation.
- Before beginning, make sure your hand blender head fits into your measuring cups. I use 2-cup Pyrex cups, which are big enough to accommodate a typical blender head.
Ingredient substitutions
- I like MCT oil, but this recipe will work with any liquid oil of your choice.
- If desired, you can also customize your lotion with your favourite blend of essential oils. But please be mindful to use them at a safe concentration for the skin.
- If you don’t have Geogard ECT, you can use another preservative. However, some preservatives can break lotion emulsions. Only substitute if you know what you are doing and have experience using your chosen preservative.
I’ve successfully made this lotion using Leucidal Liquid Complete, but it needs to be used at a higher concentration than Geogard ECT. This means that you will either need to alter the formula, or weigh your lotion at the end to determine how much preservative to add. (Don’t forget to subtract the weight of your container.)
Safety tips
- Before making magnesium lotion, consult the health disclaimer at the bottom of this post to see whether it’s safe for you.
- Do not use it on inflamed or broken skin, or if you have any skin conditions. Essential oils should also be avoided in these cases.
- Even if you think your equipment look clean, it could still harbour bacteria that could multiply in your lotion and cause infection. So, before you begin, it’s important to ensure that your workspace, tools and containers are thoroughly clean and sanitized.
How to sanitize your equipment for lotion-making
Wash all your equipment with hot, soapy water, or run it through the dishwasher. Then, spray it down with alcohol and dry with fresh paper towels (not dish cloths).
70% rubbing alcohol (isopropyl alcohol) is cheap and easily accessible.
If you’re Canadian, Dillon’s hand sanitizer is also an option. It’s made with 80% beverage-grade pure ethyl alcohol and hydrogen peroxide. It also doesn’t produce the same fumes as rubbing alcohol, making it an option for those who are scent-sensitive.
It may not be as cheap as rubbing alcohol, but it’s less expensive than using high-proof spirits like Everclear. Plus, you can get an incredible deal if you catch it on sale. And it comes in a gorgeous, eco-friendly glass bottle for zero waste.
Whichever product you choose, remember that alcohol of any kind is highly flammable. Keep it away from open flame or gas stoves, and please be sure to use it in a well-ventilated area.
As well, rubbing alcohol is highly toxic, so avoid breathing in the fumes.
DIY magnesium lotion FAQ – Questions and answers
Does magnesium lotion really need a preservative?
Yes, magnesium lotion needs a preservative.
It’s a common misconception that magnesium lotion doesn’t need a preservative. Some argue that magnesium oil’s pH prevents bacterial growth, but this simply isn’t true.
Magnesium chloride is a weak acid. Tested with my Apera PH60S, my magnesium oil’s pH was around a 4, which is well within the range for bacterial growth. And a 50/50 solution of magnesium chloride and distilled water (like what’s used in this lotion) has a pH of 5.3.
So while it’s true that pure magnesium oil doesn’t need a preservative, this isn’t due to its pH. Magnesium chloride is essentially salt water – it’s a harsh environment with no food source. But the second you incorporate it into a body lotion, this changes.
Any time you mix oil and water, you’re providing a food source for mold and bacteria, as well as a medium in which they can grow. This is why it’s vital to preserve homemade lotion.
If you’re interested, you can click here to see what happened when I tried making a magnesium lotion with no preservative. Warning: this is a gross photo of moldy lotion.
Mold may be obvious, but bacterial contamination isn’t always visible. So even if you can’t see it, doesn’t mean it isn’t there!
Finally: if you’re concerned about toxicity, not all preservatives are toxic and harmful. Plus, the pathogens that may grow in your unpreserved lotion will be far more harmful than a small amount of natural preservative.
Why does magnesium oil sting my skin?
Some believe that magnesium oil burns the skin when the body’s magnesium levels are low, but this simply isn’t true or based in science.
The answer is much more simple: magnesium oil stings the skin because it’s essentially salt water. And anyone who has ever shaved their legs before swimming in the ocean knows that salt water is an irritant!
As well, magnesium chloride is more acidic than our skin’s pH, which can also cause irritation.
Thankfully, you can ditch the itch simply by switching to magnesium lotion. Skin-nourishing ingredients like MCT oil create a buffer that helps eliminate the sting.
The emulsifiers help too, as both Olivem 1000 and ECOMulse (Ritamulse SCG) are skin-conditioners.
In my experience, this magnesium lotion recipe doesn’t sting or burn the skin. At worst, I’ve noticed some occasional minor tingling that subsides quickly.
Why didn’t I make this magnesium lotion recipe with emulsifying wax?
Though it may be a popular choice for DIY products, emulsifying wax is not natural. And while versatile, both emulsifying wax and Polawax contain ethoxylated ingredients like polysorbates and polyethylene glycols (PEGs).
Ethoxylated ingredients can contain small amounts of toxic chemical residue. Though there’s some contention on whether this is truly an issue, it’s simply my preference to avoid them.
This isn’t meant to bash anyone that uses emulsifying wax. Many use it and don’t have a problem with it. You may wish to do more reading on this subject to make the decision for yourself.
But to be on the safe side, I like to use PEG-free emulsifiers in my homemade bath and body products. Both Ritamulse SCG and Olivem 1000 make great natural substitutes for emulsifying wax.
Why didn’t I make this magnesium lotion with beeswax?
While we’re on the topic of emulsifiers, it’s time to talk about a common misconception.
Beeswax is an excellent emollient and texture enhancer. It’s also easily accessible, natural, and versatile, qualities that make it an attractive choice for making homemade lotions.
However, there’s one thing many get wrong about beeswax: its emulsifying capabilites, or lack thereof.
As useful as it is, beeswax is not an emulsifier!
Is beeswax an emulsifier?
No, beeswax is not an emulsifier.
This may seem confusing, and you may even think I’m downright wrong. After all, beeswax appears to behave like an emulsifier.
To add to the confusion, there are countless DIY lotion recipes from natural bloggers that contain beeswax as their emulsifier.
But mixtures of beeswax and water are not true emulsions. This article by Formula Botanica explains in detail why, but I will try to sum it up simply.
Beeswax is very thick. So with enough repeated force, such as with an immersion blender, food processor, or hand mixer, you can temporarily trap droplets of liquid inside the wax. This creates the temporary appearance of a cream or lotion.
However, beeswax does not behave the way an emulsifier does. It may bind liquid, but it does not emulsify. This means that, eventually, the mixture will separate and the liquid will seep out.
Plus, if at any point your lotion is exposed to heat, it will melt into two separate layers and be ruined. Proper emulsions should be stable, even when exposed to a reasonable amount of heat.
I hope this helps you understand why beeswax is only a temporary fix, and not a good choice for making emulsified lotions at home.
Trust me, it’s much easier and less frustrating to use a real emulsifier than to spend an hour blending your lotion in the food processor, only for it to fall apart a short time later.
Beeswax is frequently touted as the only non-toxic option for organic lotions. But this simply isn’t true. There are plenty of cosmetic emulsifiers derived from natural ingredients.
How much magnesium is in this magnesium lotion?
This magnesium lotion recipe contains 35.5ml of magnesium oil. So to find out exactly how much magnesium is in your lotion, you will need to find out the elemental magnesium content of your particular brand of magnesium oil.
For instance, Ancient Minerals magnesium oil and Life-Flo magnesium oil both contain 100mg of elemental magnesium per millilitre.
Therefore, a 100g batch of this homemade magnesium lotion contains approximately 3550mg of elemental magnesium. Divided into 20 or so uses, this is around 177.5mg of elemental magnesium per application.
However, this does not account for how much magnesium is actually absorbed through the skin, and more research needs to be done on this topic11.

DIY Magnesium Lotion Recipe
Learn how to make your own DIY magnesium lotion. This simple homemade lotion recipe requires only a few ingredients, and can be customized for your unique needs: sleep aid, anxiety, pain relief and more. Reap the benefits of topical magnesium without the itching and discomfort!
Ingredients
Simple Magnesium Lotion
- 35.5g distilled water
- 35.5g magnesium oil
- 20g MCT oil (or liquid oil of choice)
- 8g natural emulsifying wax (ECOMulse or Olivem 1000)
- 0.7g Geogard ECT preservative
- 0.3g allantoin powder (optional)
Magnesium Lotion for Sleep
- 35.5g lavender hydrosol
- 35.5g magnesium oil
- 20g MCT oil (or liquid oil of choice)
- 8g natural emulsifying wax (ECOMulse or Olivem 1000)
- 0.7g Geogard ECT preservative
- 0.3g allantoin powder (optional)
- 10 drops lavender essential oil
- 30 dropsvanilla oleoresin
Magnesium Lotion for Pain Relief
- 35.5g peppermint hydrosol
- 35.5g magnesium oil
- 20g MCT oil (or liquid oil of choice)
- 8g natural emulsifying wax (ECOMulse or Olivem 1000)
- 0.7g Geogard ECT preservative
- 0.3g allantoin powder (optional)
- 10 drops ginger essential oil
- 10 drops wintergreen essential oil
- 20 drops copaiba essential oil
Magnesium Lotion for Anxiety & Stress Relief
- 35.5g rosewater
- 35.5g magnesium oil
- 20g MCT oil (or liquid oil of choice)
- 8g natural emulsifying wax (ECOMulse or Olivem 1000)
- 0.7g Geogard ECT preservative
- 0.3g allantoin powder (optional)
- 20 drops rose otto or ose absolute
- 20 drops vanilla essential oil
Lotion Making Tools
- Large pan for water bath
- Glass measuring cups
- Small beakers
- Immersion blender
- Digital scale
- Silicone spatula
- Oven gloves
- Glass jar or silicone squeeze tube
Instructions
- Before you start, please be sure to thoroughly clean and sanitize all tools, containers and equipment, including your immersion blender shaft. See recipe notes for tips.
- Prepare a water bath by filling a shallow pan with a few inches of water. Heat gently over medium-low heat. It does not need to be too hot, as you don't want to burn your ingredients.
- Using a digital scale, carefully measure your oil into a heat-proof glass measuring cup. This will be the cup you use for your oil phase (oil-based ingredients).
Tip: If not using a scale, use the markings on the side of your cup as a guide. - Zero the scale. Then, weigh your Olivem 1000 or Ritamulse SCG/ECOMulse into your cup of oil. If not using a scale, measure the emulsifier and add to your oil.
- Place the cup into the water bath to heat.
- While your oil-based ingredients are heating, measure or weigh your distilled water (or hydrosol) into your other measuring cup. This will be the cup you use for your water phase (water-based ingredients).
- Then, measure or weigh your magnesium oil into the same cup.
- If adding allantoin powder, add it into your water and magnesium oil mixture.
Tip: It's difficult to measure such a small amount of allantoin powder without using a scale that can measure down to 0.01g. I use a scale and a tiny glass beaker. However, you can also use a miniature measuring spoon that measures 1/16 tsp. - Place the cup containing your water phase into the water bath.
- Allow your ingredients to heat gently. Gently stir both phases once during the heating process to ensure even heating.
Tip: You will know when both phases are finished heating when the emulsifier has liquified and your oil phase mixture is completely clear. Depending on your stove, this may take 10-20 minutes. There's no need to use a thermometer, as both phases should be close enough in temperature to ensure a successful emulsion. - While you wait for your lotion phases to heat, it's a good idea to prepare your preservative and essential oils (the cool down phase). Weigh or measure them into separate containers – tiny beakers work well for this purpose.
Tip: Accuracy is important, especially when measuring preservatives. So I highly recommend using a pocket scale that can measure small increments. But if you don't have a scale, you can also use a glass dropper with markings to measure the correct amount. - Once you've measured your preservative and your essential oils, cover each beaker with cling wrap and set aside.
- Once the oil phase has liquified, put on your oven gloves to avoid burning your hands. Carefully lift the cup containing the oil phase out of the water bath. Dry the bottom of the cup with a towel.
- Then, pour the oil phase into the water phase. Stir gently with a sanitized spatula. At this point, the mixture should turn white – this is a sign the emulsion is working.
- Allow the mixture to heat for a couple more minutes for good measure, but there's no need to overheat.
- Carefully remove the cup from the water bath. (Don't forget your gloves!) Place the cup onto the counter where you'll be mixing your magnesium lotion.
- Give the liquified mixture a quick burst with your immersion blender to kickstart the emulsion. Only a second or two is needed, but be careful, as the liquid will be prone to splashing. Then, allow to cool for a couple minutes.
Tip: be sure that any surface your blender touches is properly sanitized. You may wish to place it down on a sanitized plate while you wait. - Once your lotion mixture has cooled for a couple minutes, it's time to begin the emulsion process. Begin to emulsify the lotion using your immersion blender. Be careful and go slow to avoid splashing. If your lotion begins to turn white, creamy, and opaque, keep blending. On the other hand, if your lotion thickens, but looks a little gloopy and gelatinous, don't panic. This simply means it's still too hot. Pause and allow it to cool for a couple more minutes before continuing.
- Continue to blend until your magnesium lotion turns thick and creamy, like full-fat yogurt. Once it reaches this point, pause and allow it to cool for about 10 minutes before blending again. You'll need to blend your lotion periodically as it cools, as this will help maintain the emulsion. However, there's no need to obsess over it. Simply go back every 10 minutes or so to blend it again. You will notice that your lotion will thicken even more as it cools down.
- After about 30 minutes or so, your lotion should be cool enough to incorporate the cool-down phase (your preservative and optional essential oils).
Tip: a laser thermometer helps you know when your lotion is close to room temperature. However, this isn't necessary. You'll easily be able to tell it's ready when your container is no longer hot. It should be barely warm to the touch. Add your Geogard ECT (and essential oils, if desired) to the cooled lotion and blend again to incorporate. - Your homemade magnesium lotion is finished and ready to be packaged in the container of your choice.
More DIY recipes for self-care
- DIY Bath Salts for Stress Relief
- DIY Rosemary Mint Sugar Scrub for Sore Muscles
- Shower Steamers for Sleep & Anxiety
- Pink Lemonade Tub Tea
- Chocolate & Roses Tub Tea
- DIY Milk and Honey Floral Bath Soak
For even more natural DIY bath and body ideas, follow us on Pinterest! You can also find us on Instagram, Facebook, and Twitter.
Pin it for later
Health disclaimer
Though topical magnesium is purported to help alleviate many symptoms, magnesium lotion is not a replacement for medical intervention and does not cure or treat any disease.
I’m not a doctor, and nothing in this article is meant to be construed as medical advice.
Furthermore, before making this magnesium lotion (or any DIY recipe you see on the internet), you should consult your doctor to see whether it’s safe for you.
For instance, topical magnesium is not recommended for those with kidney disorders or heart issues. And certain essential oils are contraindicated in many situations.
To name one example – wintergreen oil contains 98% methyl salicylate, an ester of salicylic acid. Those allergic to aspirin or those taking blood-thinning drugs should not use it12. It should also be avoided in pregnancy.
This is merely scratching the surface, and it’s your responsibility to research each oil’s safety. In general, you should likely avoid using any essential oils if you have any serious health issues.
Finally, it’s also your responsibility to ensure your environment is safe. If you choose to make a recipe you see online, the author is not responsible for any mistakes or accidents.
1. Gröber, Uwe et al. “Myth or Reality-Transdermal Magnesium?.” Nutrients vol. 9,8 813. 28 Jul. 2017, doi:10.3390/nu9080813
2. Cuciureanu MD, Vink R. Magnesium and stress. In: Vink R, Nechifor M, editors. Magnesium in the Central Nervous System [Internet]. Adelaide (AU): University of Adelaide Press; 2011.
3. Engen, Deborah J et al. “Effects of transdermal magnesium chloride on quality of life for patients with fibromyalgia: a feasibility study.” Journal of integrative medicine vol. 13,5 (2015): 306-13. doi:10.1016/S2095-4964(15)60195-9
4. Yablon, Lisa A., and Alexander Mauskop. “Magnesium in headache.” Magnesium in the Central Nervous System, edited by Robert Vink et. al., University of Adelaide Press, 2011.
5. Chu, Jennifer & Bruyninckx, Frans & Neuhauser, Duncan. (2018). TRANSDERMAL MAGNESIUM SPRAYS FOR MYOFASCIAL PAIN RELIEF AND FACILITATION OF AUTONOMOUS TWITCH ELICITATION WITH ELECTRICAL TWITCH-OBTAINING INTRAMUSCULAR STIMULATION (ETOIMS). 10.13140/RG.2.2.33286.88648.
6. Sang-ngern, Mayuramas & Byoung, Jun & Mazen, Hamad & Chee, Chang & Rosanoff, Andrea. (2012). Preliminary study of transdermal permeation of magnesium cream formulations across skin. 10.1684/mrh.2012.0327.
7. Lakhan, Shaheen E et al. “The Effectiveness of Aromatherapy in Reducing Pain: A Systematic Review and Meta-Analysis.” Pain research and treatment vol. 2016 (2016): 8158693. doi:10.1155/2016/815869
8. Hebert, Patricia R et al. “Treatment of low back pain: the potential clinical and public health benefits of topical herbal remedies.” Journal of alternative and complementary medicine (New York, N.Y.) vol. 20,4 (2014): 219-20. doi:10.1089/acm.2013.0313
9. Bahr, Tyler et al. “Effects of a massage-like essential oil application procedure using Copaiba and Deep Blue oils in individuals with hand arthritis.” Complementary therapies in clinical practice vol. 33 (2018): 170-176. doi:10.1016/j.ctcp.2018.10.004
10. Hongratanaworakit, Tapanee. “Relaxing effect of rose oil on humans.” Natural product communications vol. 4,2 (2009): 291-6.
11. Kass, Lindsy et al. “Effect of transdermal magnesium cream on serum and urinary magnesium levels in humans: A pilot study.” PloS one vol. 12,4 e0174817. 12 Apr. 2017, doi:10.1371/journal.pone.0174817
12. Robert Tisserand. “Essential Oil Therapeutic Qualities: Methyl Salicylate Wintergreen.” Robert Tisserand, 28 Mar. 2012, roberttisserand.com/2012/03/wintergreen-oil-safety/.
Amber
Monday 13th of April 2026
Do you need to really get the oil part hot to get it to turn clear (mct oil and olivem1000?) For me it is staying think and whitish and I'm not sure if the emulsifying is melting into the oil completely.
Kyla
Thursday 21st of May 2026
Hi Amber, your comment was missed due to a tech issue, and I’m very sorry for the delay — especially while you were actively making the recipe. You may have already found the answer by now, but Olivem 1000 should turn fully clear once it’s completely melted into the oil phase of the lotion, so it’s possible the mixture simply wasn’t hot enough yet.
Were you able to get it to melt properly? Please let me know if you still need help, and my sincere apologies again that I couldn’t get back to you sooner.
Laura
Tuesday 9th of September 2025
Thanks for the recipe! I made it and I'm also thinking of adding beeswax since my preference is a little thicker lotion. Can I reheat an already made lotion to incorporate the beeswax or am I out of luck until next time I make it? Thanks!
Kyla
Wednesday 24th of September 2025
Hi Laura, I'm so sorry for the late response – I'm not sure why your comment ended up marked as spam. You've likely sought an answer somewhere else by now, but yes, I think it's better to wait until the next time you make the lotion to test this out. That way, you can adjust your formula to account for the beeswax you're adding (if you're adding weight with beeswax, you can use less oil, for instance).
You could also try using more emulsifying wax for a thicker texture, which may work better than beeswax to help stabilize the lotion (electrolyte-rich formulas like magnesium lotion can be finicky and prone to separation). In any case, I hope you're enjoying the lotion recipe, and if you do end up experimenting, I would love to hear how it goes for you. 😊
Madelyn Kay Victorino
Saturday 15th of March 2025
question for you, the recipe says to add the hydrosol to the container then add the magnesium oil to it. so, my question is, are we using the Hydrosol to make the magnesium oil i.e.: adding the Magnesium flakes to the Hydrosol? Or do we add the flakes to the Distilled water then add that to the Hydrosol?
Kyla
Saturday 15th of March 2025
Hi Madelyn, this lotion recipe actually uses liquid magnesium oil, not magnesium flakes. (I went with magnesium oil to try to keep the recipe as simple as possible.) In the recipe instructions, when I say to combine hydrosol with magnesium oil, I'm referring to pre-made magnesium oil, and the hydrosol is a separate ingredient.
However, if you'd like to make your own magnesium oil at home using magnesium flakes, and then incorporate that into your homemade lotion, you can absolutely do that too. I don't currently have a magnesium oil recipe on this blog, so unfortunately I don't have any detailed instructions for you. But the general consensus seems to be that you can make homemade magnesium oil by combining equal parts magnesium flakes with distilled water, and heating gently to dissolve.
Once you've made the oil, then you can measure out the required amount for this lotion recipe (35.5g).
I hope this helps clarify and answer your questions! Let me know if I can help further. 😊
JezabelRedfern
Monday 8th of January 2024
Does it need to be a liquid oil? Or could i use something like tallow as an alternative?
Kyla
Monday 8th of January 2024
Hi Jezabel, you can definitely use tallow to make magnesium lotion, and it will turn out more like a magnesium body butter. But I haven't personally tested this recipe with tallow, so unfortunately I can't comment on how your final product will turn out.
Since tallow is so solid, you will likely need to cut it with a liquid oil to make sure your magnesium lotion doesn't turn out too hard. You could try 50/50 fractionated coconut oil, jojoba oil or your liquid carrier oil of choice. But again, please note that your results may vary! I hope this helps, and if you do end up trying it, I would love to know how it goes for you.
Sheila
Tuesday 3rd of October 2023
Hi Kyla,
Firstly, thank you for the recipe and wonderful detailed directions! I have two questions...
1) Does this lotion stay soft enough to put in a pump lotion bottle or airless pump container?
2) If I add CBD oil to the recipe, should I decrease the amount of MCT oil by that amount? I may be adding as much as 3ml-4ml CBD oil - and it is made with MCT oil, too. :-)
Again, thank you! I am still quite a newbie. However, I did recently make a small batch of magnesium cream, just to test the whole emulsion technique. I used shea butter, coconut oil and jojoba oils. No emulsifier, as I read jojoba is one. It turned out beautifully . . . and has never separated!
I look forward to trying your recipe! I also appreciate if you have time to answer my questions. Take care!
Kyla
Friday 13th of October 2023
Hi Sheila, I'm sorry for the delay! I've been dealing with a family situation so it's taken me longer to get through the blog questions recently.
Thank you for your kind words about my lotion recipe. To answer your questions, in my experience the lotion stays soft enough for a pump bottle. The only issue I've noticed is some separation over time, but it doesn't happen with every batch, and only if the lotion sits for many months.
Yes, you're exactly right about the CBD oil – just decrease the MCT oil by the amount of CBD that you add. Sounds like a lovely addition!
I'm so glad to hear your lotion tester went well! Just a note that it might eventually separate since jojoba oil isn't technically an emulsifier, but if it's working for you, that's wonderful. 😊
I hope this helps, and I'd love to know how making the magnesium lotion goes for you. Thanks again and take care!