Learn how to make DIY chocolate rose bath bombs that look like truffles! This romantic bath bomb recipe combines the floral fragrance of roses with decadent chocolate essential oil, boasting a luxurious aroma that’s perfect for Valentine’s Day and beyond.
If you love chocolate as much as we do, you will enjoy the indulgent smell and look of these bath bombs, which were created to look like chocolate rose truffles.
The combination of rich, mouthwatering chocolate with the delicate aroma of roses is a surefire way to make any bath more romantic. It’s also one of our go-to essential oil blends for DIY recipes (see this romantic bath tea and Valentine’s room spray).
But while chocolate and roses is a classic Valentine’s Day combination, you can enjoy its gorgeous fragrance any time of year. Because there’s never a bad time for a luxuriously fragrant, romantic soak.
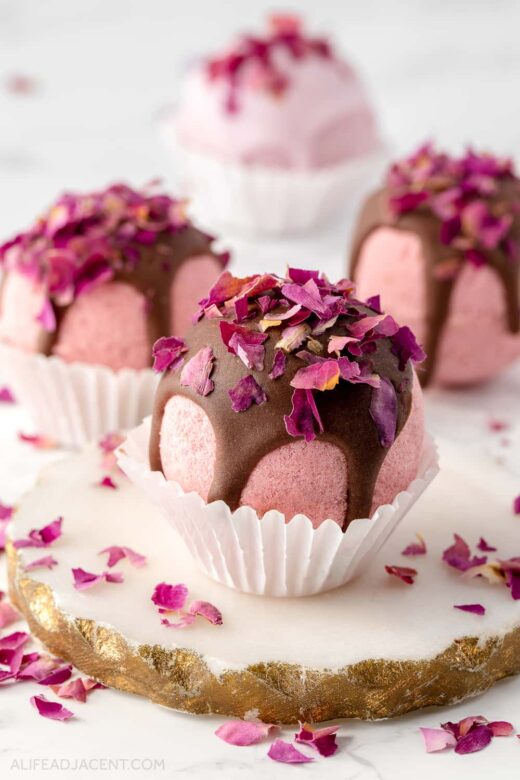
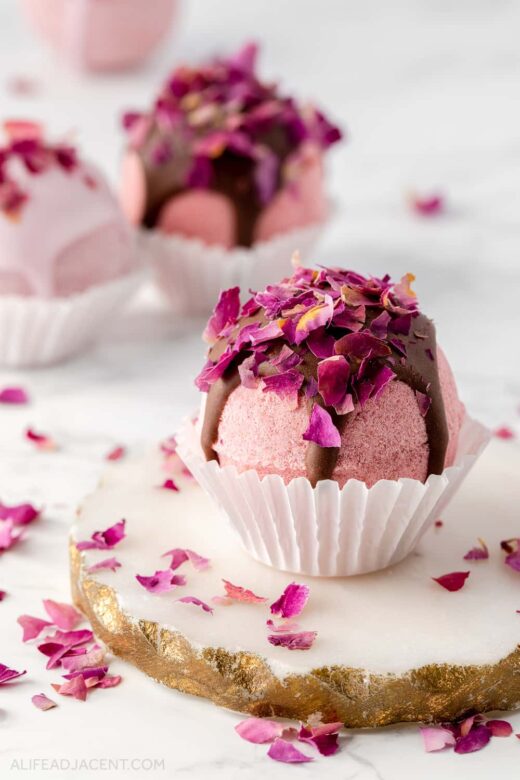
Bath bombs that look like rose truffles
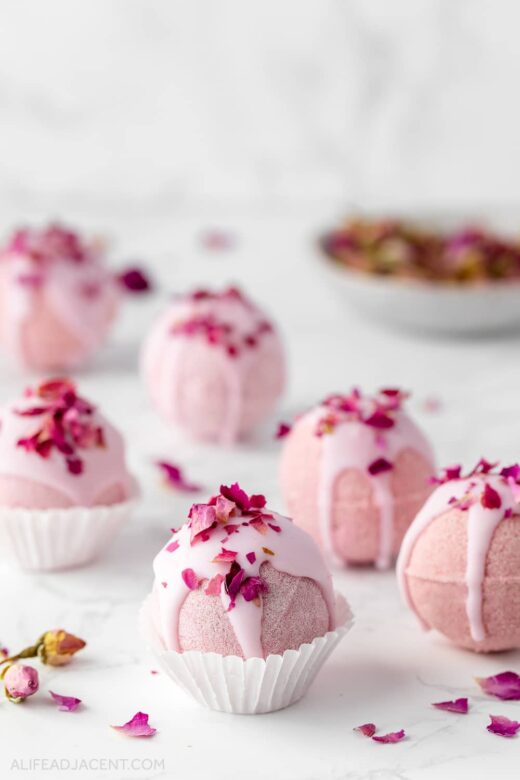
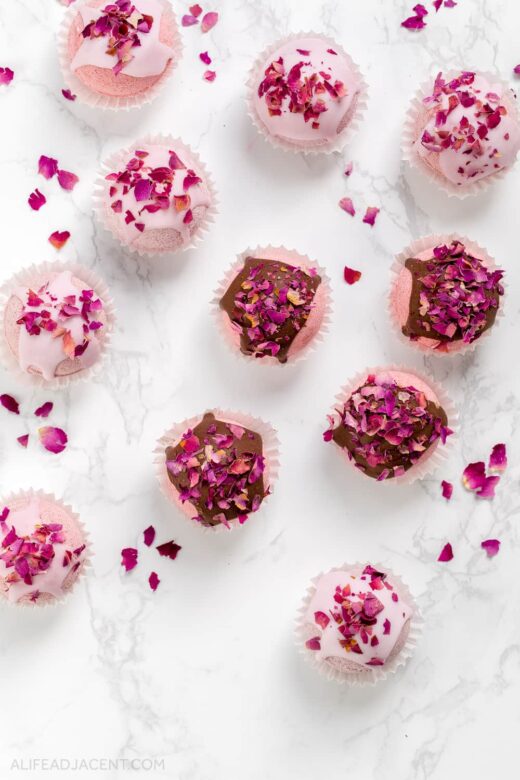
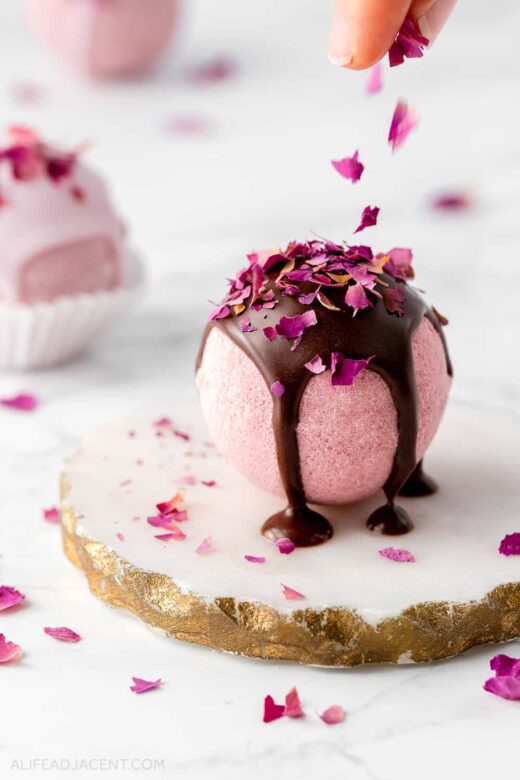
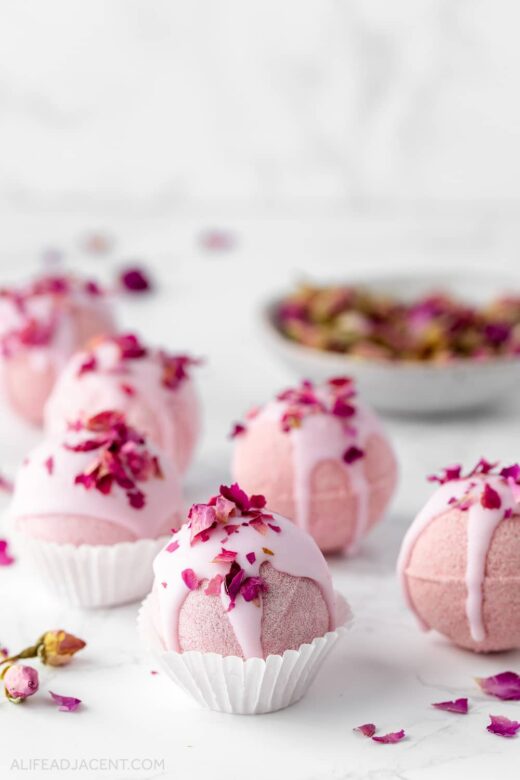
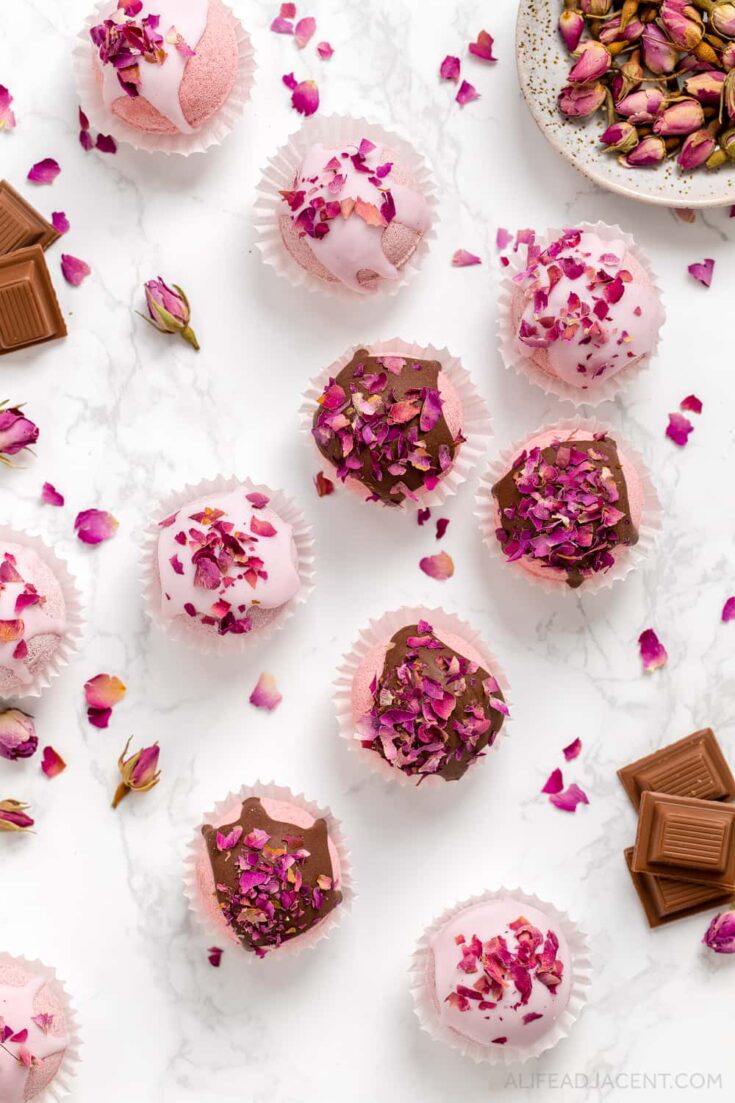
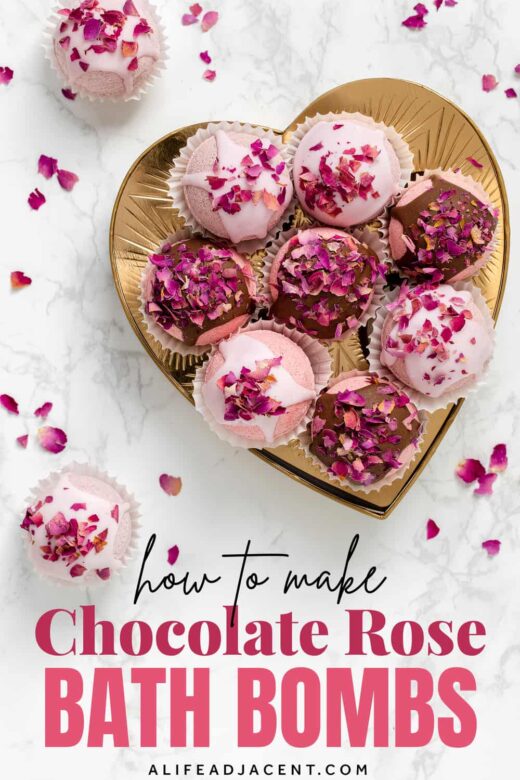
Glazed with a cocoa butter shell in your choice of dark chocolate or pink chocolate, these pretty pink bath bombs evoke the appearance of real truffles.
A light sprinkling of organic pink rose petals adds the perfect finishing touch, elevating your bath to the next level of romance and luxury.
But they don’t just look pretty. These lush bath bombs are also made with natural ingredients such as moisturizing milk powder and skin-softening cocoa butter, so you can feel good about using them in your bath water.
And as always, all varieties of these adorable bath truffles are scented with essential oils, not fragrance oils.
So if you’re looking for the perfect romantic bath, read on to learn how to make chocolate rose bath bombs in several scents: dark chocolate, milk chocolate, or pink chocolate truffle.

- Bath bombs that look like rose truffles
- Tips for making the best romantic bath bombs
- Chocolate rose bath bombs ingredients
- Essential oils for romantic bath bomb recipe
- Other materials for making chocolate rose bath truffles
- Chocolate Rose Bath Bombs Recipe
- Romantic bath bomb tips & tricks
- Chocolate Rose Essential Oil Blends
- How to package bath bombs for Valentine’s Day gifts
- More romantic DIY gift ideas
Tips for making the best romantic bath bombs
We refined these homemade bath bombs several times to come up with a formula that worked dependably.
As with any new recipe, we wanted to share the issues we encountered while making it, and provide tips on how to fix them.
We hope this will allow you to avoid similar mistakes so that the process of making these bath truffles is as foolproof as possible. Because despite their luxurious appearance, they’re not hard to make, as long as you carefully follow the instructions.
Below, we provide a thorough tutorial on making the best bath bombs that look like chocolate rose truffles, with some troubleshooting tips as well.
Plus, if you’re looking to give these bath bombs for Valentine’s Day gifts, we’ve also provided tips for packaging and presentation.
Finally, if you’re wondering what to put in a romantic bath, you can read more about each ingredient below. Or, simply skip straight to the recipe, instructions, and essential oil blends.

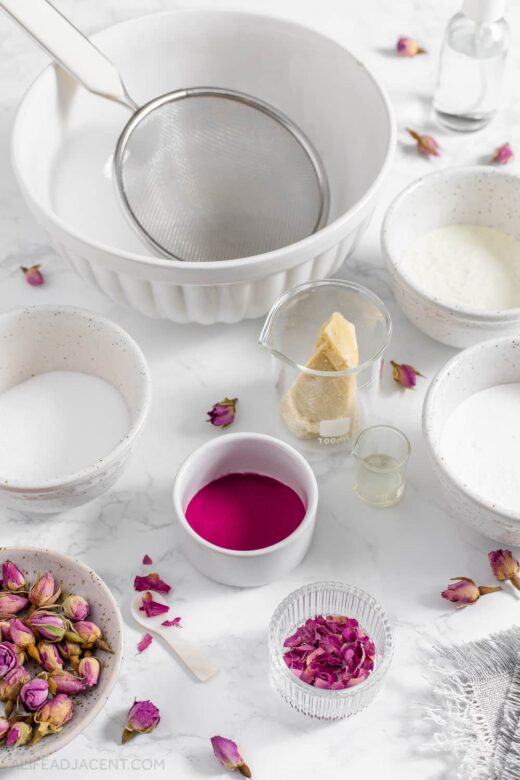
Chocolate rose bath bombs ingredients
Baking soda and citric acid
As with most bath bomb recipes, these chocolate and rose bath truffles are made with a citric acid and baking soda base.
The combination of these important ingredients is what creates that wonderful fizzing reaction and effervescent bubbliness that we all love about bath fizzies!
Additionally, baking soda and citric acid both hold and disperse the wet ingredients. In this case, that’s cocoa butter, the emulsifier, and the essential oils.
Baking soda and citric acid are also key ingredients in our rose petal bath bombs as well as our aromatherapy shower steamers.
Cocoa butter
Rich, decadent cocoa butter plays a key role in this romantic bath bomb recipe.
Not only does it make up the rich chocolate glaze on top of each truffle, but it also acts as the carrier oil that disperses the essential oils into your bathwater.
And because cocoa butter is so fragrant, it adds a delectable chocolatey aroma that perfectly complements the chocolate rose essential oil blend.
Benefits of using cocoa butter in bath bombs
Many bath bomb recipes contain liquid carrier oils such as coconut oil, but there are benefits to using a solid butter such as cocoa butter.
For one, cocoa butter’s hard texture helps add structure to homemade bath bombs, so they stick together better, are easier to mold, and are less prone to crumbling.
As an added bonus, cocoa butter’s slick texture also helps prevent the truffles from sticking to your molds. All of these qualities make cocoa butter bath bombs ideal for beginners.
But technical attributes aside, cocoa butter is also highly moisturizing, making these lush bath bombs ideal for dry skin.
Recipes with high butter content are also sometimes called “butter bombs.” Personally, we think they feel like a cross between a bath bomb and a bath melt.
But whatever you call them, you’re sure to emerge from the bath with soft, moisturized skin that smells like chocolate and roses.
One last benefit – saturated fats like cocoa butter are ideal for bath bombs because they’re highly stable, have long shelf lives, and won’t oxidize in hot bathwater, unlike oils rich in polyunsaturates (PUFAs) like sunflower oil.
These reasons and more are why we strive to make only low-PUFA skincare and bath and body recipes.
Milk powder
You can’t create luxurious milk chocolate bath bombs without milk, so nourishing whole milk powder is a must for this recipe.
There’s actually an important reason why milk baths are recommended for irritated or very dry skin. For one, milk powder contains abundant fatty acids and proteins which help nourish and repair the skin barrier.
As a bonus, milk powder also imparts a lovely, silky feel to your bathwater for a luxurious soak. And using milk powder also allows you to make creamy bath bombs without corn starch, if that’s your preference.
Finally, milk powder also helps create a wonderful frothiness we associate with a good bath fizzy.
So as your chocolate bath bomb hits the water and begins to fizz, you will get that soft, frothy texture that resemble latte foam. (Which is why milk powder is also key for latte bath bombs!)
You can use either non-fat dry milk or full-fat milk powder in these moisturizing DIY bath bombs. But whole milk powder contains the full spectrum of nourishing fatty acids, so it’s a better choice for dry skin.
Substitute for milk powder in bath bombs
For those who are vegan or dairy free, coconut milk powder is an excellent alternative to the milk powder in this recipe.
Similar to powdered milk, powdered coconut milk also contains saturated fats that can help soften and moisturize the skin.
Plus, the creamy scent of coconut won’t overpower the cocoa butter, so you’re still going to get a luxurious, chocolate-scented bath bomb.
Natural bath bomb emulsifier
This chocolate rose bath bomb recipe is made without polysorbate 80. While it’s the most commonly used bath bomb emulsifier, we prefer to avoid it in our homemade bath and body products.
This is because polysorbates are ethoxylated ingredients, which means they may contain chemical residue (though there’s some debate around this).
What’s a natural substitute for polysorbate 80?
If you prefer natural ingredients too, you may also be asking what can I use to replace polysorbate 80 in bath bombs?
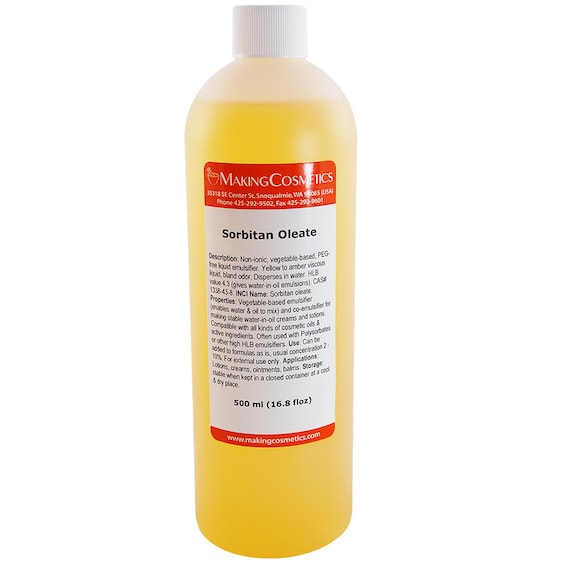
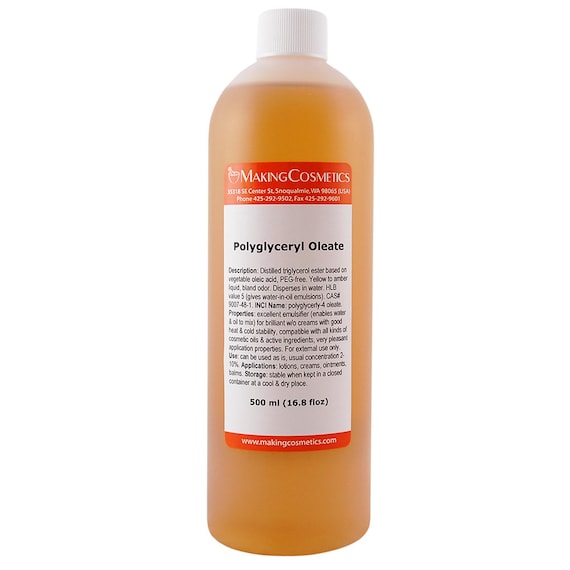
In our experience, we have found the best natural alternatives to polysorbate 80 are sorbitan oleate and polyglyceryl oleate.
We use both of these natural bath bomb emulsifiers interchangeably, as we haven’t found any difference in their efficacy.
Both help disperse the fragrance and cocoa butter in the bathwater, helping to avoid oil puddles and undiluted essential oils.
Essential oils for romantic bath bomb recipe
Is there any duo more romantic than chocolate and roses? When combined, they create a unique, gourmand aroma that’s both intoxicatingly sweet and delicately floral, just like chocolate rose truffles.
In the section below, you will find 3 chocolate rose fragrance blends to choose from.
You will need a couple key essential oils to make each one, with one additional oil for the pink chocolate truffle blend.
Cocoa absolute
Cocoa absolute (or chocolate essential oil) has a rich dark chocolate aroma that will make chocolate lovers swoon.
It’s not the most inexpensive ingredient, and it’s usually reserved for perfumery. But you don’t need much for this lush bath bomb recipe, as cocoa absolute and cocoa butter work together to create a luscious chocolate aroma.
And it’s worth the investment, because cacao absolute is the best way to make chocolate scented bath bombs without using a synthetic fragrance oil.
Rose essential oil
When it comes to imbuing your bath truffles with the sweet, floral fragrance of roses, you have a few options.
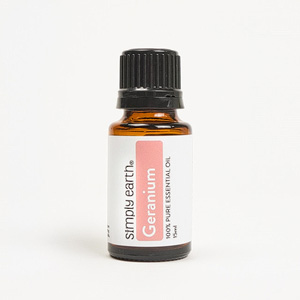
Rose otto or rose absolute are obvious choices, as they create the most authentic rose scent. However, you can also use rose geranium essential oil, as its rose-like fragrance makes it an economical substitute for real rose otto.
Of course, uncut rose oil comes at a high price, so be sure to choose a diluted rose essential oil or absolute.
We used a 5% rose maroc absolute from a local perfumery supplier, but feel free to choose your favourite variety, whether that’s damask or Bulgarian rose oil.
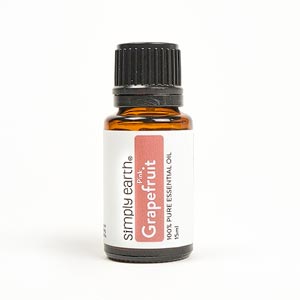
Pink grapefruit essential oil
You may be wondering what a citrus oil is doing in chocolate rose bath bombs, but this one is optional!
We added a small amount of pink grapefruit essential oil to the pink chocolate bath bombs. Its sweet, fruity aroma is a nod to ruby cacao, with its delicate flavour profile and sweet, berry-like undertones.
So if you’d like to make bath bombs that look and smell like ruby chocolate truffles, use the pink chocolate blend!
Other materials for making chocolate rose bath truffles
Aside form the main ingredients in the bath bomb base, you will also need a few extras:
- Rose petals for garnishing. You can’t create a romantic bath without rose petals. Dried pink rose petals are the loveliest garnish for the top of your bath bombs, making them look even more like real rose truffles.
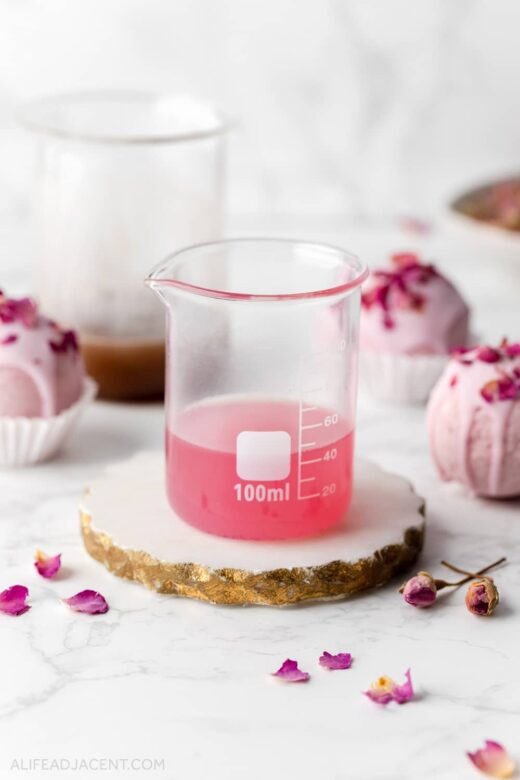
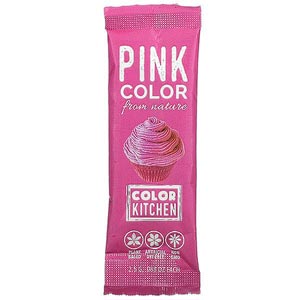
- Pink bath bomb colorant. Most beet powders are red-toned, but we used this special kind of pink beet powder to color each bath bomb a lovely pale pink. However, you can also use pink mica or another pink colorant such as pitaya powder.
- Cocoa butter for glazing. You will need a bit of extra cocoa butter to create the chocolate glaze on top of each bath truffle. Regular cocoa butter is fine, but you may prefer to use deodorized white cocoa butter for a pastel pink glaze.
- Brown cocoa butter coloring. We used a scoop of real cocoa powder to colour the dark chocolate glaze.
- Pink cocoa butter coloring. For pink chocolate, we chose oil-soluble beetroot extract for a natural pink tint. However, it’s not the most widely available ingredient, so you can also simply use pink mica. But if you want to add it to your collection, we have many more ways to use it coming soon, including a homemade pink lip balm recipe with beet powder.
- Alcohol. A small amount of alcohol moistens the bath bomb mixture just enough so it sticks together. It’s best to use a spray bottle to ensure a light, even spritz. In terms of alcohol, we prefer Everclear to avoid rubbing alcohol’s toxic fumes.
Tip: We don’t recommend using water, especially with bath bomb recipes that contain milk powder or corn starch. These ingredients absorb a lot of moisture, so mixing them with water can cause doughy, lumpy bath bombs.
Finally, you will also need a few key pieces of equipment to make these luxurious bath bombs:
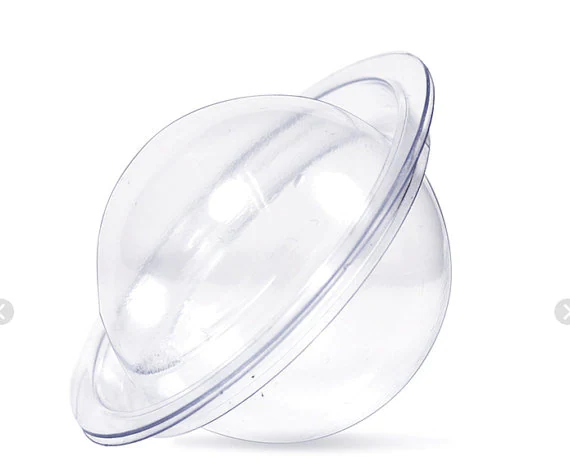
- Mini bath bomb molds. We used 1.75 inch molds to create these tiny, truffle-sized bath bombs. We prefer stainless steel molds whenever possible, as they’re the most durable and eco-friendly choice. But we could only find plastic molds in the small size we wanted at our local store.
- Mixing bowl and spoon. You will need a large, non-metallic mixing bowl and wooden spoon to mix your ingredients together.
- Heat-safe container with spout. Use a heat-proof container such as a glass measuring cup or lab beaker to melt your cocoa butter. It should have a spout for easy pouring.
- Kitchen scale. To weigh out a precise amount of cocoa butter.
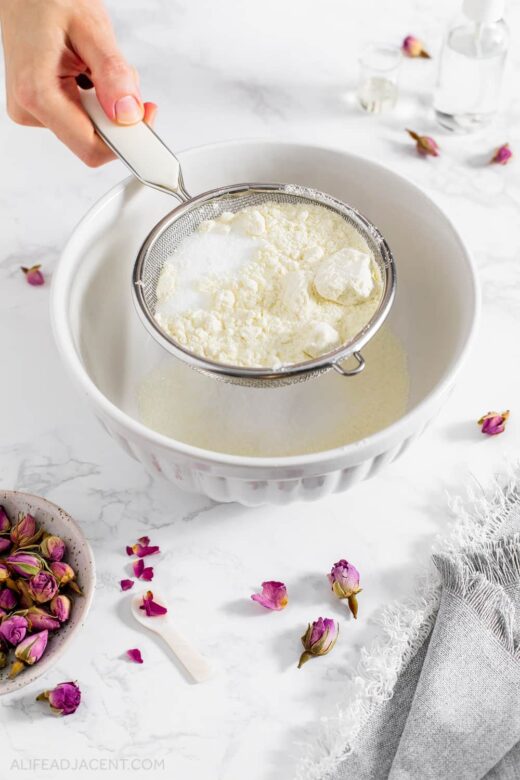
- Sieve. Sifting the dry ingredients ensures your truffle bath bombs don’t turn out lumpy.
- Nitrile gloves. If you’d like, you can use gloves to protect your hands while kneading and molding each sphere. But this recipe contains so much moisturizing cocoa butter that we didn’t find skin irritation to be an issue.
- Mini mixer. A cordless mini mixer helps incorporate your colorant into your cocoa butter and break up any clumps. But it isn’t necessary, and you can also just whisk it thoroughly.
- Laser thermometer. A laser thermometer is helpful to determine when exactly you should begin pouring your cocoa butter glaze. But you can also gauge this by your cocoa butter’s appearance – we will tell you how.
- Small silicone spatula. To stir your cocoa butter glaze as it cools.
Chocolate Rose Bath Bombs Recipe
1/2 cup baking soda
1/4 cup citric acid
1/4 cup milk powder or powdered coconut milk, tightly packed
30g cocoa butter, melted
1 tsp sorbitan oleate or polyglyceryl oleate
~2 tsp pink beet powder or 1/2 tsp pink mica, as desired
35-40 drops chocolate rose essential oil blend (see below)
Alcohol to moisten
Cocoa Butter Icing
~15g cocoa butter, melted
Small scoop pink mica or oil-soluble beetroot extract pigment for pink chocolate glaze
Small scoop cocoa powder for milk chocolate glaze
Pink rose petals to garnish, chopped finely
How to make chocolate rose bath bombs
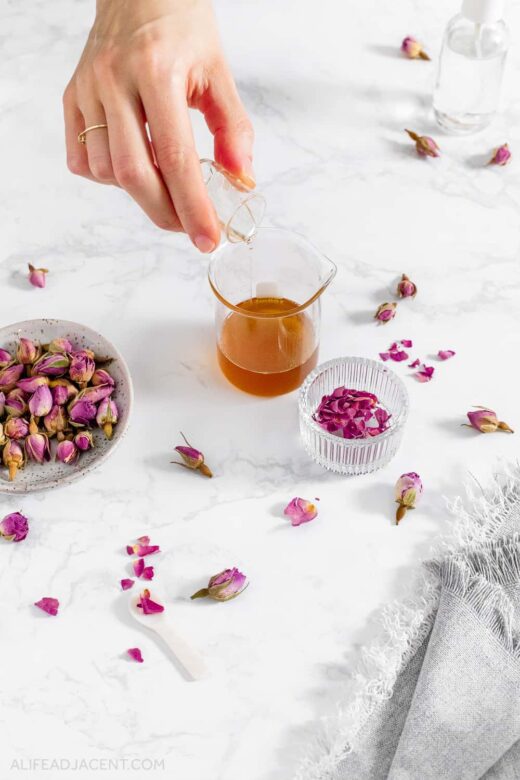
Weigh and melt cocoa butter. Begin by weighing 30g of cocoa butter in your heat-safe container. Then, melt it using your preferred method. You can melt it in the microwave in 30 second increments, pausing in between to stir. Or, heat on the stovetop by placing your container in a shallow pan of water. Once the cocoa butter is melted, set aside.
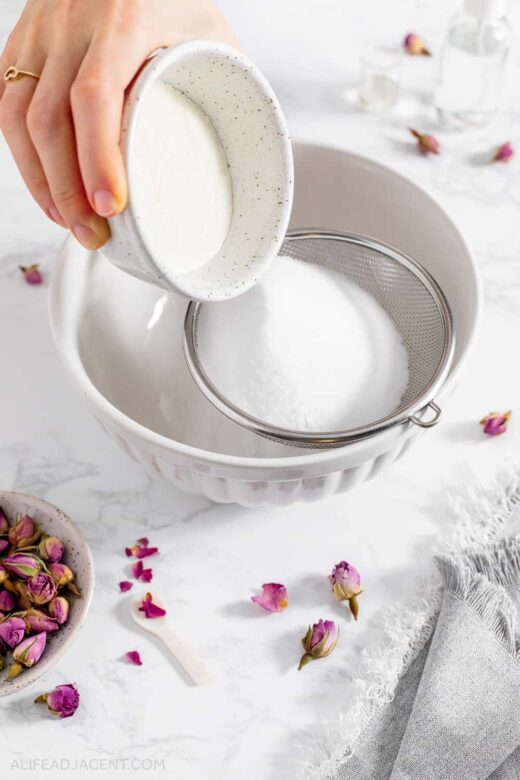
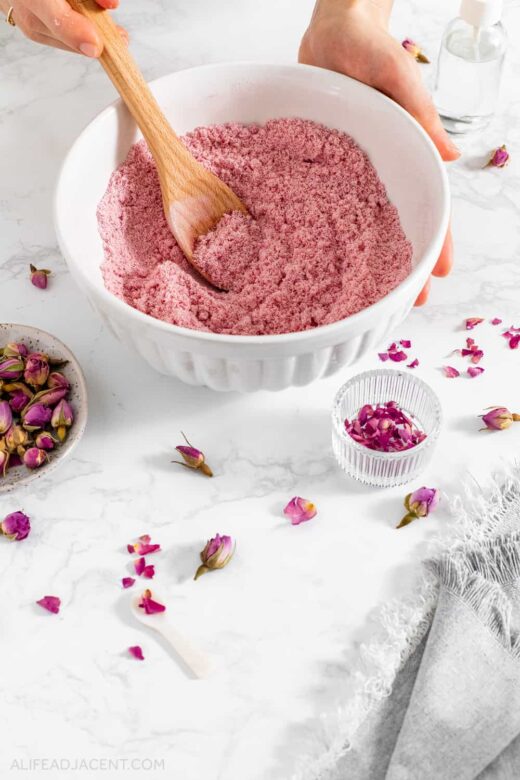
Combine dry ingredients. In your large mixing bowl, sift all dry ingredients: baking soda, citric acid, milk powder, and pink bath bombs colorant. Once sifted, mix well with a wooden spoon until you achieve a uniform color and texture.
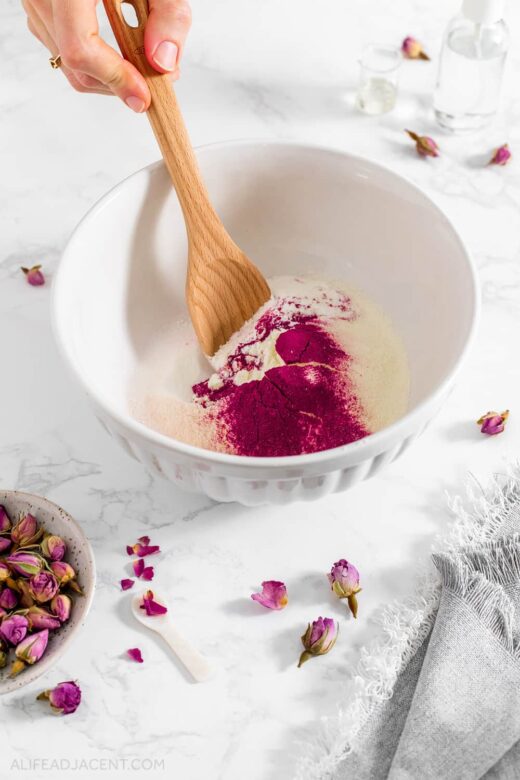

Tip: We used 1 full package of pink beet powder for pale pink bath bombs. If you’re not satisfied with your mixture’s color, you can opt to add more colorant at this stage. But keep in mind that the wet ingredients will deepen your bath bombs’ pink tone.
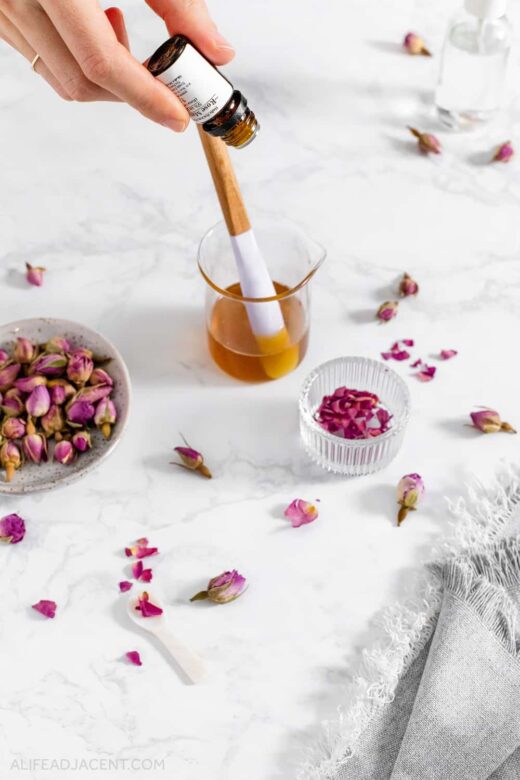
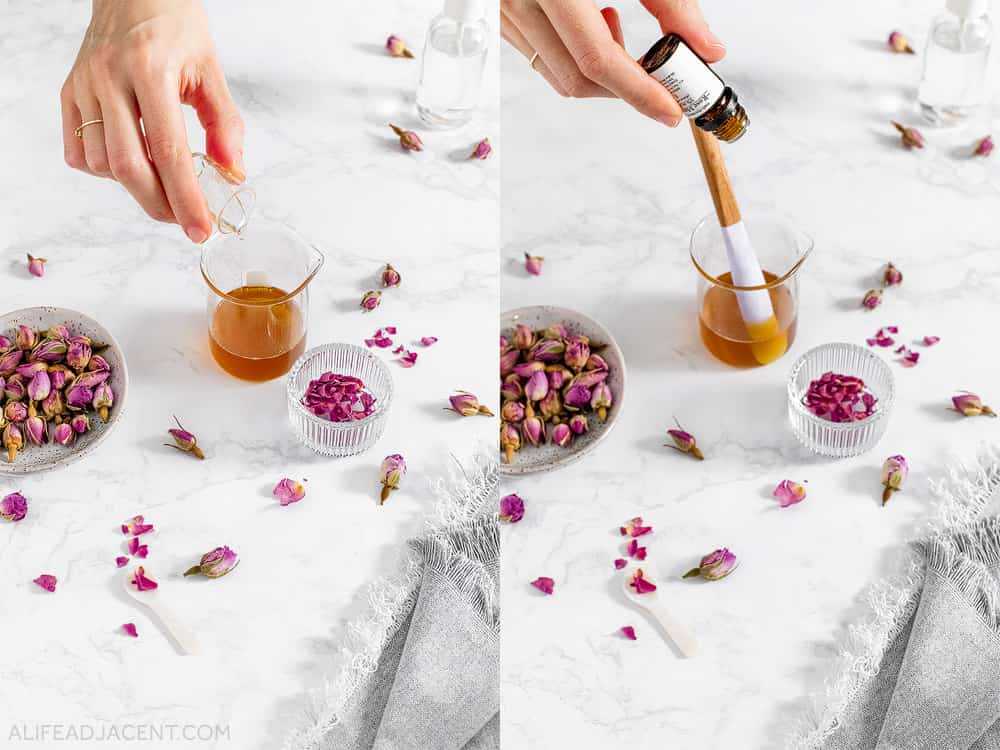
Mix oil-based ingredients. Add the natural bath bomb emulsifier and essential oils to your melted cocoa butter. Mix well to combine the oil-based ingredients. The mixture will turn dark brown, but don’t be alarmed. Cocoa absolute is very pigmented, but it will only darken your mixture slightly, and will not affect your bath bombs’ pretty rose pink.
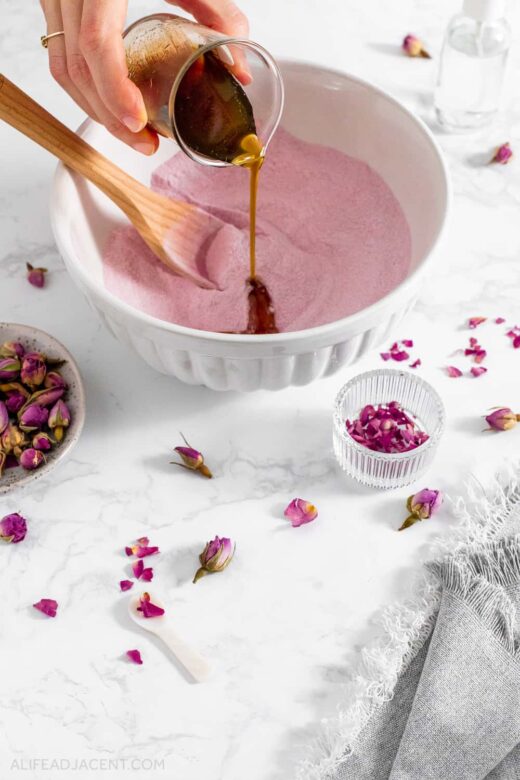
Combine wet and dry ingredients. Add the wet ingredients to your bowl of dry ingredients and mix well. You can use a wooden spoon, but kneading with your hands is the best way to ensure the oil is fully incorporated.
Tip: Use gloves if you have a manicure or sensitive skin, however we found that the cocoa butter helps protect your hands.
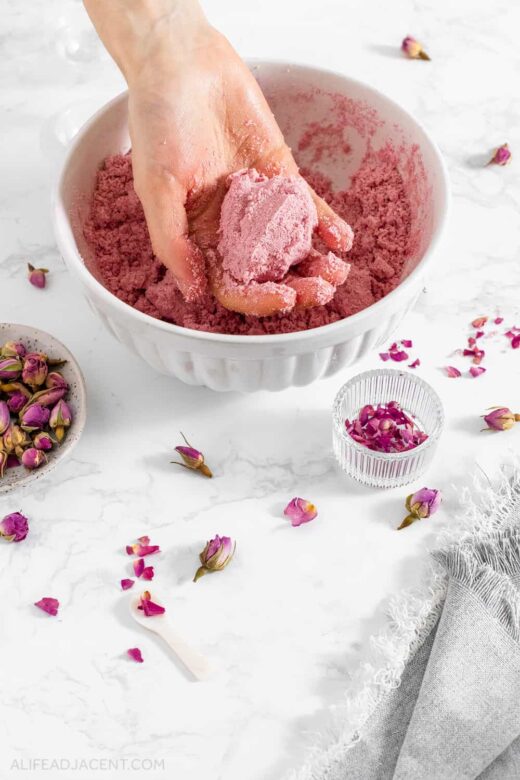
Add alcohol to moisten. At this point the mixture will resemble damp sand, but it needs more moisture to hold its shape. Spritz the mixture evenly with alcohol and knead to incorporate. Start slowly with 10 sprays or so. You want just enough liquid to hold the truffles together. Too much, and your mixture will become doughy and soggy.
Tip: You can test whether your bath truffles are ready to mold by picking up a handful of the mixture, squeezing it into a ball, and dropping it back into the bowl. If it doesn’t crumble, it’s ready.
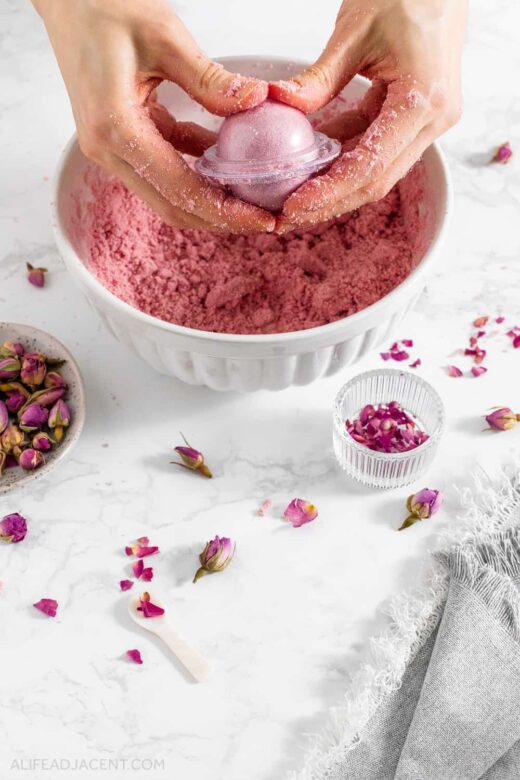
Mold bath truffles. Now it’s time to mold your bath bombs into their truffle shape. Loosely fill each half of your mold until it overflows. Then press both halves of the mold firmly together, allowing any excess to fall away. There’s a learning curve to this that only experience can teach you, so you may need to try a few times to gauge how to fill your particular molds. Some molds require a different technique than others.
Tip: If desired, you can smooth out any seams by running your fingers around the edge of each sphere. This helps avoid harsh lines around the circumference of your bath fizzies. But, don’t expect perfection, because they will still look pretty, even with obvious seams. And any imperfections can be covered with cocoa butter.
Set aside to harden. Once you’ve formed a bath bomb, set it aside on a plate while you mold the rest. Do not remove the bath bombs from their molds. Leave them to set for approximately 30 minutes. Later, you will carefully release each truffle from its mold, and place it back into the bottom half to dry out fully.
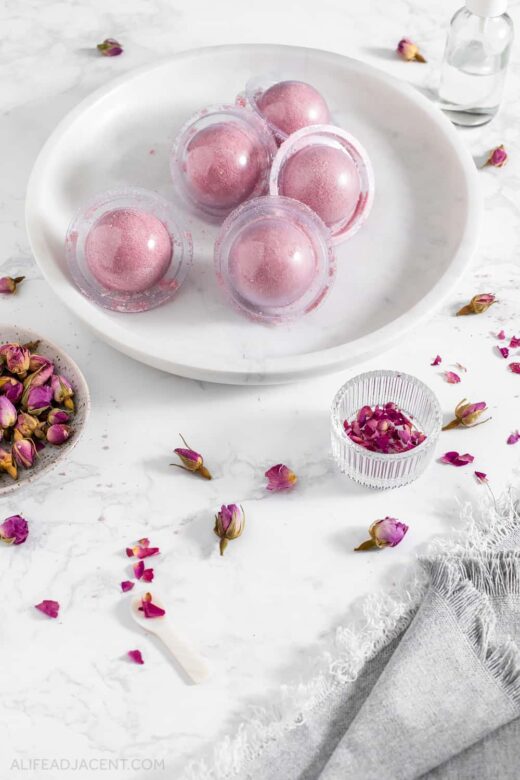
Release from mold. By now each bath fizzy should be sturdy enough to be handled, but be gentle to avoid denting them. Carefully release each truffle from the mold, one side at a time, before placing it back into the mold. The point of this step is only to ensure your bath bombs are not stuck to their molds. They should come out easily thanks to the cocoa butter. But if the bath bombs are stuck, you can lightly tap each side against a countertop until they come loose.
Place back into mold to dry. Once you’ve loosened each truffle, place it gently back into the bottom half of the mold. Drying your bath bombs in the mold ensures they can dry out thoroughly while avoiding flat or misshapen bottoms. Set aside to dry overnight.
Prepare cocoa butter glaze. The following day, melt the rest of the cocoa butter. Once it begins to soften, add the colorant and mix well. Continue to heat until both the cocoa butter and the colorant are completely liquified. A mini mixer helps break up any clumps of cocoa powder or beet powder. But if you don’t have one, just be sure to mix thoroughly.
Allow cocoa butter to cool. Now comes the most difficult process of decorating your chocolate rose truffles: waiting for the cocoa butter icing to reach the perfect temperature. If your cocoa butter is too hot when you pour it, it will seep right into your bath bomb. But if you let it cool too long, it will sit on top in a gloopy blob instead of dripping beautifully down the sides.
We found that the optimal temperature for pouring is around 27-28° C, but you can also eyeball it. The cocoa butter should be liquid enough to pour easily, but still thick enough to sit on top of your bath bomb. Look for a liquid yet slightly opaque appearance. Translucent cocoa butter is a sign that it’s too hot, and it will sink into your bath bombs. It’s a delicate balance. Once your cocoa butter reaches the right consistency, you will need to work quickly.
Tip: Stir your cocoa butter periodically with a spatula while it cools. This prevents lumps and ensures even cooling. Be sure to scrape the sides of the container, because it will solidify there first. Once your cocoa butter is both pourable and slightly opaque, it’s ready. Don’t worry if you overshoot the mark and it becomes too solid. Just heat it again and wait for it to reach the right temperature.
Prepare for decorating. While you’re waiting for your cocoa butter to cool, prepare your bath bombs for decorating by releasing them from the molds and arranging them on your desired surface. A plate or tray that’s easy to move is ideal, as you’ll want to place your finished truffles in a safe place to set. Also, make sure you have your rose petals ready for garnishing. If your petals are too big, cut or tear them into smaller pieces.
Decorate bath bombs. Now it’s time to decorate your bath truffles with the chocolate glaze. Slowly begin to pour the cocoa butter on top of each bath bomb, using a small circular motion. If the cocoa butter is ready, it should pool on top and drip down the sides like a real chocolate glaze. Be conservative here and don’t pour too much. You don’t want the cocoa butter to pool under the bottoms of your truffles.

Sprinkle with rose petals. As soon as you’ve finished icing one bath truffle, lightly sprinkle it with rose petals. It’s important to work quickly before the cocoa butter hardens, or the petals won’t stick. Repeat this process until each bath truffle is decorated with rose petals.
Set aside to harden. Very carefully, set your bath truffles aside to allow the cocoa butter to fully harden and come to room temperature. This shouldn’t take long, but we leave them for at least an hour for good measure.
Finished. Once the cocoa butter is set, your chocolate rose bath truffles are ready to store, gift, or use. Remove them carefully from the plate, removing any excess cocoa butter from the bottoms. Store them in an airtight container, and be sure to check out the packaging and storage tips below, as well as the section on giving DIY bath bombs for Valentine’s Day gifts. Use 1-2 mini bath bombs for a luxurious, romantic bath.
Romantic bath bomb tips & tricks
Here are some tips to keep in mind while making this bath bomb recipe:
- To fragrance your chocolate rose bath truffles, see the essential oil blends section below.
- Beet powder is not as pigmented as mica, so start slowly (1/2 tsp or so) if you’re using pink mica as your colorant.
- Measuring by volume is not as precise as measuring by weight, so you may end up with a little bit of extra bath bomb mixture (enough to make half a bath truffle). If this happens, fill one mold half, and set aside to use as a cocoa butter tester.
- The decoration stage is less precise than the rest of the bath bomb making process. It’s up to you how much cocoa butter you want to use on top of each truffle, how dark you’d like the glaze to be, and how many rose petals to add as a garnish.
Tips for decorating cocoa butter bath bombs
- Left at room temperature, the cocoa butter can take anywhere from 20-40 minutes to reach the right consistency for pouring. You can also place the container in a cool water bath to speed up the cooling process. Be sure to stir continuously and watch closely, as it will solidify quickly in a water bath.
- If you have any doubts about whether your cocoa butter is ready to pour, you could do a test run. Once you’ve seen what the perfect consistency looks like, it will be much easier to gauge.
- If you pour the cocoa butter too soon and your bath bomb absorbs the butter, you can cover the mistake with more cocoa butter. Simply wait a bit longer for the right temperature before trying again.
- If at any point the cocoa butter becomes too hard to work with, you can simply heat it up again.
- It’s better to end up with too much cocoa butter than not enough, because you don’t want to have to make the glaze twice. Any leftover cocoa butter can be used in other recipes. For instance, you can melt it down and use it in DIY body butter.
Storage tips & shelf life
- This recipe yields five 1.75″ mini bath bombs, but this may vary depending on the size of your molds.
- Cocoa butter’s shelf life is around 2 years. So when stored correctly, your bath bombs will last a long time. However, you should use them within a year for the best chocolate rose fragrance and the most luxurious, aromatic bath experience.
- Store your bath truffles in a cool, dry place in an airtight container. We suggest wrapping them in plastic wrap (or more eco-friendly compostable cling wrap) to ward off moisture.
- If you don’t want to wrap them, you can add some dry rice or a silica gel pack to the container for good measure.
- Cocoa butter bath bombs can withstand temperatures up to 93–101 °F without melting.
Safety tips & how to use
- For a luxuriously fragrant and sensual chocolate rose scented soak, use 1-2 mini bath truffles per bath.
- This bath bomb recipe contains a lot of cocoa butter, which can be a slipping hazard. The liquid emulsifier helps disperse the cocoa butter in the bathwater, but it’s still going to be somewhat slippery. So, please be extremely careful when getting in and out of the bath.
Chocolate Rose Essential Oil Blends
Depending on your preferred fragrance, you can choose from 3 essential oil blends for your bath bombs.
Tip: You can also substitute rose geranium essential oil for rose.
Milk Chocolate Rose
15 drops rose essential oil or rose absolute
20 drops cocoa absolute
Dark Chocolate Rose
15 drops rose otto or rose absolute
30 drops cacao absolute
Pink Chocolate Rose
10 drops rose essential oil or rose absolute
20 drops chocolate essential oil
10 drops grapefruit essential oil
How to package bath bombs for Valentine’s Day gifts
A box of chocolates is a tasty but predictable way to win someone’s heart – so why not mix it up with a box of chocolate truffle bath bombs?
These DIY bath bombs would make for a lovely Valentine’s Day gift idea, whether that’s for yourself, a friend, or a romantic soak for two shared with someone special.
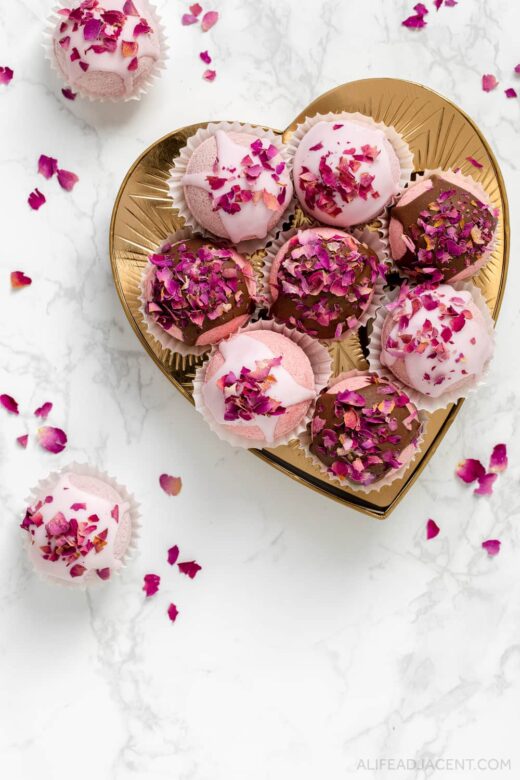
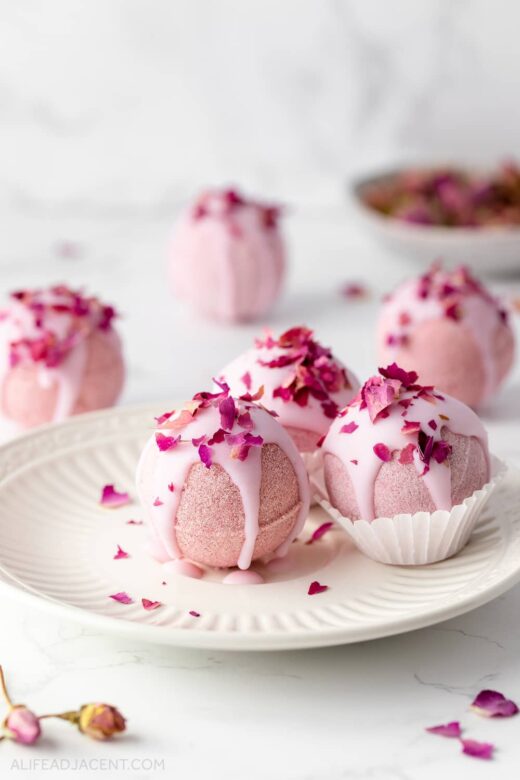
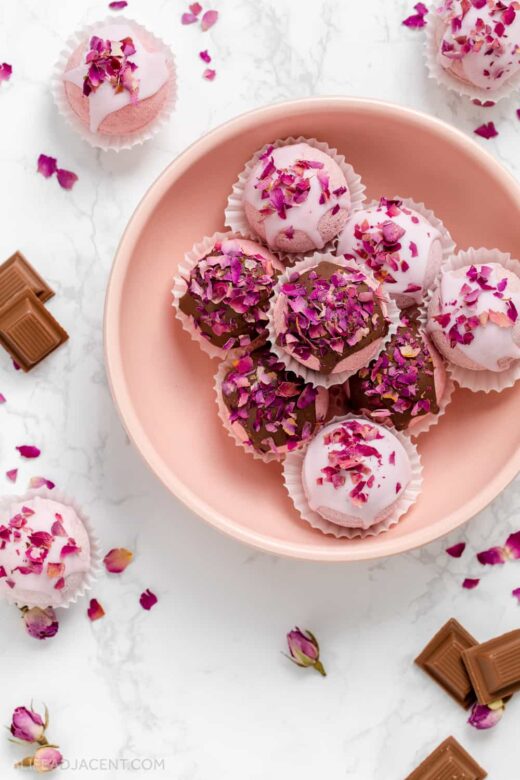
For packaging, placing each truffle in a tiny muffin wrapper makes for a lovely presentation. It also makes your bath bombs look even more edible, so be sure to warn your lucky recipient that these truffles aren’t for eating!
With their diminutive size and delicious chocolate rose aroma, they just might pass for the real thing.
For a creative gift idea, you can package your homemade bath bombs in an empty chocolates box, surrounded by shredded paper for padding. As mentioned above, just be sure to wrap them in cling wrap first to keep out moisture.
If you’d like to avoid plastic, you can also place them in a shallow mason jar with an airtight lid, with shredded paper for padding. Small 4oz mason jars are the perfect size to fit 1 mini bath bomb gift.
Chocolate Rose Bath Truffles Recipe
Learn how to make DIY chocolate rose bath bombs that look like truffles! This romantic bath bomb recipe combines the floral fragrance of roses with decadent chocolate essential oil, boasting a luxurious aroma that's perfect for Valentine's Day and beyond.
Ingredients
- 1/2 cup baking soda
- 1/4 cup citric acid
- 1/4 cup milk powder or powdered coconut milk, tightly packed
- 30g cocoa butter, melted
- 1 tsp natural bath bomb emulsifier: sorbitan oleate or polyglyceryl oleate
- ~2 tsp pink beet powder or 1/2 tsp pink mica, as desired
- 35-40 drops chocolate rose essential oil blend (see below)
- Alcohol to moisten
Cocoa Butter Icing
- ~15g cocoa butter, melted
- Small scoop pink mica or oil-soluble beetroot extract pigment for pink chocolate glaze
- Small scoop cocoa powder for milk chocolate glaze
- Pink rose petals to garnish, chopped finely
Milk Chocolate Essential Oil Blend
- 15 drops rose otto, geranium essential oil, or rose absolute
- 20 drops cocoa absolute
Dark Chocolate Essential Oil Blend
- 15 drops rose otto, geranium essential oil, or rose absolute
- 30 drops cacao absolute
Pink Chocolate Essential Oil Blend
- 10 drops rose essential oil, rose geranium oil, or rose absolute
- 20 drops chocolate essential oil
- 10 drops grapefruit essential oil
Tools
- 1.75" mini bath bomb molds
- Mixing bowl and spoon
- Heat-safe glass measuring cup
- Kitchen scale
- Sieve to sift dry ingredients
- Cordless mini mixer
- Laser thermometer
- Small silicone spatula
Instructions
- Weigh and melt cocoa butter. Begin by weighing 30g of cocoa butter in your heat-safe container. Then, melt it using your preferred method. You can melt it in the microwave in 30 second increments, pausing in between to stir. Or, heat on the stovetop by placing your container in a shallow pan of water. Once the cocoa butter is melted, set aside.?
- Combine dry ingredients. In your large mixing bowl, sift all dry ingredients: baking soda, citric acid, milk powder, and pink bath bombs colorant. Once sifted, mix well with a wooden spoon until you achieve a uniform color and texture.??
Tip: We used 1 full package of pink beet powder for pale pink bath bombs. If you're not satisfied with your mixture's color, you can opt to add more colorant at this stage. But keep in mind that the wet ingredients will deepen your bath bombs' pink tone.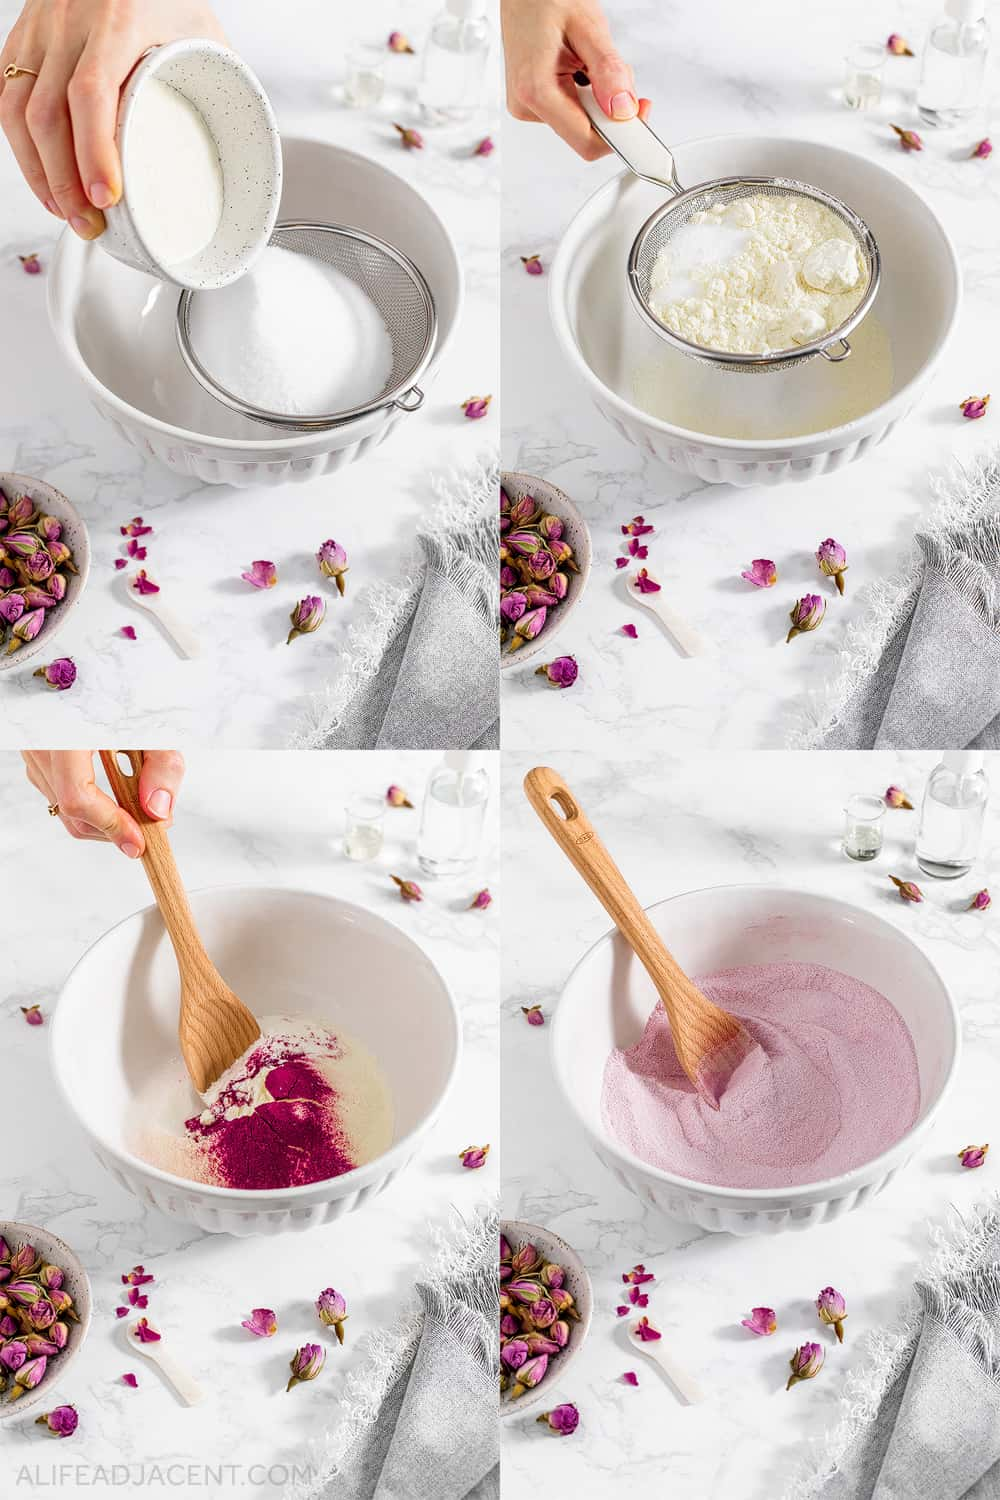
- Mix oil-based ingredients. Add the natural bath bomb emulsifier and essential oils to your melted cocoa butter. Mix well to combine the oil-based ingredients. The mixture will turn dark brown, but don't be alarmed. Cocoa absolute is very pigmented, but it will only darken your mixture slightly, and will not affect your bath truffles' pretty rose pink.?
- Combine wet and dry ingredients. Add the wet ingredients to your bowl of dry ingredients and mix well. You can use a wooden spoon, but kneading with your hands is the best way to ensure the oil is fully incorporated.??
Tip: Use gloves if you have a manicure or sensitive skin, however we found that the cocoa butter helps protect your hands.?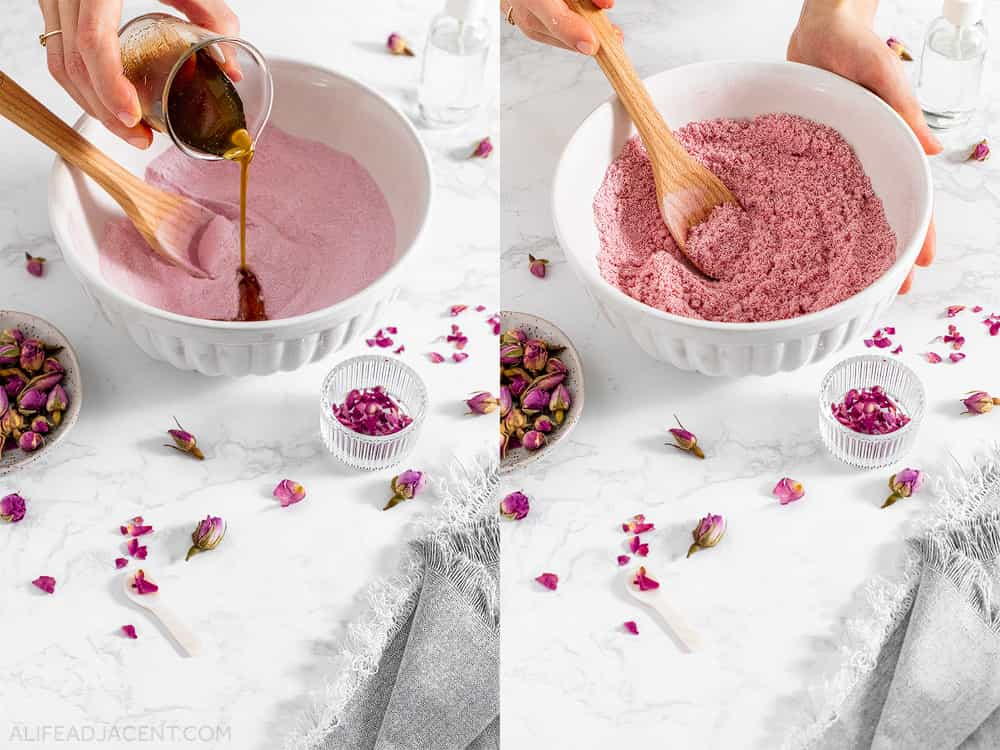
- Add alcohol to moisten. At this point the mixture will resemble damp sand, but it needs more moisture to hold its shape. Spritz the mixture evenly with alcohol and knead to incorporate. Start slowly with 10 sprays or so. You want just enough liquid to hold the truffles together. Too much, and your mixture will become doughy and soggy.??
Tip: You can test whether your bath truffles are ready to mold by picking up a handful of the mixture, squeezing it into a ball, and dropping it back into the bowl. If it doesn't crumble, it's ready.? - Mold bath truffles. Now it's time to mold your bath bombs into their truffle shape. Loosely fill each half of your mold until it overflows. Then press both halves of the mold firmly together, allowing any excess to fall away. There's a learning curve to this that only experience can teach you, so you may need to try a few times to gauge how to fill your particular molds. Some molds require a different technique than others.??
Tip: If desired, you can smooth out any seams by running your fingers around the edge of each sphere. This helps avoid harsh lines around the circumference of your bath fizzies. But, don't expect perfection, because they will still look pretty, even with obvious seams. And any imperfections can be covered with cocoa butter.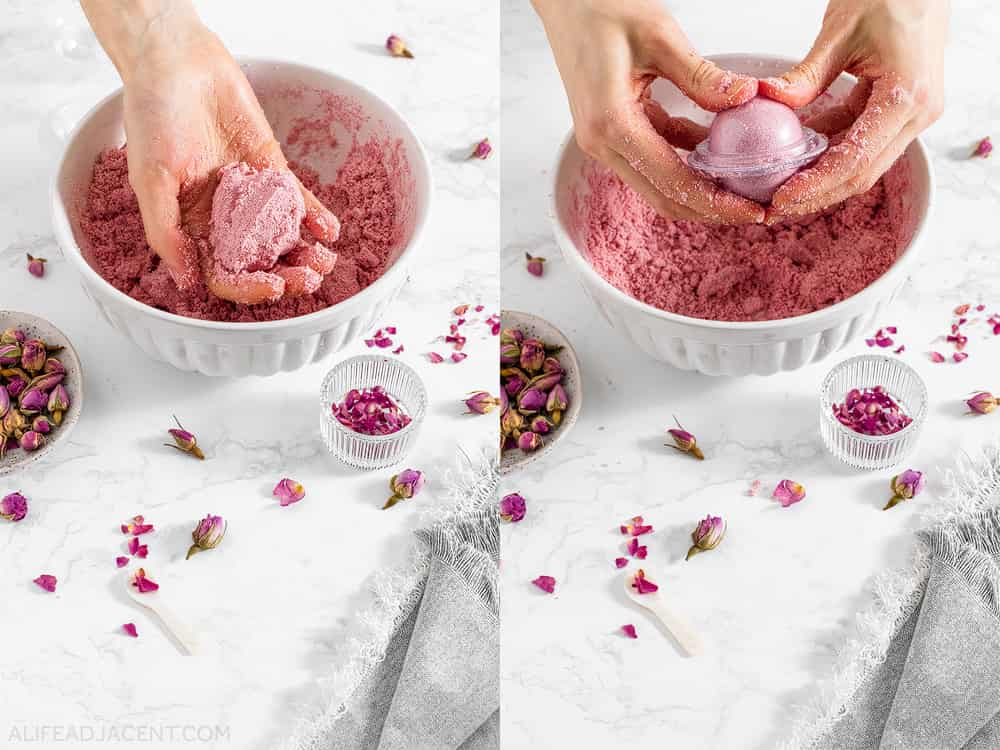 ?
? - Set aside to harden. Once you've formed a bath bomb, set it aside on a plate while you mold the rest. Do not remove the bath bombs from their molds. Leave them to set for approximately 30 minutes. Later, you will carefully release each truffle from its mold, and place it back into the bottom half to dry out fully.?
- Release from mold. By now each bath truffle should be sturdy enough to be handled, but be gentle to avoid denting them. Carefully release each truffle from the mold, one side at a time, before placing it back into the mold. The point of this step is only to ensure your bath bombs are not stuck to their molds. They should come out easily thanks to the cocoa butter. But if the bath bombs are stuck, you can lightly tap each side against a countertop until they come loose.?
- Place back into mold to dry. Once you've loosened each truffle, place it gently back into the bottom half of the mold. Drying your bath bombs in the mold ensures they can dry out thoroughly while avoiding flat or misshapen bottoms. Set aside to dry overnight.?
- Prepare cocoa butter glaze. The following day, melt the rest of the cocoa butter. Once it begins to soften, add the colorant and mix well. Continue to heat until both the cocoa butter and the colorant are completely liquified. A mini mixer helps break up any clumps of cocoa powder or beet powder. But if you don't have one, just be sure to mix thoroughly.?
- Allow cocoa butter to cool. Now comes the most difficult process of decorating your chocolate rose truffles: waiting for the cocoa butter icing to reach the perfect temperature. If your cocoa butter is too hot when you pour it, it will seep right into your bath bomb. But if you let it cool too long, it will sit on top in a gloopy blob instead of dripping beautifully down the sides.??
We found that the optimal temperature for pouring is around 27-28° C, but you can also eyeball it. The cocoa butter should be liquid enough to pour easily, but still thick enough to sit on top of your bath bomb. Look for a liquid yet slightly opaque appearance. Translucent cocoa butter is a sign that it's too hot, and it will sink into your bath bombs. It's a delicate balance. Once your cocoa butter reaches the right consistency, you will need to work quickly.??
Tip: Stir your cocoa butter periodically with a spatula while it cools. This prevents lumps and ensures even cooling. Be sure to scrape the sides of the container, because it will solidify there first. Once your cocoa butter is both pourable and slightly opaque, it's ready. Don't worry if you overshoot the mark and it becomes too solid. Just heat it again and wait for it to reach the right temperature.? - Prepare for decorating. While you're waiting for your cocoa butter to cool, prepare your bath bombs for decorating by releasing them from the molds and arranging them on your desired surface. A plate or tray that's easy to move is ideal, as you'll want to place your finished truffles in a safe place to set. Also, make sure you have your rose petals ready for garnishing. If your petals are too big, cut or tear them into smaller pieces.?
- Decorate bath bombs. Now it's time to decorate your bath truffles with the chocolate glaze. Slowly begin to pour the cocoa butter on top of each bath bomb, using a small circular motion. If the cocoa butter is ready, it should pool on top and drip down the sides like a real chocolate glaze. Be conservative here and don't pour too much. You don't want the cocoa butter to pool under the bottoms of your truffles.?

- Sprinkle with rose petals. As soon as you've finished icing one bath truffle, lightly sprinkle it with rose petals. It's important to work quickly before the cocoa butter hardens, or the petals won't stick. Repeat this process until each bath truffle is decorated with rose petals.?
- Set aside to harden. Very carefully, set your bath truffles aside to allow the cocoa butter to fully harden and come to room temperature. This shouldn't take long, but we leave them for at least an hour for good measure.?
- Finished. Once the cocoa butter is set, your chocolate rose bath truffles are ready to store, gift, or use. Remove them carefully from the plate, removing any excess cocoa butter from the bottoms. Store them in an airtight container, and be sure to check out the packaging and storage tips, as well as the section on giving DIY bath bombs for Valentine's Day gifts. Use 1-2 mini bath bombs for a luxurious, romantic bath.
Notes
Tips & tricks
- Pink beet powder is not as pigmented as mica, so start slowly (1/2 tsp or so) if you're using pink mica as your colorant.
- Measuring by volume is not as precise as measuring by weight, so you may end up with a little bit of extra bath bomb mixture (enough to make half a bath truffle). If this happens, fill one mold half, and set aside to use as a cocoa butter tester.
- For tips & tricks on handling the cocoa butter glaze, see the section on decorating cocoa butter bath bombs (in article above).
Storage & shelf life
- This recipe yields five 1.75" mini bath bombs, but this may vary depending on the size of your molds.
- Use your bath truffles within a year for the best chocolate rose fragrance and the most luxurious bath experience.
- Store in a cool, dry place in an airtight container.
- Cocoa butter bath bombs can withstand temperatures up to 93–101 °F without melting.
Safety tips & how to use
- For a luxuriously fragrant and romantic bath soak, use 1-2 mini bath truffles per bath.
- This chocolate rose bath bomb recipe contains a lot of cocoa butter, which can be a slipping hazard. The emulsifier helps disperse the cocoa butter in the bathwater, but it's still going to be somewhat slippery. So, please be extremely careful when getting in and out of the bath.
Recommended Products
As an Amazon Associate and member of other affiliate programs, we earn from qualifying purchases.


More romantic DIY gift ideas
If you’re looking for more romantic bath ideas for Valentine’s Day, check out:
Don’t forget to set the mood for romance with a chocolate rose room spray or “fall in love” candle. Or, apply an aromatherapy perfume to promote feelings of love, affection and attraction.
And before you pucker up, make these homemade recipes for soft, kissable lips:
For more homemade skincare and bath recipes, follow us on Pinterest, Instagram, YouTube, Facebook, TikTok, and Twitter.
Pin it for later

Diane
Thursday 22nd of December 2022
These look good enough to eat! I can't wait to make a batch.
Kim
Thursday 22nd of December 2022
Thanks, Diane! Let us know how they turn out for you. Enjoy!