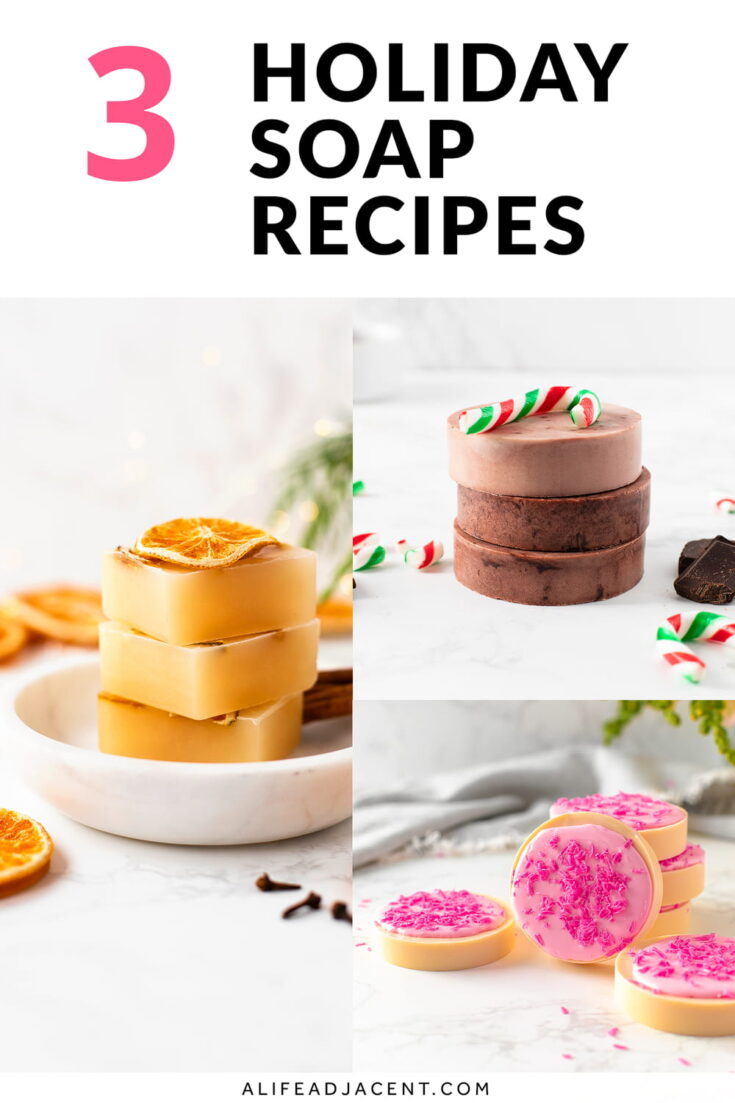
These easy Christmas soap recipes will lather you up in delicious holiday scents! Crafted with melt and pour soap base and essential oils, these simple, all-natural soap bars are easy to make and ideal for gifting. Read on to learn how to make 3 holiday melt and pour soap recipes in decadent winter scents: sugar cookie, orange spice, and peppermint hot cocoa.

When you’re strapped for time and ideas, handmade soap makes the perfect gift for Christmas and beyond. But you don’t need to be an expert soapmaker to make soap, because this thoughtful gift idea comes together quickly with the right tools!
In this post, we share 3 easy Christmas soap recipes using melt and pour soap:
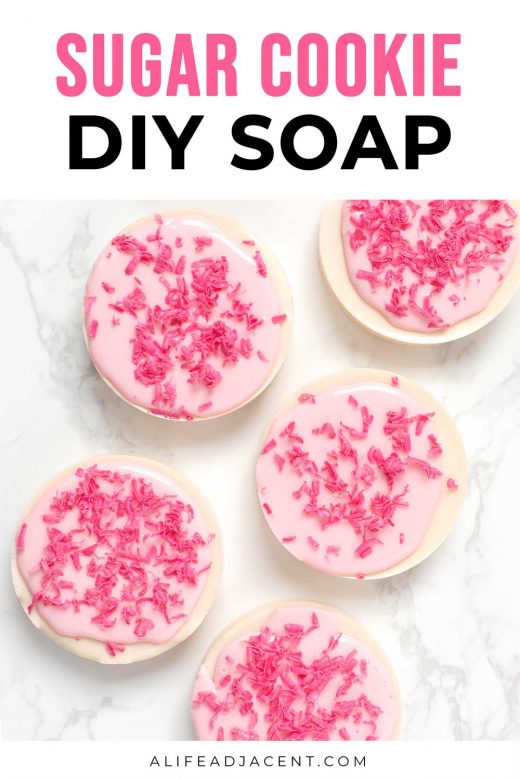
- 🍪 Holiday Sugar Cookie Soap that looks like a real cookie, complete with soap icing and soap sprinkles
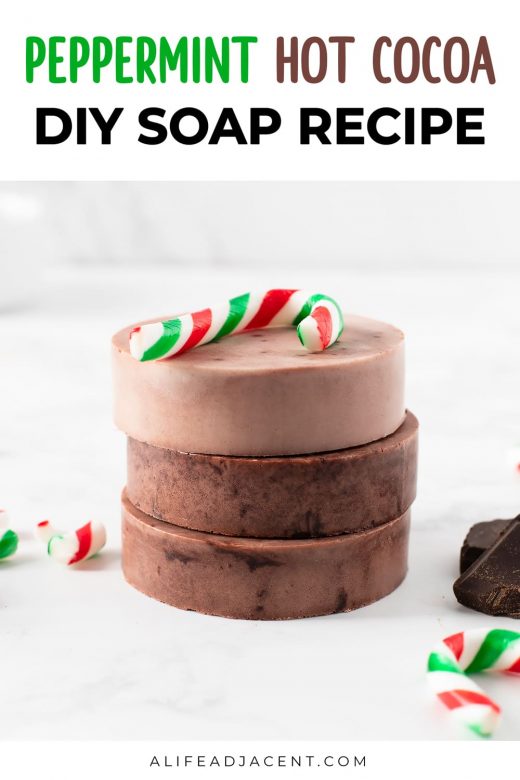
- 🍫 Peppermint Hot Cocoa Soap infused with real cocoa and peppermint oil
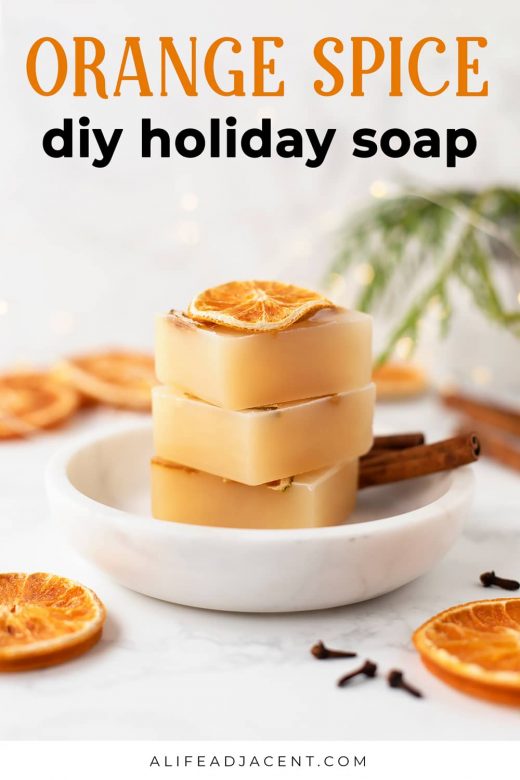
- 🍊 Orange Spice Soap with a festive, wintery scent that’s perfect for the holiday season
Each soap recipe is scented with a blend of natural essential oils, not synthetic fragrance oils. Yes, even the sugar cookie variety, which is scented with our special cookie essential oil blend!
We’ve included detailed, step by step instructions that are simple to follow, even if you’re a beginner. Simply melt the soap base, add your ingredients, and pour the soap into festive molds. Homemade soap can truly be that simple.
But if you’re a seasoned soapmaker, we also have traditional cold process holiday soap recipe for seasonal gift giving. This detailed recipe is a guest post from expert soapmaker Rebecca of Soap Deli News, so you can trust that she knows what she’s doing when it comes to handling lye.
3 Holiday Soap Ideas for Gifts
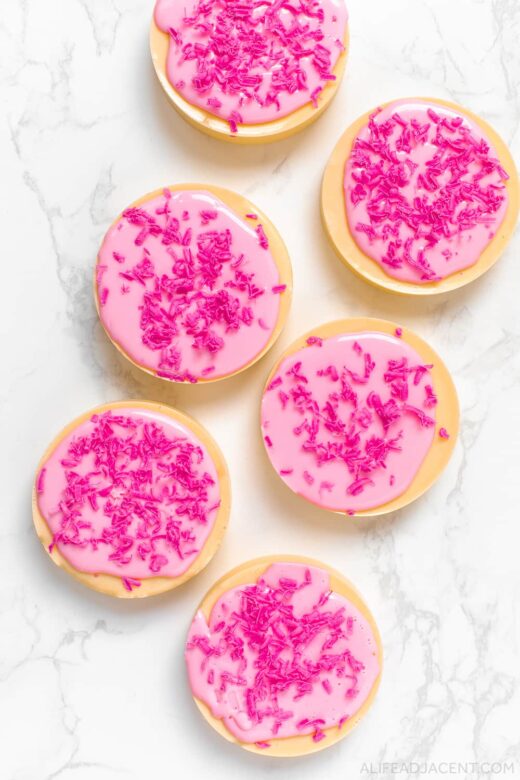
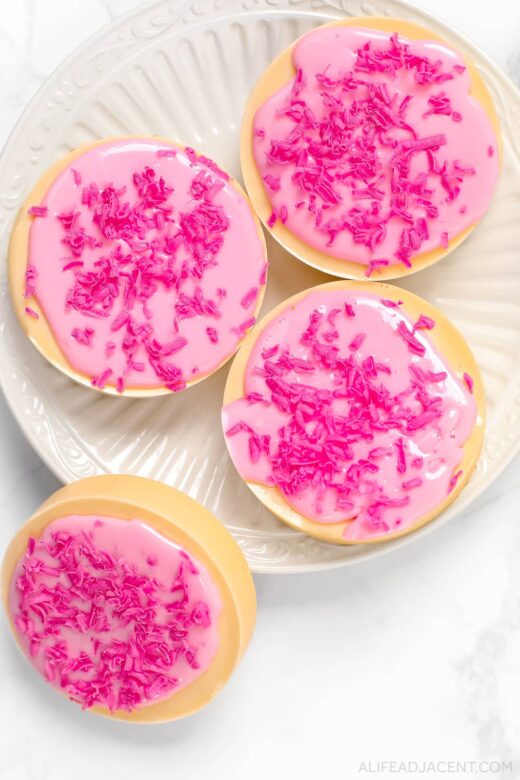
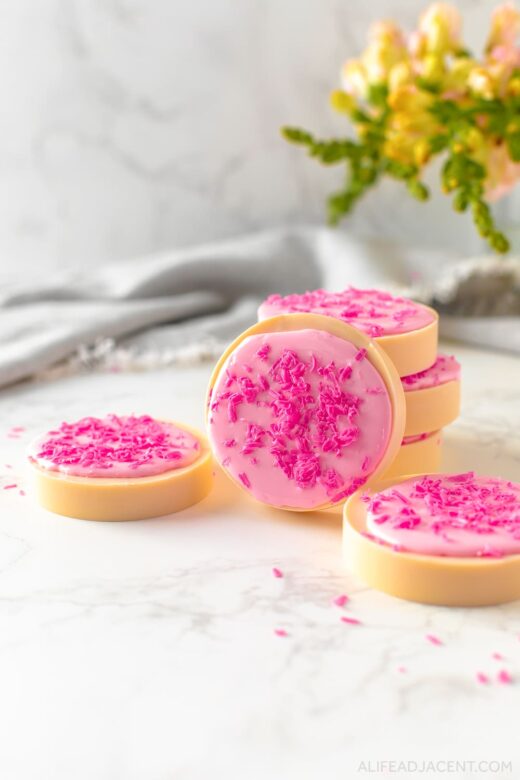
Sugar Cookie Soap
This festive soap looks and smells just like a frosted sugar cookie, right down to the pink soap icing and sprinkles made from soap as well.
While it may look complicated, this homemade Christmas soap is very easy to make and a perfect holiday activity to do with kids. They’ll love helping you place soap frosting and sprinkles onto each “cookie.”
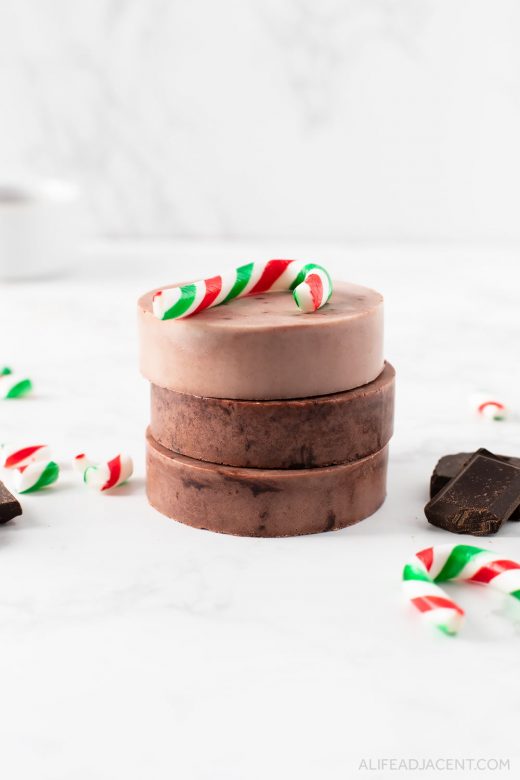
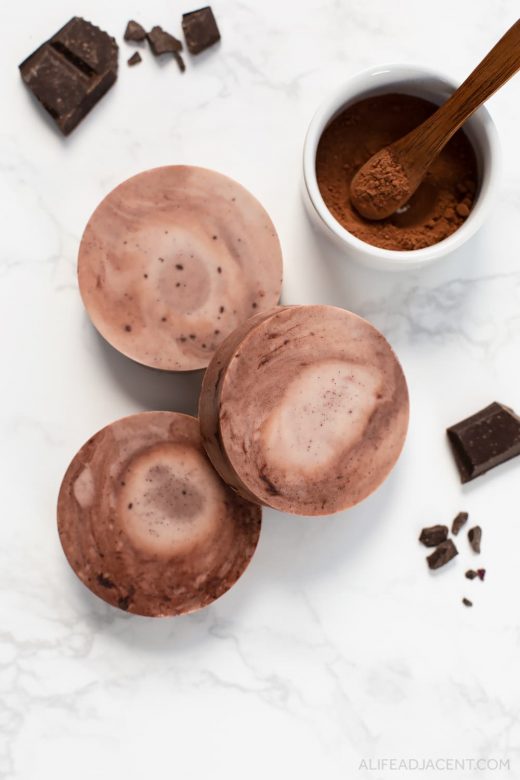
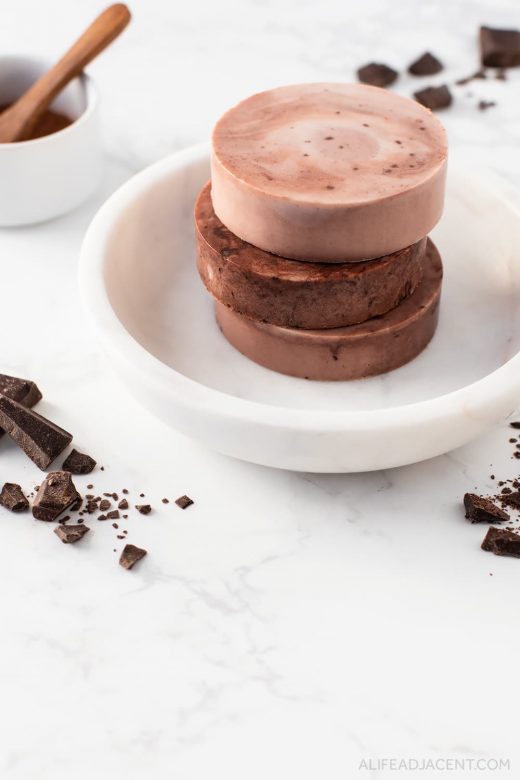
Peppermint Hot Cocoa Soap
This chocolatey peppermint soap recipe is marbled with real cocoa and chocolate essential oil, just like a mug of hot chocolate. We we added a dash of peppermint oil for a festive touch, like candy cane hot cocoa!
If you don’t like mint, simply omit the peppermint oil. Or, replace it with sweet orange oil to make chocolate orange soap.
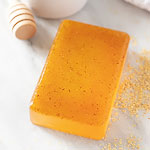
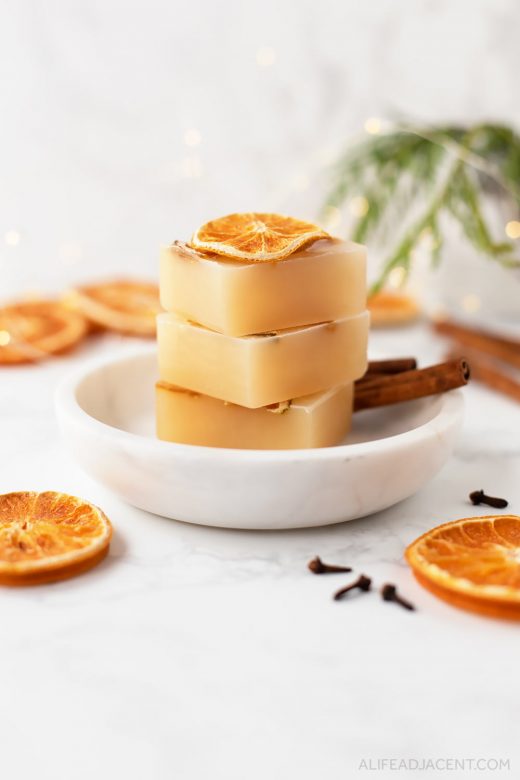
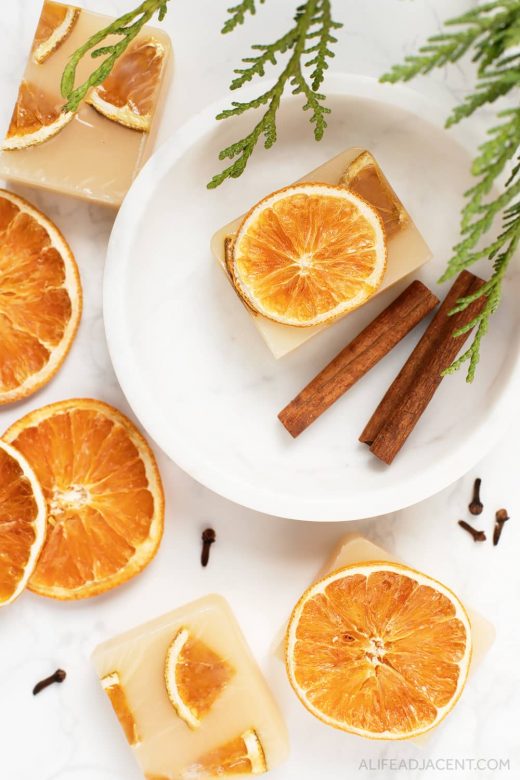
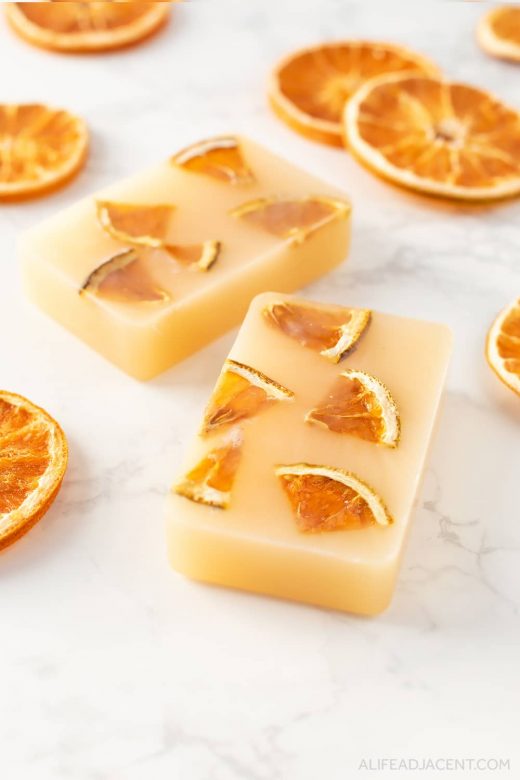
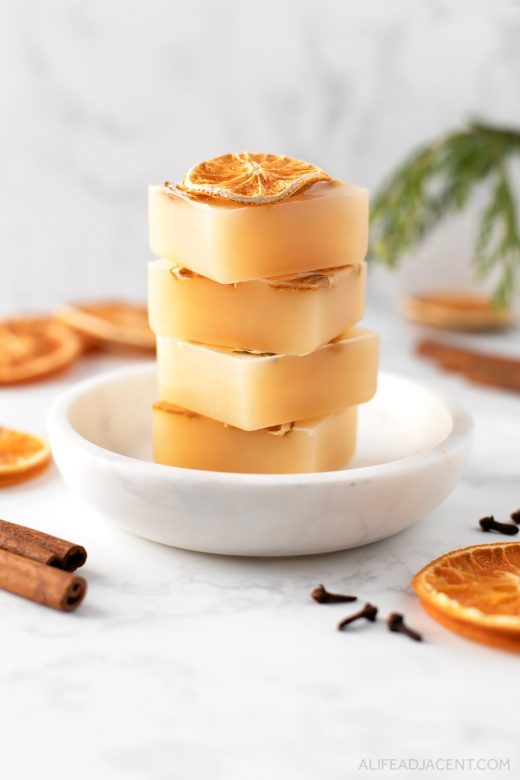
Orange Spice Soap
With notes of citrus, spice and Christmas trees, this unique and festive soap recipe smells like winter sunshine.
It’s embedded with optional dried orange slices for a pretty, decorative touch that’s especially nice when giving homemade soap as gifts. Orange slices also provide gentle exfoliation, and you can use them to gently buff away dry skin as you cleanse.
DIY Christmas Soap Ingredients
You’ll need only a handful of natural ingredients to make each easy Christmas soap recipe: 1 pound block of melt and pour soap base, a natural soap colorant such as mica, and a festive essential oil blend.
Melt and pour soap base
For the peppermint hot cocoa and sugar cookie soap recipes, we used goat milk soap base. It has a rich, creamy lather that’s extremely moisturizing and perfect for dry or sensitive skin.
Goat’s milk soap also makes a lovely backdrop for fragrances and colorants, since it doesn’t impart any noticeable color or scent.
For the orange spice soap, we used honey soap base to give the soaps a translucent orange color. However, you can use any kind of translucent or clear soap base.
Finally, if you’re vegan or can’t find goat’s milk soap, you can use any variety of white soap base. Cocoa butter soap base is another good option with moisturizing properties.
Soap colorant
Mica’s fine particles make it an ideal natural soap colorant, and its shimmery quality is perfect for festive holiday soaps. You can use any kind of mica you wish, but we always recommend sourcing cruelty-free, ethical mica (you can read more about this in our post on DIY shimmer spray).
We used pretty gold mica to color the orange spice soap and the sugar cookie soap’s cookie base. Gold pairs well with honey soap base to create a light, shimmery orange. And when mixed into goats milk soap, it resembles the creamy, golden beige of a sugar cookie.
For the sugar cookie soap icing and sprinkles, we used pink mica. A small dash was enough to give the frosting a soft pink tone, but we added a lot more for the vibrantly colored pink soap sprinkles.
For the peppermint hot cocoa soap, no mica is needed, as its rich brown marbling comes from real cocoa powder and chocolate essential oil.
Essential oils
When gifting homemade soap for the holiday season, you never know when your recipient may have a fragrance sensitivity.
Synthetic fragrance oils may smell nice, but their potential health effects aren’t. Not only are natural essential oils better for health, but they’re also less likely to irritate sensitive skin or cause headaches for sensitive people.
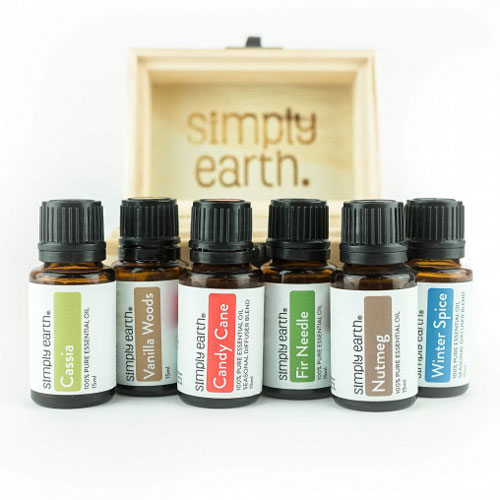
We created all-natural, realistic Christmas scents with essential oils for these holiday soap recipes, which you’ll find in the essential oil blends section below. You can also find many of the oils needed in this handy boxed set:
Holiday soap equipment and tools
Aside from your ingredients, you will also need the following equipment to make DIY holiday soaps:
- Soap molds. Silicone soap molds are by far the easiest to use. We used standard, bar-shaped soap molds and round molds, but you can use any size or shape that you wish.
- Glass measuring cup. We used heat-safe glass Pyrex measuring cups to heat our soap base. They’re extremely versatile, and their lip makes for easy pouring.
- Stirring utensil. You’ll need a silicone spatula, wooden spoon, or whisk to stir your soap during the melting process.
- Cutting board and knife. You’ll need to chop your soap base into smaller pieces for easy melting. You can use a soap knife made specifically for this purpose or a large, sharp kitchen knife.
- Small grater or zester. If making the Christmas cookie soap, you will need a small cheese grater or citrus zester to grate your soap sprinkles.
- Spray bottle with alcohol. Spritzing your homemade soap with alcohol helps remove any bubbles that may form on the soaps’ surface. Many soapmakers use rubbing alcohol for this step, but we opt to use high-proof alcohol or vodka in our chemically sensitive household.
Christmas Melt and Pour Soap Recipes
Peppermint Hot Cocoa Soap Recipe
1 lb goat’s milk melt and pour soap base
1 tbsp cocoa powder
1 tsp high-proof alcohol or rubbing alcohol
150 drops chocolate essential oil
50 drops peppermint essential oil
How to make peppermint hot cocoa soap
- Before you begin, measure the essential oils into a small bottle or container and set aside. This will save time later, as cocoa essential oil is viscous and may take a while to drip from the bottle.
- Chop your melt and pour soap base into small 1 inch cubes. Place into a heat-safe measuring cup and melt in the microwave in 30 second increments. Stir gently in between each heating. Continue until fully melted, but don’t overheat.
- Once liquified, set the soap aside to cool and thicken slightly. This is important before adding the cocoa mixture, otherwise it will bleed and turn the whole soap brown. But if this doesn’t bother you, don’t worry about the temperature. The soaps don’t need to be perfect, and you’ll notice by the photos that ours are not perfectly marbled.
- While the soap cools, mix cocoa powder, chocolate essential oil and alcohol in a small bowl to create a chocolate paste.
- Once the soap has thickened slightly, add the peppermint essential oil and mix to combine.
- Now it’s time to add the cocoa marbling. Gently pour the cocoa paste mixture into the soap. Then, using a flat spatula, swirl to marble the cocoa mixture throughout the soap. Don’t over swirl, or you will lose the marbled effect.
- Carefully pour the peppermint cocoa soap into the mold. Allow the soaps to set and cool for about 4-6 hours, or overnight.
- Once hardened, carefully unmold each soap bar, and they’re ready to use or gift.
Sugar Cookie Christmas Soap Recipe
2/3 lb goat milk melt and pour soap
2 tsp gold mica
1 tsp butter co2 extract (optional)
120 drops vanilla oleoresin or vanilla substitute
40 drops bitter almond essential oil
10 drops sweet orange essential oil
9 drops cinnamon leaf essential oil
Sugar Cookie Soap Icing
1/3 lb goat’s milk melt and pour soap
1/2 tsp pink mica
20 drops bitter almond essential oil
5 drops sweet orange essential oil
1 drops cinnamon leaf essential oil
Sugar Cookie Soap Sprinkles
2-3 small cubes goat’s milk melt and pour soap
Pink mica (or another color of choice)
How to make sugar cookie soap
1. Prepare soap base and essential oils
- Divide your 1 pound block of melt and pour soap into thirds. You will use one third for the icing and sprinkles, and two thirds for your sugar cookie base. Chop the melt and pour soap base into approximately 1 inch cubes.
- Measure the cookie essential oil blends for the icing and cookie base. Mix each blend into a separate small bottle and set aside.
2. Create soap sprinkles
- Microwave 2-3 cubes of melt and pour soap in a small heat safe cup. Be sure to melt the cubes in short bursts (10-15 seconds or so), as this small amount of soap will melt quickly.
- Once melted, slowly stir in pink mica until you achieve your desired shade of pink. Once you are satisfied, pour the soap into a small mold and set aside to harden before moving on. The mold’s shape or size doesn’t matter, as you will be grating this soap bar to make sprinkles.
3. Create sugar cookie soap base
- Place two thirds of the chopped soap in a heat-safe measuring cup. Heat in the microwave in 30 second increments, stirring gently in between until fully liquified. Do not overheat.
- Once the sugar cookie soap base has melted, slowly add the gold mica while whisking gently. Don’t add the mica all at once, or it may clump. The gold mica will turn your soap a light cookie beige. Continue adding more to achieve your desired color.
- Allow the soap to cool for a couple minutes. You want it to cool only slightly before adding the essential oils, but you don’t want it to begin to harden.
- Add the sugar cookie essential oil blend and mix gently to incorporate. Your soap will deepen slightly in color due to the vanilla essential oil.
- Carefully pour your soap into round silicone soap molds. Fill the molds only about halfway. If you fill them too full, they’ll look like cakes instead of cookies, and you want to leave room for your soap frosting.
- Set aside and allow your soap cookies to cool.
4. Grate soap sprinkles
- Carefully unmold the sprinkle soap bar. Since it’s so small, it should already have hardened. Grate it into fine shavings using a small grater or zester, and set the sprinkles aside in a small bowl.
5. Create soap icing
- Melt the remaining soap cubes according to the directions above. Once melted, add pink mica to achieve your desired pink frosting color, and stir gently to combine.
- Allow the soap to cool for a couple minutes before adding the sugar cookie essential oil blend. Remember to omit the vanilla for the icing, or it will add a yellow tone to your icing.
- Allow your soap icing to cool for a couple more minutes. Stir gently every 30 seconds or so to avoid lumps. You want it to thicken slightly so that it hardens quickly once poured, but not so much that it gets chunky. If this happens, simply re-melt it and start the process over again.
6. Assemble sugar cookie soaps
- Once the soap icing has thickened, it’s time to frost the cookie soaps. It helps to have two people for this process, as you will need to work quickly. If you have kids, this would be a good time to get them involved.
- Very slowly pour the frosting onto the centre of each soap cookie, allowing it pool on top. Don’t pour too quickly, as you don’t want your frosting to run. You want to leave room around the edge of the mold. Otherwise, each soap will simply look like a layered soap, not a frosted cookie.
- Immediately after icing each soap, sprinkle with soap sprinkles. Work quickly, otherwise the icing will harden and the sprinkles won’t stick. This is where getting someone else to help comes in handy – one person can pour the icing, and the other can sprinkle. Repeat this process for each soap cookie.
- Allow your soaps to cool for about 4-6 hours, or overnight.
- Once hardened, carefully unmold each soap cookie. Your sugar cookie soaps are then ready to use or give as holiday gifts.
Orange Spice Soap Recipe
1 lb honey melt and pour or another clear soap base
1 1/2 tsp gold mica
Dried orange slices for decoration (optional)
40 drops bergamot or sweet orange essential oil
150 drops Winter Spice essential oil blend
10 drops cinnamon leaf or cassia essential oil
How to make orange spice soap
- Prepare the orange slices and measure out the essential oil blend. Set both aside. You can make your own orange slices by drying them in the oven, or buy them pre-made.
- Arrange your orange slices at the bottom of your silicone mold. You can leave them whole, or cut them into smaller pieces before arranging.
- To make the soap, begin by chopping your soap base into cubes. Place it into your measuring cup and heat in the microwave in 30 second increments, stirring gently in between. You may need to heat it 3-4 times until melted, but please don’t overheat.
- Once the soap base melts, add the gold mica slowly and stir gently. Don’t add too much at once to avoid clumping.
- Allow the soap to cool for a couple minutes until it begins to thicken. Then, add the essential oils and stir.
- Carefully pour the soap into the mold. The orange slices will float to the top. You can use a small spatula to carefully arrange them or you can leave them as is.
- Allow your soaps to set and cool for 4-6 hours, or overnight. The next day, carefully remove each soap bar from the mold. Your holiday soaps are ready to use or gift!
Tips for making homemade Christmas soap
- Before pouring your soap, you can place your mold on a cookie sheet or tray so that it’s easier to move later. Allow the soaps to set for approximately 20 minutes before moving them to another location.
- Always stir your soap gently – stirring too vigorously will create bubbles in your soap.
- If any bubbles form on top of your soap after pouring, spritz with alcohol to pop them.
- If a skin forms on the top of your soap as it cools, simply mix it into the soap to dissolve it before pouring.
- If you overshoot the cooling time and your soap hardens too early, don’t worry. You can reheat it by placing into the microwave for 5-10 seconds or so.
- Instead of the microwave, you can also melt the soap base in a double boiler, or create a water bath by placing your measuring cup in a shallow saucepan filled with a few inches of water. Stir the soap often and watch it closely, as it melts quickly.
Christmas Soap Essential Oil Blends
Holiday Sugar Cookie
120 drops vanilla oleoresin
60 drops bitter almond essential oil
15 drops sweet orange essential oil
10 drops cinnamon leaf or cassia essential oil
This decadent essential oil blend smells like freshly baked holiday sugar cookies. It has a rich vanilla base, a dash of sweet orange, and a few drops of cinnamon or cassia for subtle holiday spice.
But its secret ingredient is bitter almond essential oil, which gives this blend a sugary, marzipan-like aroma that will make your mouth water. Together, they create the perfect sugar cookie soap fragrance.
Safety tip: Bitter almonds are toxic, but the bitter almond oil sold for soapmaking is safe for use in cosmetics. (It’s also sometimes called benzaldehyde.) Be sure the bitter almond oil you purchase is labelled for cosmetic purposes.
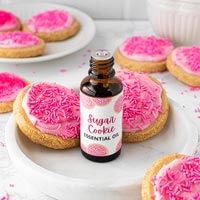
Our cookie body butter, scrub and soap would make the perfect trio for gifting! Here are more ways to use our original holiday sugar cookie fragrance blend with bitter almond oil:
Peppermint Hot Chocolate
150 drops cacao absolute
50 drops peppermint essential oil
This essential oil blend smells just like a warm cup of hot cocoa with a candy cane. Peppermint oil paired with rich cacao absolute is the perfect blend for a Christmas soap.
Cacao absolute (chocolate essential oil) adds a potent, decadent chocolate fragrance to homemade bath and body products that chocoholics will love.
You may also enjoy our other recipes with this delicious peppermint hot cocoa blend:
For more ways to use cacao absolute, check out our chocolate rose sugar scrub cubes or this chocolate orange body butter from Soap Deli News.
Orange Spice
40 drops bergamot or sweet orange essential oil
150 drops Winter Spice essential oil blend
10 drops cinnamon leaf or cassia essential oil
Uplifting bergamot, spicy cinnamon leaf, fresh balsam fir and fir needle combine to create a soap that smells like Christmas trees and spiced oranges!
Please be aware that bergamot oil is phototoxic, so it will make your skin more sensitive to the sun after use. If you are concerned by this, you can replace it with sweet orange essential oil.
Packaging homemade soap for Christmas gifts
We think these Christmas soap recipes would make for lovely homemade gifts. They’d be perfect as hostess gifts, stocking stuffers or as a gift for anyone who would appreciate a handmade soap.
To prepare your holiday soaps for gift gifting, you can wrap each soap individually in brown paper or Christmas wrapping paper. Then, tie each soap with pretty ribbon or raffia string.
If you prefer, you can also place your soaps in an air-tight jar or in a decorative holiday tin box. A pretty muslin bag works as well. We like to use muslin bags to gift bath bombs and tub tea.
Note: melt and pour soap soap base contains glycerin (a humectant), which absorbs moisture, so homemade melt and pour soaps can be prone to glycerin “dew” (or sweating or beading).
To combat this issue, we recommend you wrap your DIY soaps in plastic wrap before packaging them for gifts.
For even more creative ways to package soap for holiday gifts, see this resource from Soap Deli News Blog.
Christmas Melt and Pour Soap Recipes
Learn how to make 3 Christmas soap recipes in decadent winter scents: holiday sugar cookie, orange spice, and peppermint hot cocoa. Crafted with melt and pour soap base and essential oils, these simple DIY holiday soap bars are easy to make and ideal for gifts.
Ingredients
Sugar Cookie Soap Base
- 2/3 lb goat's milk melt and pour soap
- 2 tsp gold mica
Sugar Cookie Essential Oil Blend
- 120 drops vanilla oleoresin
- 40 drops bitter almond essential oil
- 10 drops sweet orange essential oil
- 9 drops cinnamon leaf essential oil
Sugar Cookie Soap Frosting
- 1/3 lb goat's milk melt and pour soap
- 1/2 tsp pink mica
Sugar Cookie Frosting Essential Oil Blend
- 20 drops bitter almond essential oil
- 5 drops sweet orange essential oil
- 1 drops cinnamon leaf essential oil
Sugar Cookie Soap Sprinkles
- 2-3 small cubes goat's milk melt and pour soap
- Pink mica
Peppermint Hot Cocoa Soap
- 1 lb goat's milk melt and pour soap base
- 1 tbsp cocoa powder
- 1 tsp high-proof alcohol or rubbing alcohol
Peppermint Hot Cocoa Essential Oil Blend
- 150 drops cacao absolute
- 50 drops peppermint essential oil
Christmas Orange Spice Soap
- 1 lb honey melt and pour or another clear soap base
- 1 1/2 tsp gold mica for colour
- Dried orange slices for decoration
Christmas Orange Spice Essential Oil Blend
- 40 drops bergamot essential oil
- 150 drops Winter Spice essential oil blend
- 10 drops cinnamon leaf essential oil
Equipment
- Silicone soap molds (round or bar-shaped)
- Heat-proof glass measuring cups
- Silicone spatula, wooden spoon, or whisk
- Soap knife or sharp kitchen knife
- Small cheese grater or citrus zester for sprinkles
- Spray bottle with alcohol to pop bubbles
Instructions
How to make sugar cookie soap
1. Prepare soap base and essential oils
- Divide your 1 pound block of melt and pour soap into thirds. You will use one third for the icing and sprinkles, and two thirds for your sugar cookie base. Chop the melt and pour soap base into approximately 1 inch cubes.
- Measure the cookie essential oil blends for the icing and cookie base. Mix each blend into a separate small bottle and set aside.
2. Create soap sprinkles
- Microwave 2-3 cubes of melt and pour soap in a small heat safe cup. Be sure to melt the cubes in short bursts (10-15 seconds or so), as this small amount of soap will melt quickly.
- Once melted, slowly stir in pink mica until you achieve your desired shade of pink. Once you are satisfied, pour the soap into a small mold and set aside to harden before moving on. The mold’s shape or size doesn’t matter, as you will be grating this soap bar to make sprinkles.
3. Create sugar cookie soap base
- Place two thirds of the chopped soap in a heat-safe measuring cup. Heat in the microwave in 30 second increments, stirring gently in between until fully liquified. Do not overheat.
- Once the sugar cookie soap base has melted, slowly add the gold mica while whisking gently. Don’t add the mica all at once, or it may clump. The gold mica will turn your soap a light cookie beige. Continue adding more to achieve your desired color.
- Allow the soap to cool for a couple minutes. You want it to cool only slightly before adding the essential oils, but you don’t want it to begin to harden.
- Add the sugar cookie essential oil blend and mix gently to incorporate. Your soap will deepen slightly in color due to the vanilla essential oil.
- Carefully pour your soap into round silicone soap molds. Fill the molds only about halfway. If you fill them too full, they’ll look like cakes instead of cookies, and you want to leave room for your soap frosting.
- Set aside and allow your soap cookies to cool.
4. Grate soap sprinkles
- Carefully unmold the sprinkle soap bar. Since it’s so small, it should already have hardened. Grate it into fine shavings using a small grater or zester, and set the sprinkles aside in a small bowl.
5. Create soap icing
- Melt the remaining soap cubes according to the directions above. Once melted, add pink mica to achieve your desired pink frosting color, and stir gently to combine.
- Allow the soap to cool for a couple minutes before adding the sugar cookie essential oil blend. Remember to omit the vanilla for the icing, or it will add a yellow tone to your icing.
- Allow your soap icing to cool for a couple more minutes. Stir gently every 30 seconds or so to avoid lumps. You want it to thicken slightly so that it hardens quickly once poured, but not so much that it gets chunky. If this happens, simply re-melt it and start the process over again.
6. Assemble sugar cookie soaps
- Once the soap icing has thickened, it’s time to frost the cookie soaps. It helps to have two people for this process, as you will need to work quickly. If you have kids, this would be a good time to get them involved.
- Very slowly pour the frosting onto the centre of each soap cookie, allowing it pool on top. Don’t pour too quickly, as you don’t want your frosting to run. You want to leave room around the edge of the mold. Otherwise, each soap will simply look like a layered soap, not a frosted cookie.
- Immediately after icing each soap, sprinkle with soap sprinkles. Work quickly, otherwise the icing will harden and the sprinkles won’t stick. This is where getting someone else to help comes in handy – one person can pour the icing, and the other can sprinkle. Repeat this process for each soap cookie.
- Allow your soaps to cool for about 4-6 hours, or overnight.
- Once hardened, carefully unmold each soap cookie. Your sugar cookie soaps are then ready to use or give as holiday gifts.
How to make peppermint hot cocoa soap
- Before you begin, measure the essential oils into a small bottle or container and set aside. This will save time later, as cocoa essential oil is viscous and may take a while to drip from the bottle.
- Chop your melt and pour soap base into small 1 inch cubes. Place into a heat-safe measuring cup and melt in the microwave in 30 second increments. Stir gently in between each heating. Continue until fully melted, but don’t overheat.
- Once liquified, set the soap aside to cool and thicken slightly. This is important before adding the cocoa mixture, otherwise it will bleed and turn the whole soap brown. But if this doesn’t bother you, don’t worry about the temperature. The soaps don’t need to be perfect, and you’ll notice by the photos that ours are not perfectly marbled.
- While the soap cools, mix cocoa powder, chocolate essential oil and alcohol in a small bowl to create a chocolate paste.
- Once the soap has thickened slightly, add the peppermint essential oil and mix to combine.
- Now it’s time to add the cocoa marbling. Gently pour the cocoa paste mixture into the soap. Then, using a flat spatula, swirl to marble the cocoa mixture throughout the soap. Don’t over swirl, or you will lose the marbled effect.
- Carefully pour the peppermint cocoa soap into the mold. Allow the soaps to set and cool for about 4-6 hours, or overnight.
- Once hardened, carefully unmold each soap bar, and they’re ready to use or gift.
How to make orange spice soap
- Prepare the orange slices and measure out the essential oil blend. Set both aside. You can make your own orange slices by drying them in the oven, or buy them pre-made.
- Arrange your orange slices at the bottom of your silicone mold. You can leave them whole, or cut them into smaller pieces before arranging.
- To make the soap, begin by chopping your soap base into cubes. Place it into your measuring cup and heat in the microwave in 30 second increments, stirring gently in between. You may need to heat it 3-4 times until melted, but please don’t overheat.
- Once the soap base melts, add the gold mica slowly and stir gently. Don’t add too much at once to avoid clumping.
- Allow the soap to cool for a couple minutes until it begins to thicken. Then, add the essential oils and stir.
- Carefully pour the soap into the mold. The orange slices will float to the top. You can use a small spatula to carefully arrange them or you can leave them as is.
- Allow your soaps to set and cool for 4-6 hours, or overnight. The next day, carefully remove each soap bar from the mold. Your holiday soaps are ready to use or gift!
Notes
Recommended Products
As an Amazon Associate and member of other affiliate programs, we earn from qualifying purchases.


More festive bath and body recipes
Looking for more seasonal bath and body products for holiday gits? You may also enjoy these recipes:
- DIY Holiday Body Scrubs
- Cold Process Christmas Soap
- Honey Almond Soap Recipe
- DIY Mulled Cider Hand Soap
- Holiday Cookie Body Butter
- Peppermint Hot Cocoa Body Butter
For even more natural DIY bath and body ideas, follow us on Pinterest! You can also find us on Instagram, Facebook, and Twitter.
Pin it for later