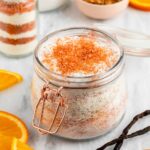
Orange Creamsicle Milk Bath Recipe
This orange creamsicle milk bath recipe is a citrusy and uplifting twist on a traditional milk bath. Creamy vanilla and milk combine with sweet orange for an energizing, sweet-smelling bath soak that will brighten your spirits while it moisturizes your skin.
Servings: 5.5 cups
Equipment
- Large mixing bowl (glass or ceramic)
- Smaller mixing bowl for Natrasorb Bath
- Wooden spoon or spatula
- Sieve (sifter)
- Funnel
- Storage containers (such as large mason jars, milk bottles, or bath tubes)
Ingredients
Creamsicle Milk Bath Recipe
- 3 cups full-fat milk powder or goat's milk powder or coconut milk powder for a vegan option
- 1 cup Epsom salts
- 1/2 cup Natrasorb Bath starch
- 1/2 cup honey powder
- 1/2 teaspoon ethical orange mica
- 1/2 cup dried orange peel powder or dried orange peel or dried orange slices
Orange Creamsicle Essential Oil Blend
- 30 drops sweet orange essential oil or
orange essence - 40 drops vanilla oleoresin or vanilla botanical extract
Instructions
- Sift the Powders: Using a sieve, sift the milk powder and honey powder into a large bowl. Mix well with a wooden spoon.
- Emulsify the Oils: Place the Natrasorb Bath starch into a separate, smaller bowl. Sprinkle your essential oils over the starch, then mix well until the oils are completely absorbed and enveloped by the starch.
- Combine: Pour this emulsified essential oil starch blend into your large bowl with the milk powder mixture. Mix thoroughly to incorporate the ingredients evenly.
- Add Botanicals: Add the dried orange peel to the milk mixture. (Note: If you plan to layer your milk bath in jars later, set the orange peel aside instead).
- Color the Salts: Place the Epsom salts into a separate bowl and add the ethical orange mica. Stir well until the salts are evenly colored.
- Package Your Milk Bath: Transfer your ingredients into airtight containers, such as a large mason jar, milk bottles, or bath tubes.Tip – How to Layer: You can either stir the colored Epsom salts directly into the milk mixture for a uniform look, or layer them separately for a beautiful gift-ready presentation. To layer, start with a base of the white milk bath mixture, add a layer of colored Epsom salts, follow with a layer of dried orange peel, and repeat!
Notes
- Store the finished product away from heat, moisture, and humidity. A dark cupboard is ideal.
- Use this orange bath soak within approximately 4-6 months, and remember to check the expiry date on your oldest ingredients.